This is another common problem you may face while you are trying to access a site on your computer but there are some errors. One such error is the This site can’t be reached.
The error says “Server IP address could not be found” Try running Windows Network Diagnostics” DNS_PROBE_FINISHED_NXDOMAIN. On the Microsoft Edge browser you will get a similar error “Hmm We Can’t Reach This Page”
Sometimes, the browser also shows ‘No internet’. Well, no need to worry as there are some easy methods to fix this issue.
In this article, you will see different methods to fix this site can’t be reached error on Windows 7/8.1/10.
Why the sites are unable to reach?
This may happen out of nowhere, or you may have installed some conflicting apps or changed important Windows settings. Here are some of the reasons behind this issue:-
- Browser’s cache.
- Invalid IP or DNS settings.
- Wrong proxy server.
- Outdated network driver.
- Windows Network services are not running.
- Blocked by Windows Hosts file.
- Different types of malware.
There may be a case when some sites are able to open and some are not, or only a particular site is not opening.
Fix This Site Can’t be Reached Chrome Error on Windows 10/8.1/7
Most of the time you don’t know the reason behind this issue, you have to try these methods in order. Any of these methods should fix the problem.
Let’s start with the basic.
Method 1: Clearing The Browser’s Data
When you browse the Internet, different websites store tons of temporary data in form of cookies and cache. This data might be causing this issue. In order to fix it, you can clean your browser’s data. Here is how:
Step 1: Open Google Chrome.
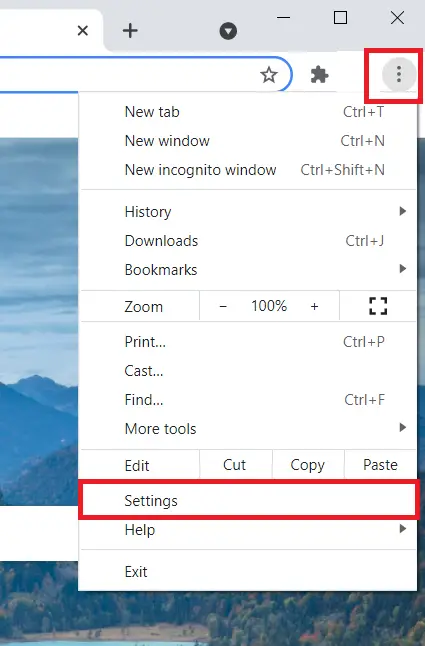
Step 2: Click on the three dots icon on the top right corner.
Step 3: Select ‘Settings’ option.
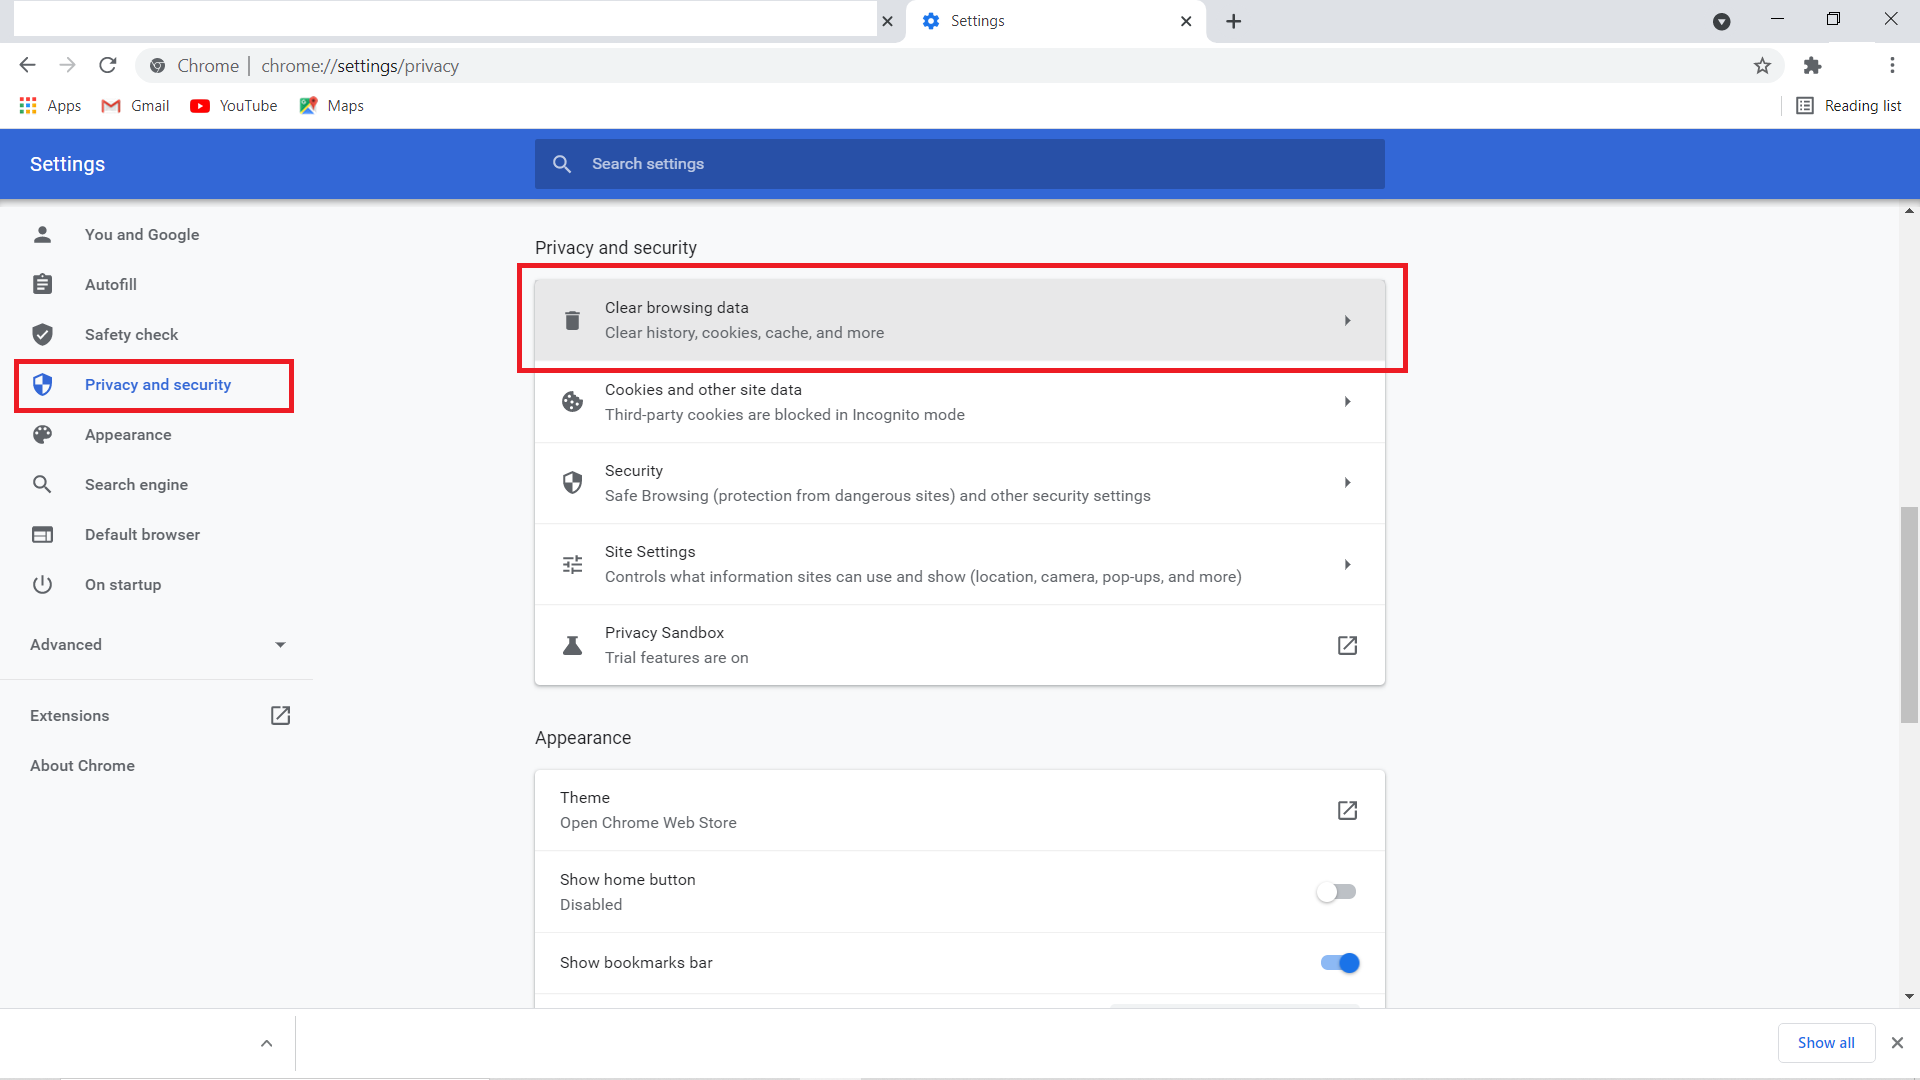
Step 4: Select “Privacy and Security” from the left pane and click on ‘Clear browsing data’.
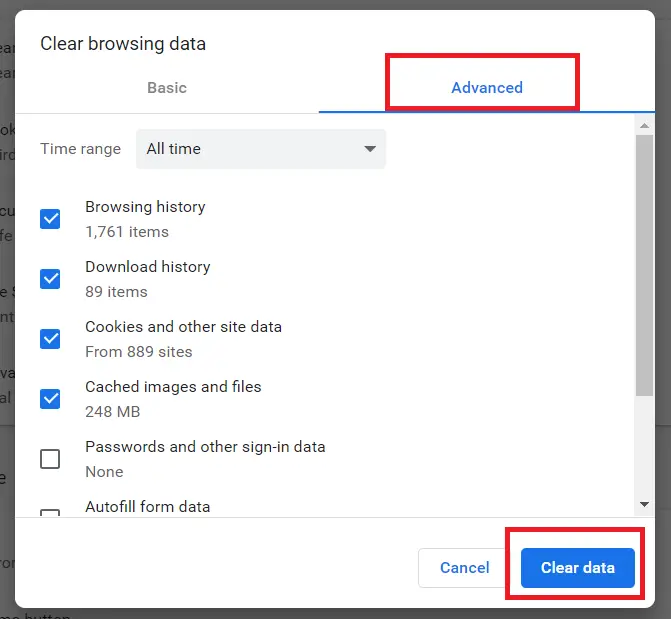
Step 5: Go to the ‘Advanced’ tab, select everything and from the ‘Time range’ drop-down menu, select ‘All time’.
Step 6: Click on ‘Clear data’. (You may uncheck the “History” and “Form data” option to save browsing history and autofill form data.
Let the process complete. This should probably fix the issue for you.
If you are getting similar error on other browsers then clear the temporary data for those browsers.
Method 2: Resetting the Proxy Settings
A malware may change the proxy settings to show you redirect Ads, or you may have done it for some purpose. Invalid proxy settings may stop websites to reach their destination server.
Now the first thing to do is check your proxy settings. Here is how:
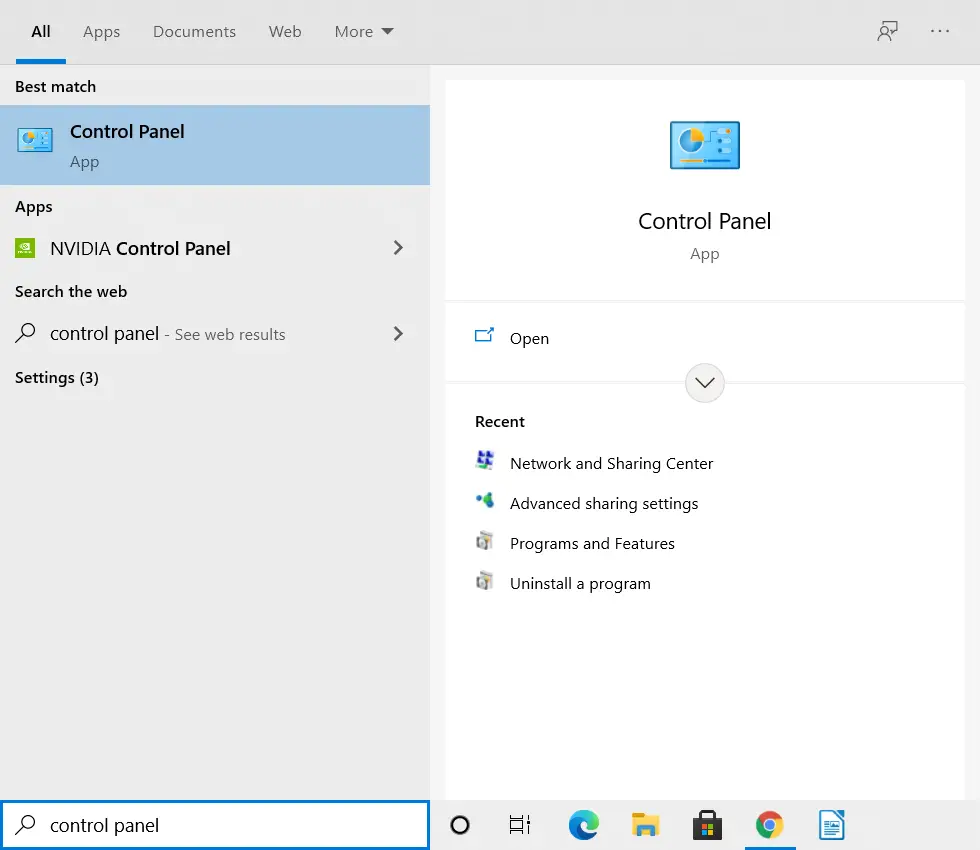
Step 1: Go to the Windows search bar, type “Control Panel” and hit enter.
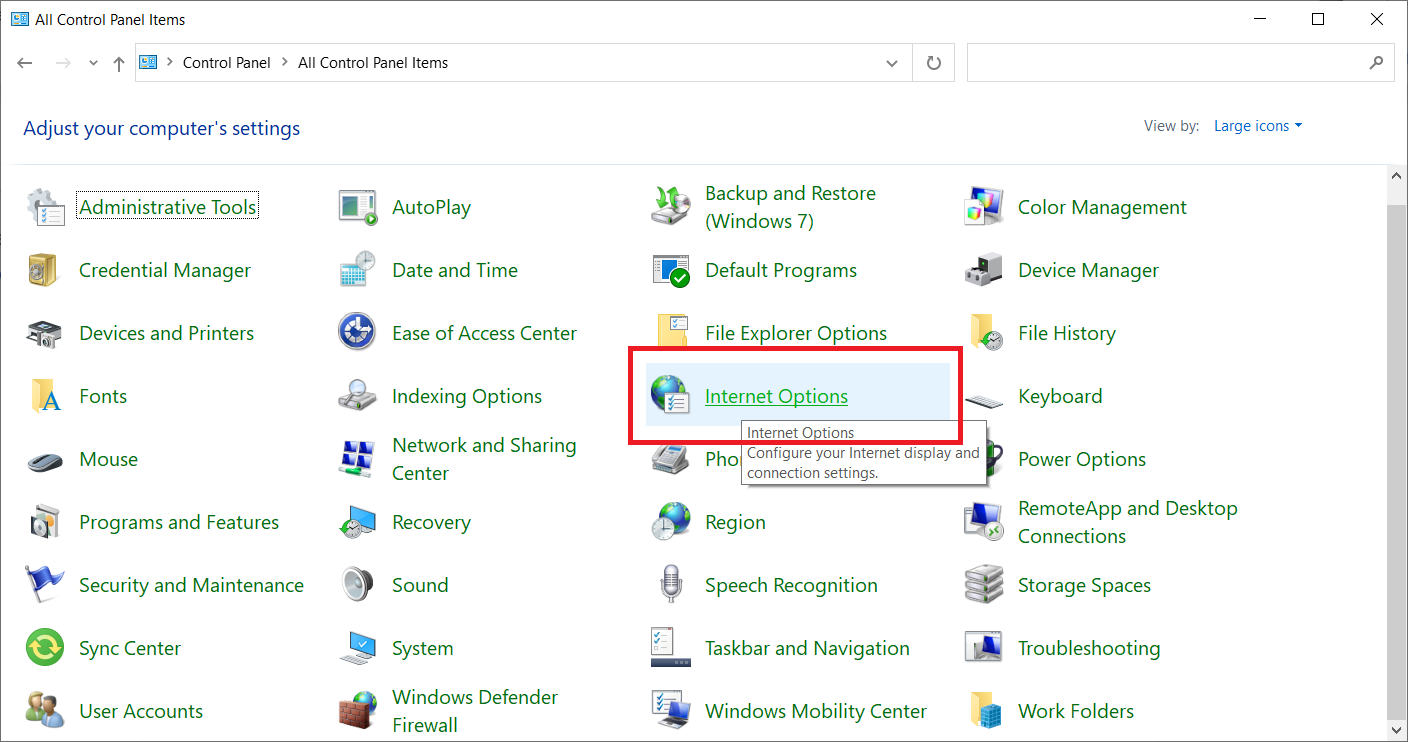
Step 2: From the Control Panel, click on ‘Internet Options’.
Step 3: Select the ‘Connections’ tab.
Step 4: Now click on ‘LAN settings’.

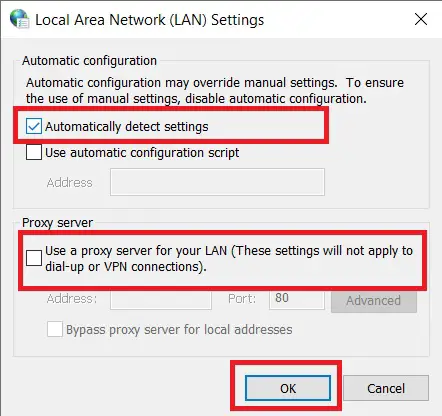
Step 5: Uncheck the box under ‘Proxy server’ and check the box reading ‘Automatically detect settings’ under ‘Automatic configuration. Click on OK to save the settings.
That’s it! Now you can go and check if the internet is working or not, you may have to restart the PC. If it is not working, we can move on to the next method.
Method 3: Selecting Automatic DNS
If you are using the custom DNS provided by ISP then this may also cause the issue, in this case you should try selecting Auto DNS or choose a better public DNS.
Step 1: Go to the Windows search bar, type “Control Panel” and hit enter.
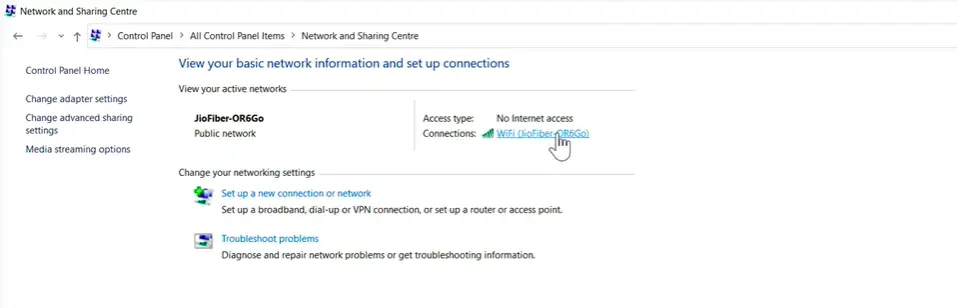
Step 2: Click on ‘Network and Sharing Center’ option.
Step 3: Now you will be able to see your active network. If the ‘Access type’ shows “No Internet access”, click on your connection.
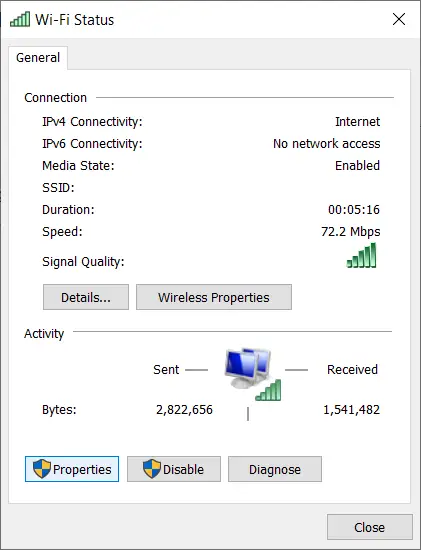
Step 4: Here, click on ‘Properties’.
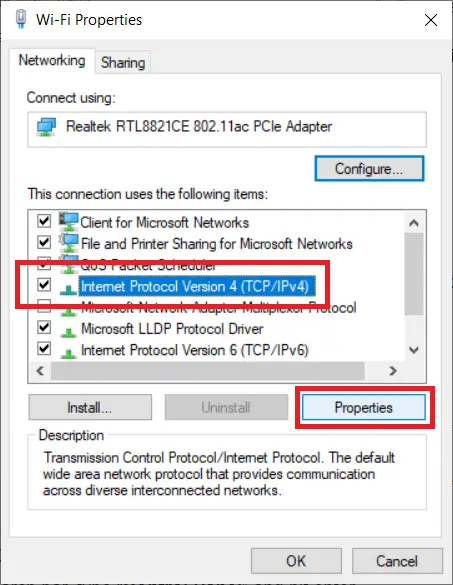
Step 5: Select ‘Internet Version Protocol 4(TCP/IPv4)’ and then click on ‘Properties’.
Step 6: Click on the options reading “Obtain an IP address automatically” and “Obtain DNS server address automatically”.
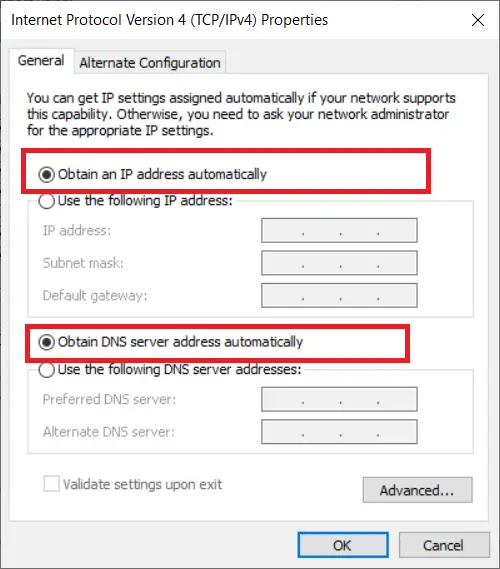
Step 7: Click on OK.
Restart your PC and check if the sites are able to open or not. If not, follow the next method.
Method 4: By Checking the DHCP and DNS Client Services
DHCP (Dynamic host control protocol) is a Windows service responsible for the Internet connection on your PC, if the service is not running then internet won’t work. Here’s how to enable DHCP client.
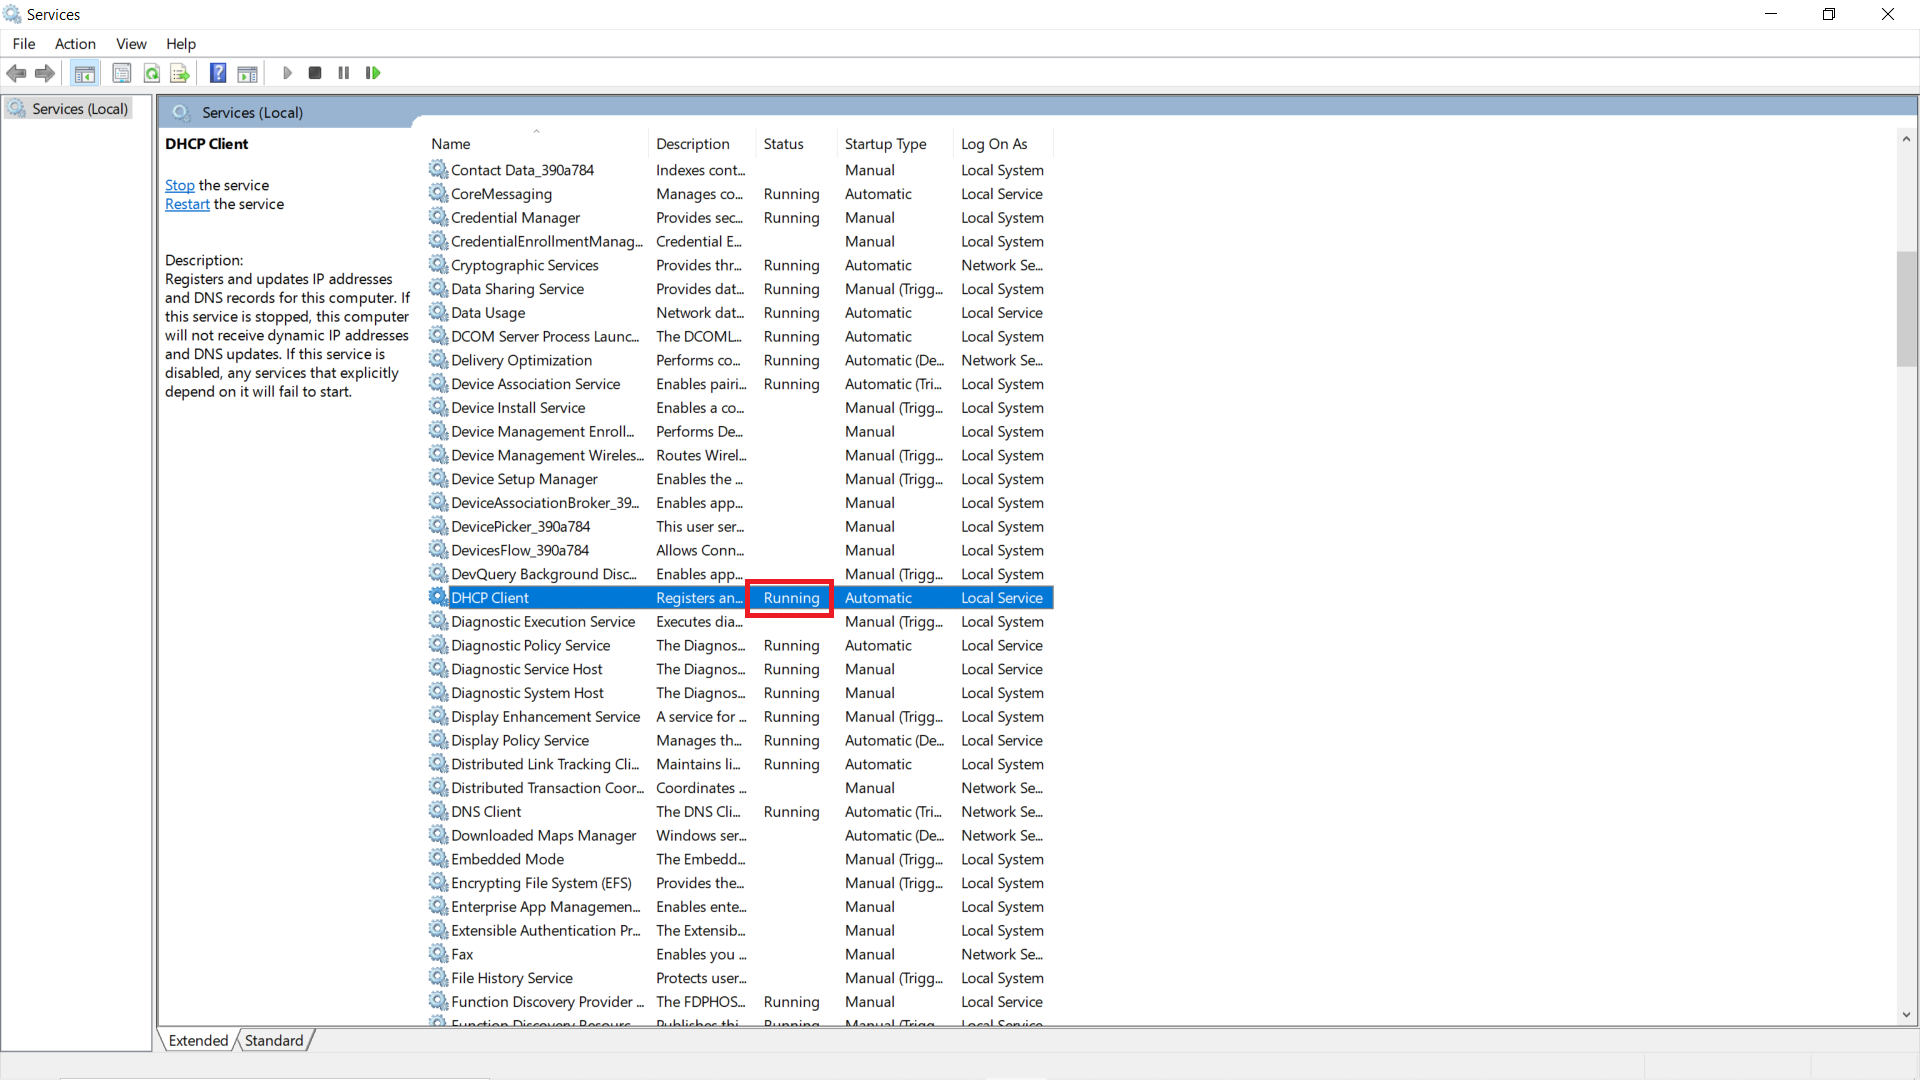
Step 1: Go to the Windows search bar, type “Services” and hit enter.
Step 2: Navigate down and locate ‘DHCP Client’.
Step 3: Make sure that the service is running. If it is not running, you can ‘Start’ the service from the top-left corner.
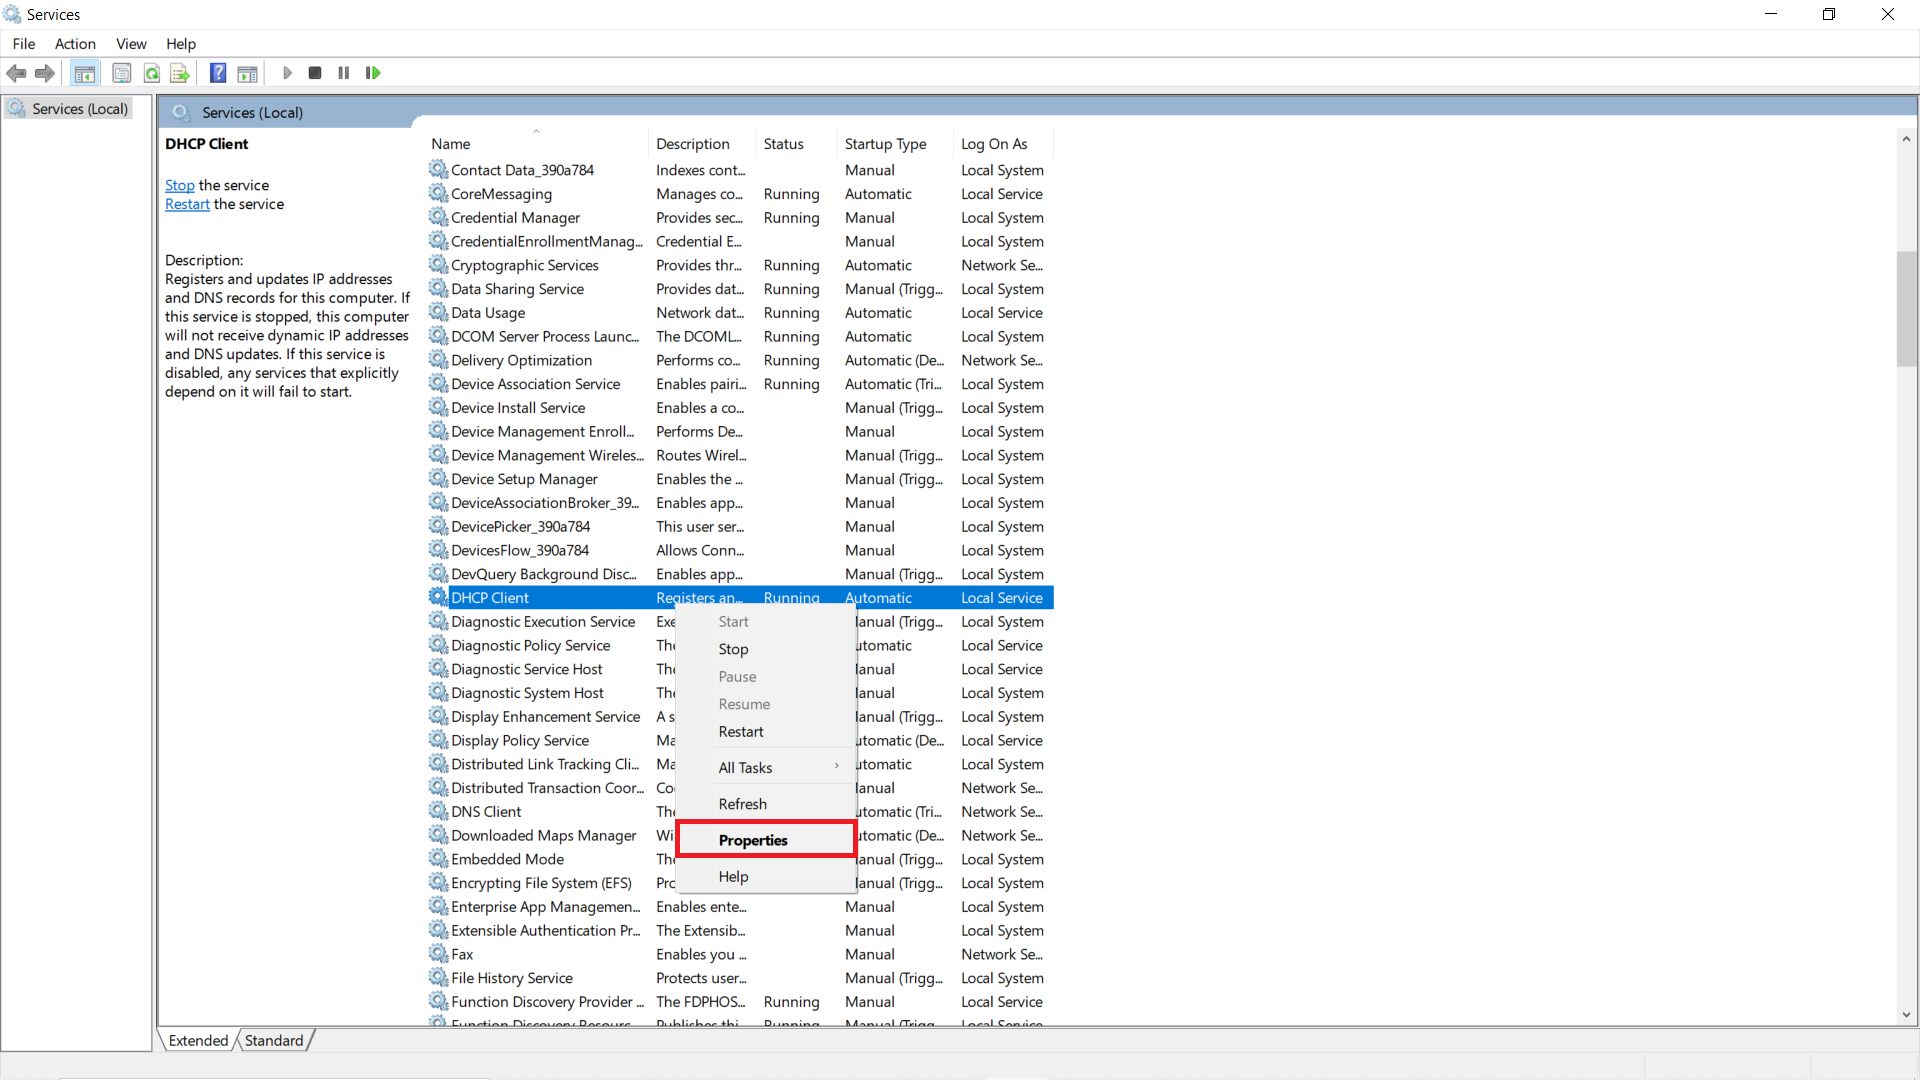
Step 4: Now right-click on the service and click on ‘Properties’.
Step 5: Here, make sure that the ‘Startup type’ is ‘Automatic’.
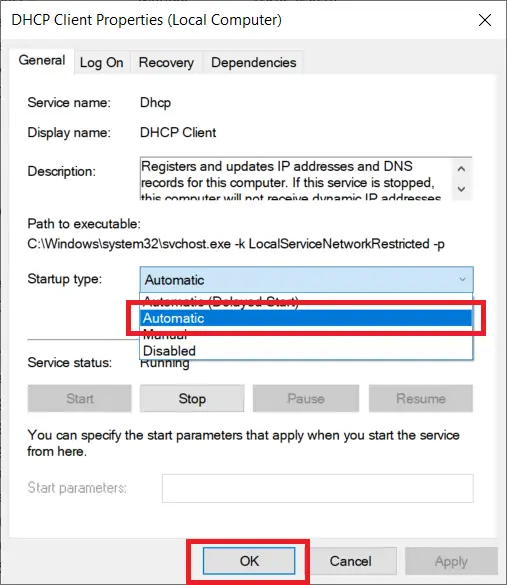
If it is not, set it to automatic from the drop-down menu and apply the settings.
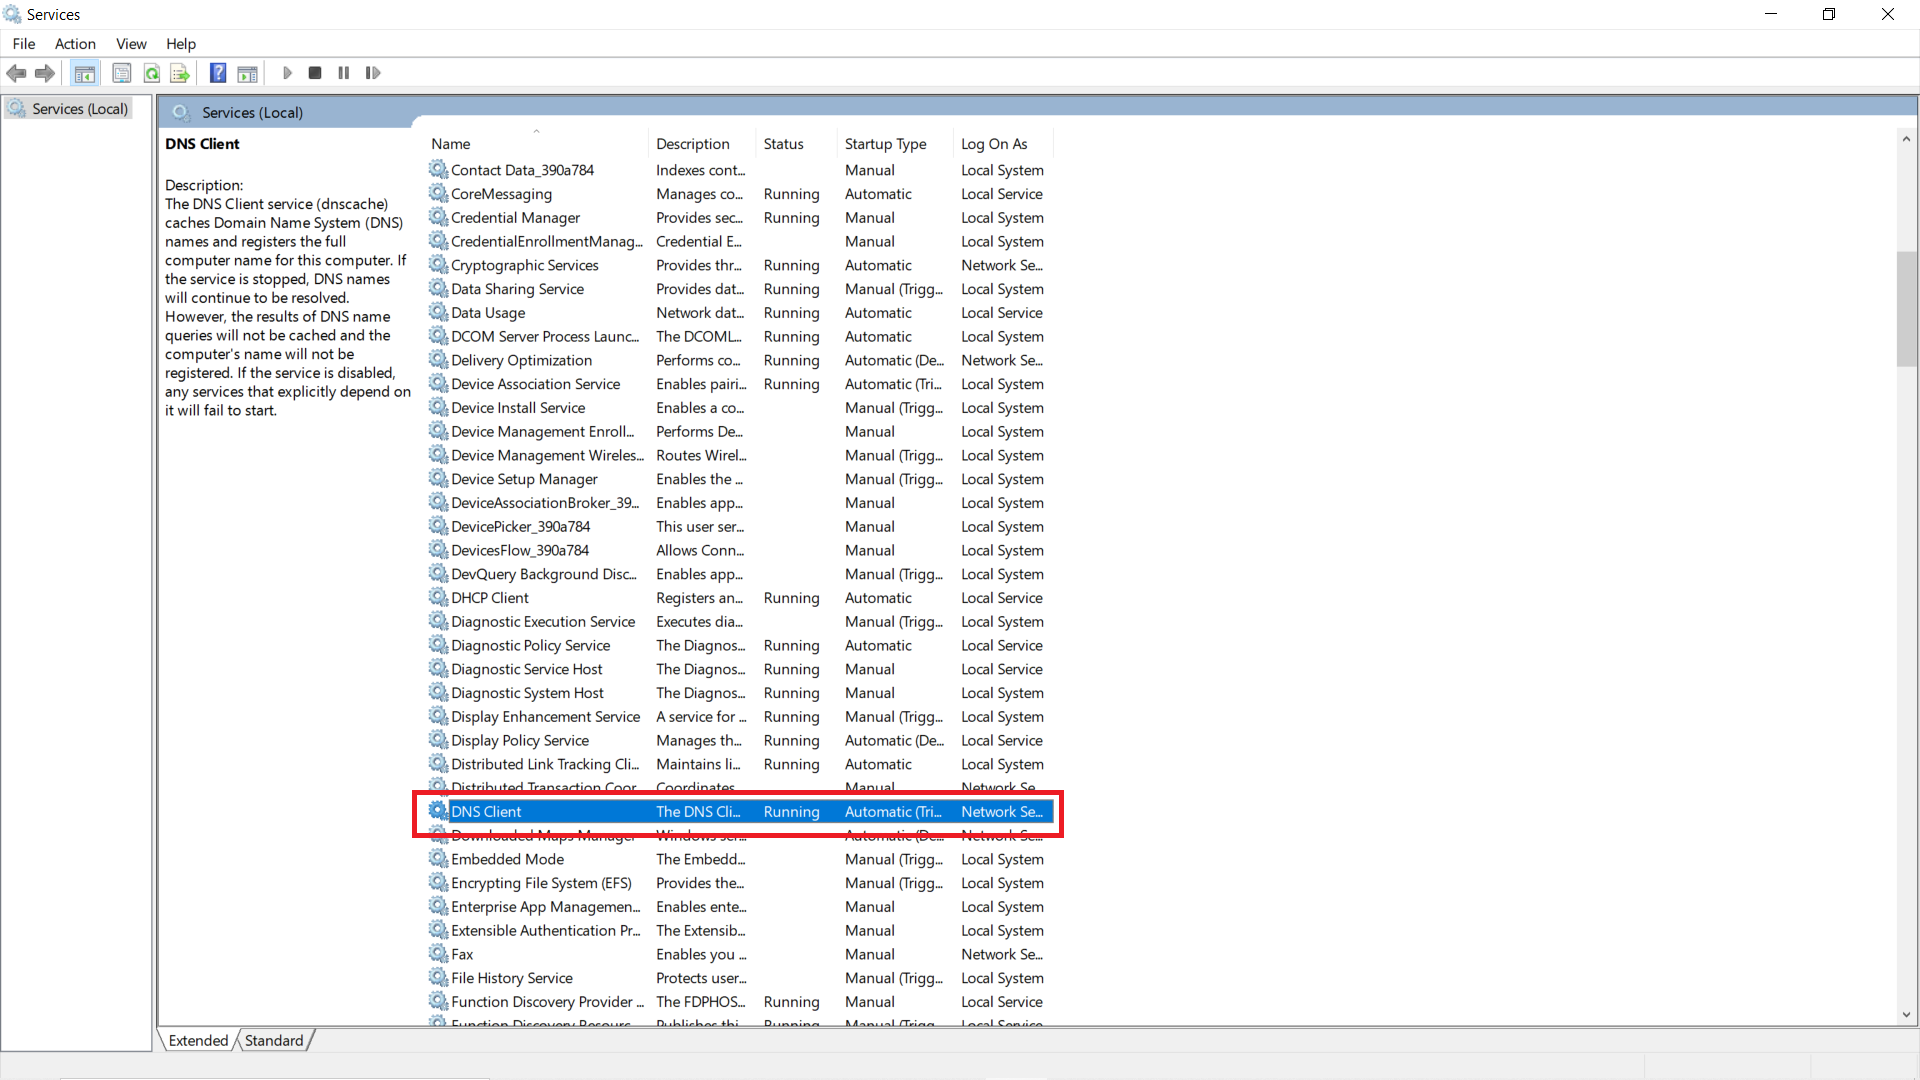
Now repeat the above steps for the ‘DNS Client’ service as well. Mostly, it is automatic and greyed out, if it is not, select the startup type as ‘Automatic’.
Finally, restart your computer and check if the This site can’t be reached error is gone or not.
Method 5: Updating the Network Driver
An outdated network driver may be responsible for the error, you can try to update the network driver to it’s latest version.
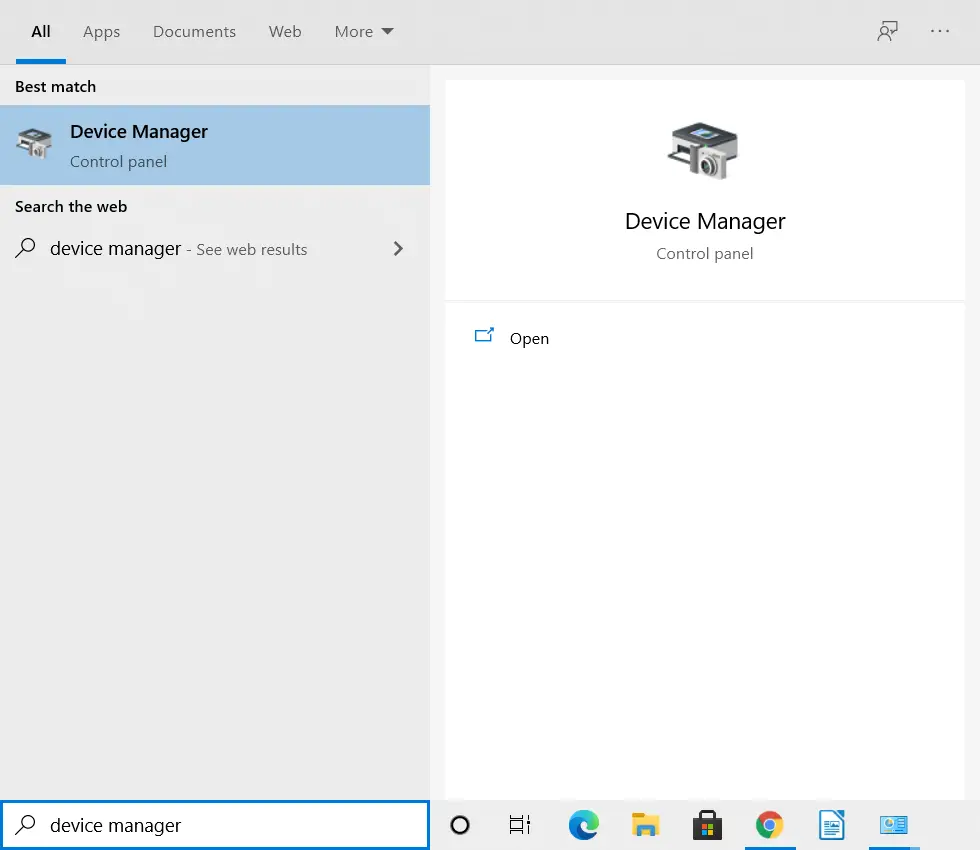
Step 1: Open the Windows Search bar, type “Device Manager” and hit enter.
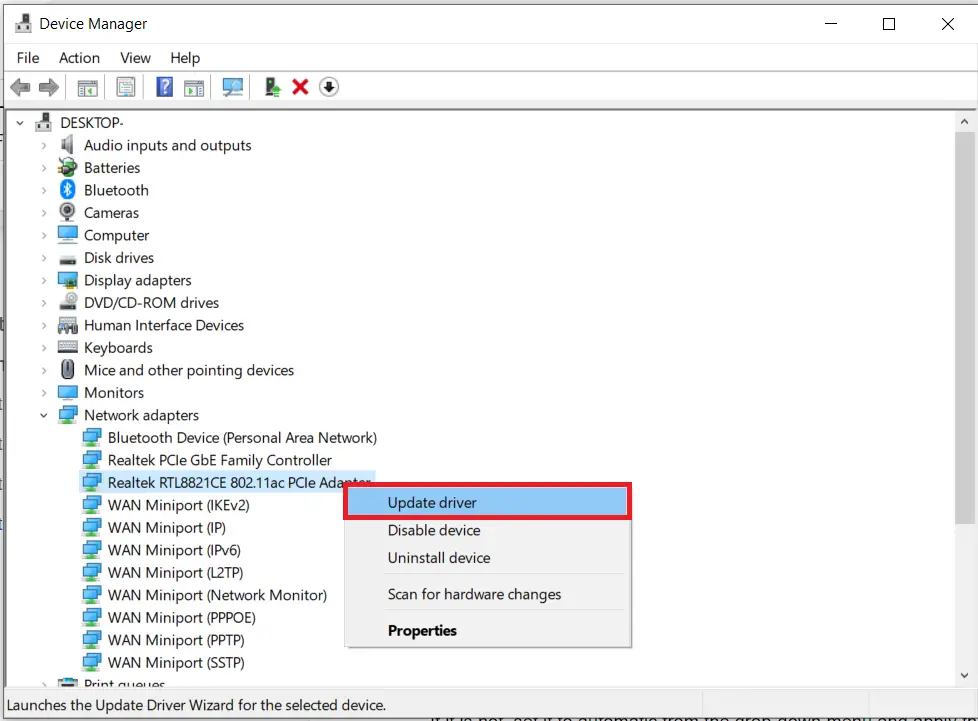
Step 2: Double-click on ‘Network adapters’ to expand.
Step 3: Select your network adapter, it could be Realtek, Broadcom, Atheros, etc.
Step 4: Right-click on it and select ‘Update driver’.
Step 5: Select ‘Search automatically for drivers’.
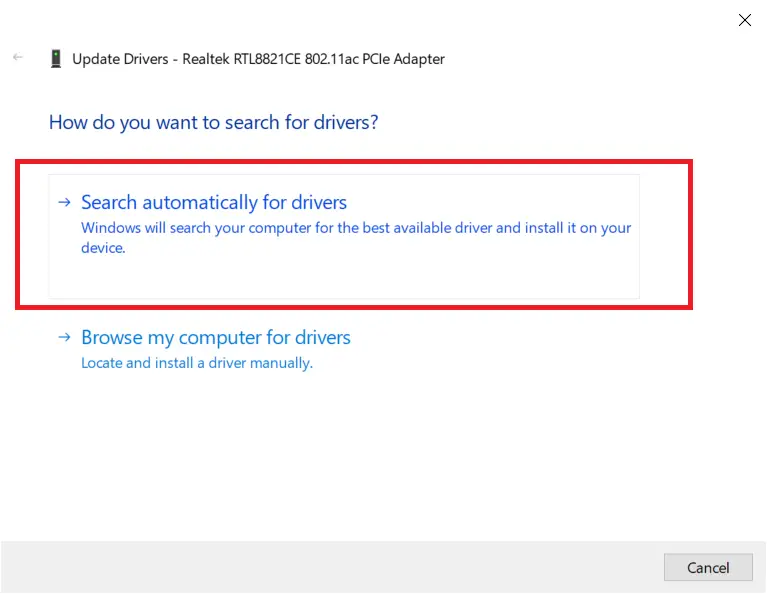
Step 6: Now the computer will search and update the network drivers for you.
Complete the process and restart your computer and check.
Method 6: Reinstalling the Network Driver
If the above method didn’t work, or you get a message “The best driver is already installed” then you can try reinstalling the network driver. Here is how:
Step 1: Open the Windows Search bar, type “Device Manager” and hit enter to open device manager window.
Step 2: Double-click on ‘Network adapters’ to expand.
Step 3: Select your network adapter, it could be Realtek, Broadcom, etc.
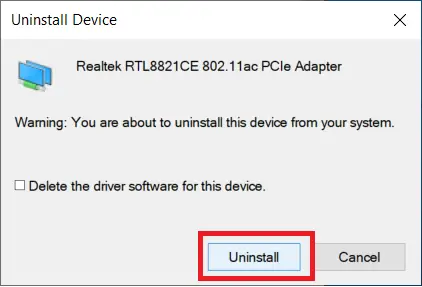
Step 4: Right-click on it and select ‘Uninstall device’.
Step 5: Finally, click on ‘Uninstall’ and make sure that you do not check the box reading “Delete the driver software for this device”.
Let the process complete and after that restart your computer and check if the problem is solved or not. If not then repeat the uninstall and select “Delete the driver software” this time.
Method 7: By Resetting IPs. DNS and Socket
This is more of a technical method compared to the other methods on the list. Make sure that you follow each step in the process. It is very effective and will probably fix This site can’t be reached error for you. Here is how to do it:
Step 1: Go to Windows search bar, type “cmd”, right-click on cmd and ‘Run as administrator’.
Step 2: Enter the following command and hit enter:
ipconfig /all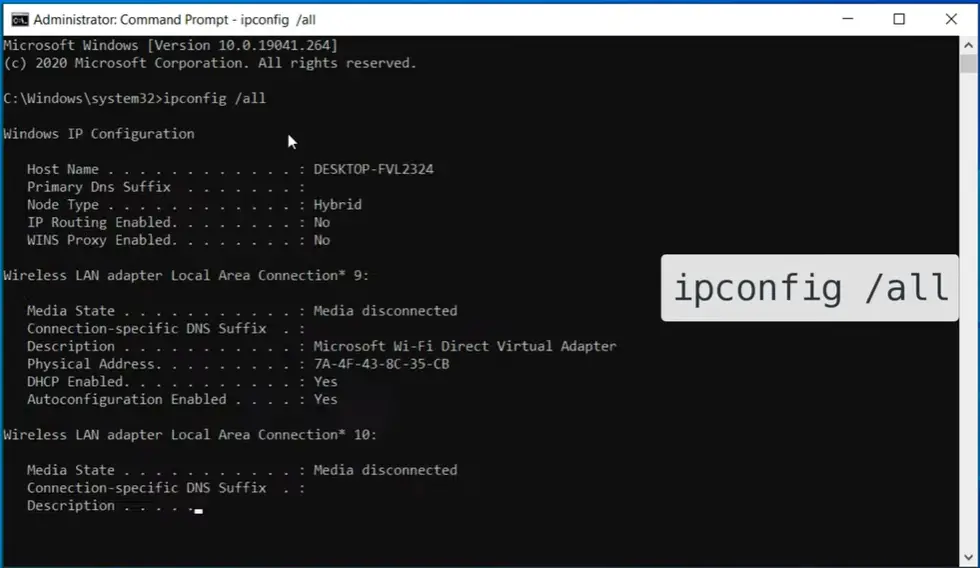
Step 3: Now type the following command and hit enter:
ipconfig /releaseStep 4: Renew the IP address by typing the following command and hit enter:
ipconfig /renew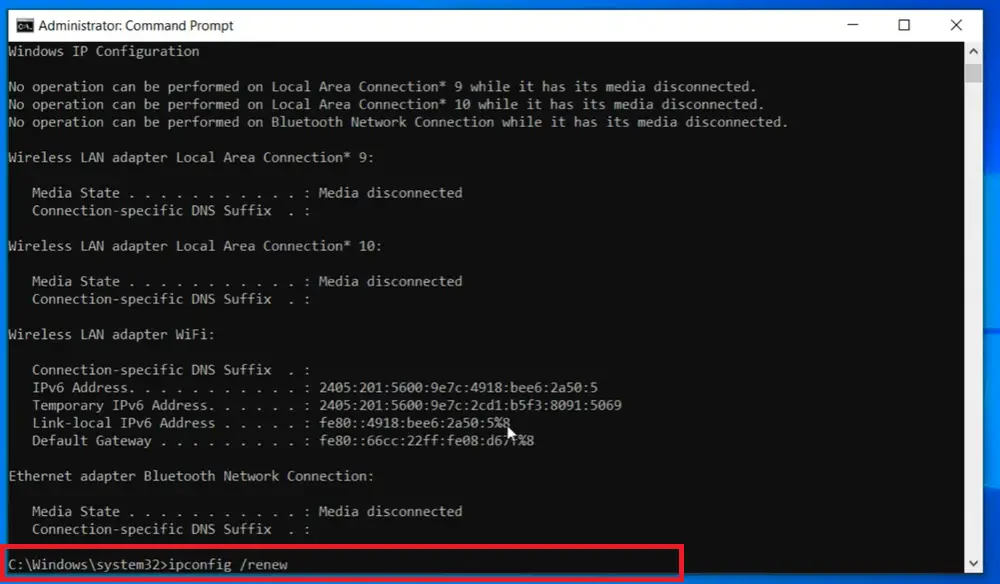
Step 5: Clear the DNS cache by typing the following command and hit enter:
ipconfig /flushdnsNow it is time to fix any kind of socket error.
Step 6: To fix any socket error, type the following command and hit enter:
netsh winsock resetStep 7: Reset the IP logs by entering the following command:
netsh int ip reset resetlog.txtStep 8: If the above command didn’t work for you, you can enter the following command:
netsh winsock reset catalogStep 9: Now reset the IPv4 logs by entering the following command:
netsh int ipv4 reset reset.logStep 10: Additionally, you can also reset all the IP addresses by the following command:
netsh int ip resetNow exit the command prompt and restart your computer. This method will fix the issue for you.
Method 8: Using Google’s Public DNS
This method is useful if any particular site won’t load on your computer. In that case, you can use Google’s public DNS and the problematic sites should load fine. Here is how to do it:
Step 1: Go to the Windows search bar, type “Control Panel” and hit enter.
Step 2: Click on ‘Network and Sharing Center’.
Step 3: Now you will be able to see your active network. If the ‘Access type’ shows “No Internet access”, click on your connection.
Step 4: Here, click on ‘Properties’.
Step 5: Select ‘Internet Version Protocol 4(TCP/IPv4)’ and then click on ‘Properties’.
Step 6: Click on ‘Use the following DNS server addresses’.
Step 7: Enter the following DNS addresses in ‘Preferred DNS server’ and ‘Alternative DNS server’ respectively:
8.8.8.8
8.8.4.4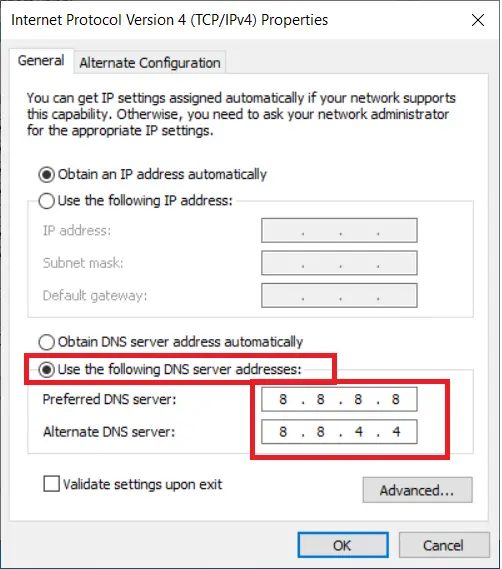
You can also use Cloudflare Lightning Fast DNS with the following addresses:
1.1.1.1
1.0.0.1
Step 8: Click on OK.
Finally, restart your computer.
Closing Phrase
All the above methods should help you to fix This site can’t be reached error on Windows 10 / 8.1 and lower versions of Windows. If you are still getting the error then make sure to check and fix the WiFi issue as well.
Also, Read: