No doubt that Windows 11/10 is one of the most widely used operating systems out there. However, there are times when Windows 10 users get different types of errors due to corrupted files. If some system files are corrupt or missing, then you will get an integrity violation message after running the SFC (System File Checker) command. Normally, the SFC command fixes the issues, but DISM commands will help if SFC doesn’t work.
However, if the system files are deleted, or the Windows image file is corrupt by any means, then the SFC command may not work. That is where the DISM command in Windows 10 comes into play.
In this article, you will learn about the DISM command in Windows 10 and how you can use it to fix a lot of errors related to Windows 10.
About the DISM Command in Windows 10 & 11
DISM stands for Deployment Image Servicing and Management; it is an administrator-level command-line tool that can be used to prepare, modify, and repair system images, including Windows Recovery Environment, Windows Setup, and Windows PE (WinPE).
Windows 10 keeps a system image file in C drive that we can use to repair the corrupt Windows. But, if the image file itself is corrupted, then you need to repair the image file first and then fix the corrupt Windows 10/11.
Using the DISM tool, you can easily fix a lot of common Windows 10 errors, including Windows 10 update errors, booting errors, etc.
Another great thing about the DISM tool is that it can also be used to repair the Windows 10 files in the image. Generally, the SFC command can repair and replace corrupted system files.
However, if there are multiple Windows 10 files corrupted, the SFC command doesn’t work. In that case, you can use the DISM tool to repair the image of Windows 10 without having to install a fresh copy of Windows from scratch.
DISM will allow you to download and repair the image file directly from the Microsoft server. Hence, you must have an Internet connection to execute DISM.
Using DISM Command to Repair Windows File Image
Basically, you get three options with the DISM command in Windows 10, namely “CheckHealth”, “ScanHealth”, and “RestoreHealth”. You have to run these commands in order to repair the corrupted files.
If you are facing any issues like slow performance, unexpected crashes, and the SFC command isn’t working, you can run the DISM tool to fix the issue.
OR if the issue is quite serious and you can’t boot the PC, then you can use the “RestoreHealth” command to fix the locally available image by using source files from different locations.
Here is how you can use the basic DISM tool:
Using the CheckHealth Option
The CheckHealth command of the DISM tool is the most basic command, and it can be used to quickly detect if there are some corrupted files with the local system image.
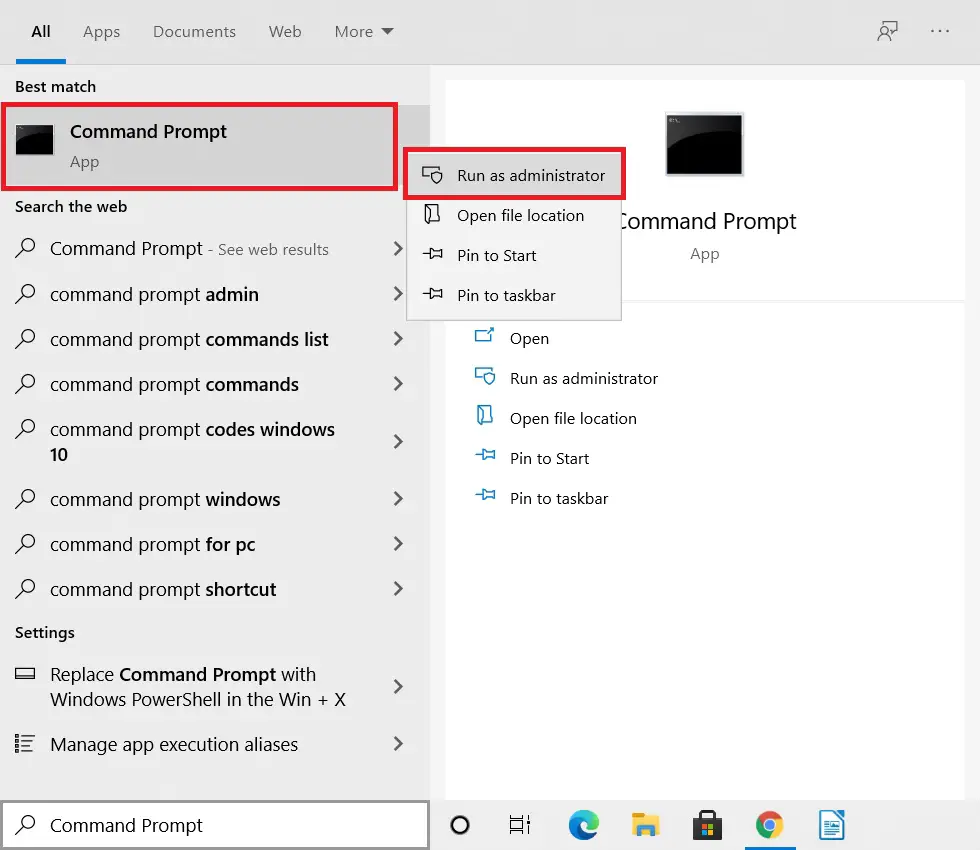
Step 1: Go to the Windows Search bar, type “Command Prompt”, and right-click on it to ‘Run as administrator’.
Step 2: Now enter the following command and hit enter:
DISM /Online /Cleanup-Image /CheckHealth
Now it will run the scan and verify if something needs fixing.
That’s it; if you see a message reading “No component store corruption detected.”, you are good to go; all you have to do is restart your system.
Using the ScanHealth Option
ScanHealth command will scan the disk image to find the actual corruption with the Image files.
Step 1: Open the Windows Search bar, type “Command Prompt”, right-click on it to ‘Run as administrator’.
Step 2: Now enter the following command and hit enter:
DISM /Online /Cleanup-Image /ScanHealth
Let the process complete and this may take some time. The DISM command will determine if the Windows 10 image needs repairing or not. If you do not see any error, you can just restart your computer, and that’s it!
Using the RestoreHealth Option
Finally, the most advanced option for the DISM command in Windows 10 is the RestoreHealth option. It can scan and repair the problems with the system image.
Step 1: Open the Windows Search bar, type “Command Prompt,” and right-click on it to ‘Run as administrator’.
Step 2: Enter the following command and hit enter:
DISM /Online /Cleanup-Image /RestoreHealth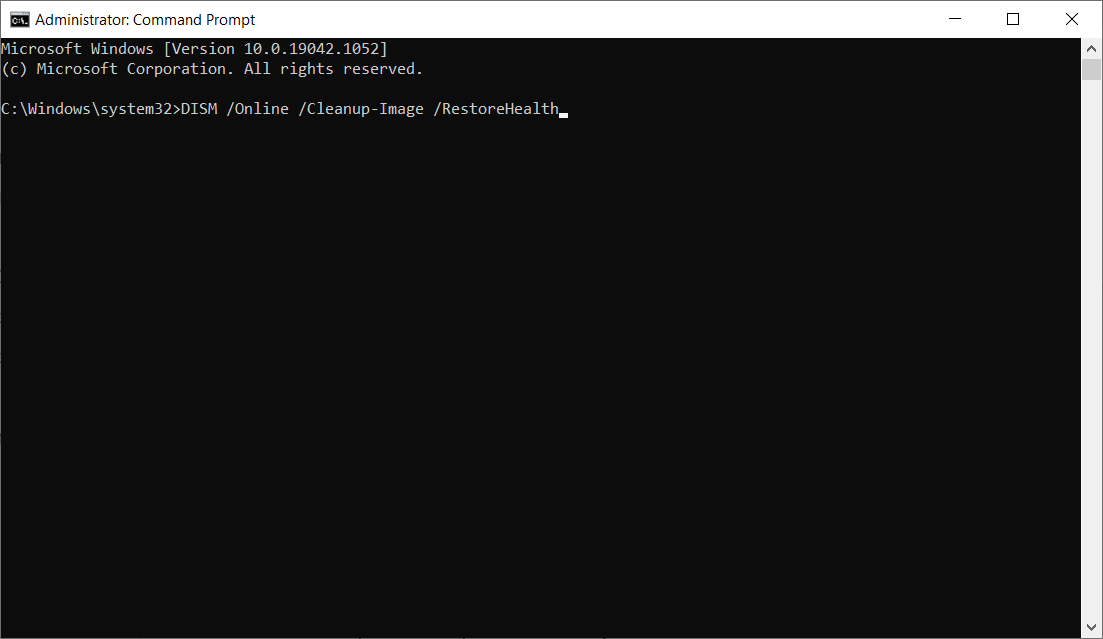
This command allows your PC to download the Image file from the Microsoft server. It may take a lot of time just wait and let it complete.
If there is a need, the DISM tool will connect to the Windows Update online in order to download and replace the corrupted files make sure to keep connected to the internet.
So that was pretty much it about the DISM command in Windows 10. Using the Deployment Image Servicing & Management command, you can solve a lot of Windows 10 errors.
Using DISM Tool with the install.wim Image to Fix Corrupt Windows Files
Usually, the DISM tool works without any problem. However, if the files are too damaged or corrupted, or you are not connected to the internet, you will have to provide another image. This can be done easily using the Source option. That means using external media to supply the Image File.
You can easily find an “install.wim” file from a bootable media or Windows 10/11 ISO file. Make sure that the files match the version, edition, and language of the version of Windows 10 you are trying to fix.
You may have to use another PC to create bootable media in case the affected PC is not able to boot Windows 10. (Also, an USB flash drive with at least 8GB capacity is required)
Read: How to Make Flash Disk Bootable Using Command Prompt (cmd) and install Windows OR follow the below steps.
It is always good to download a fresh copy of Windows 10. Here is how:
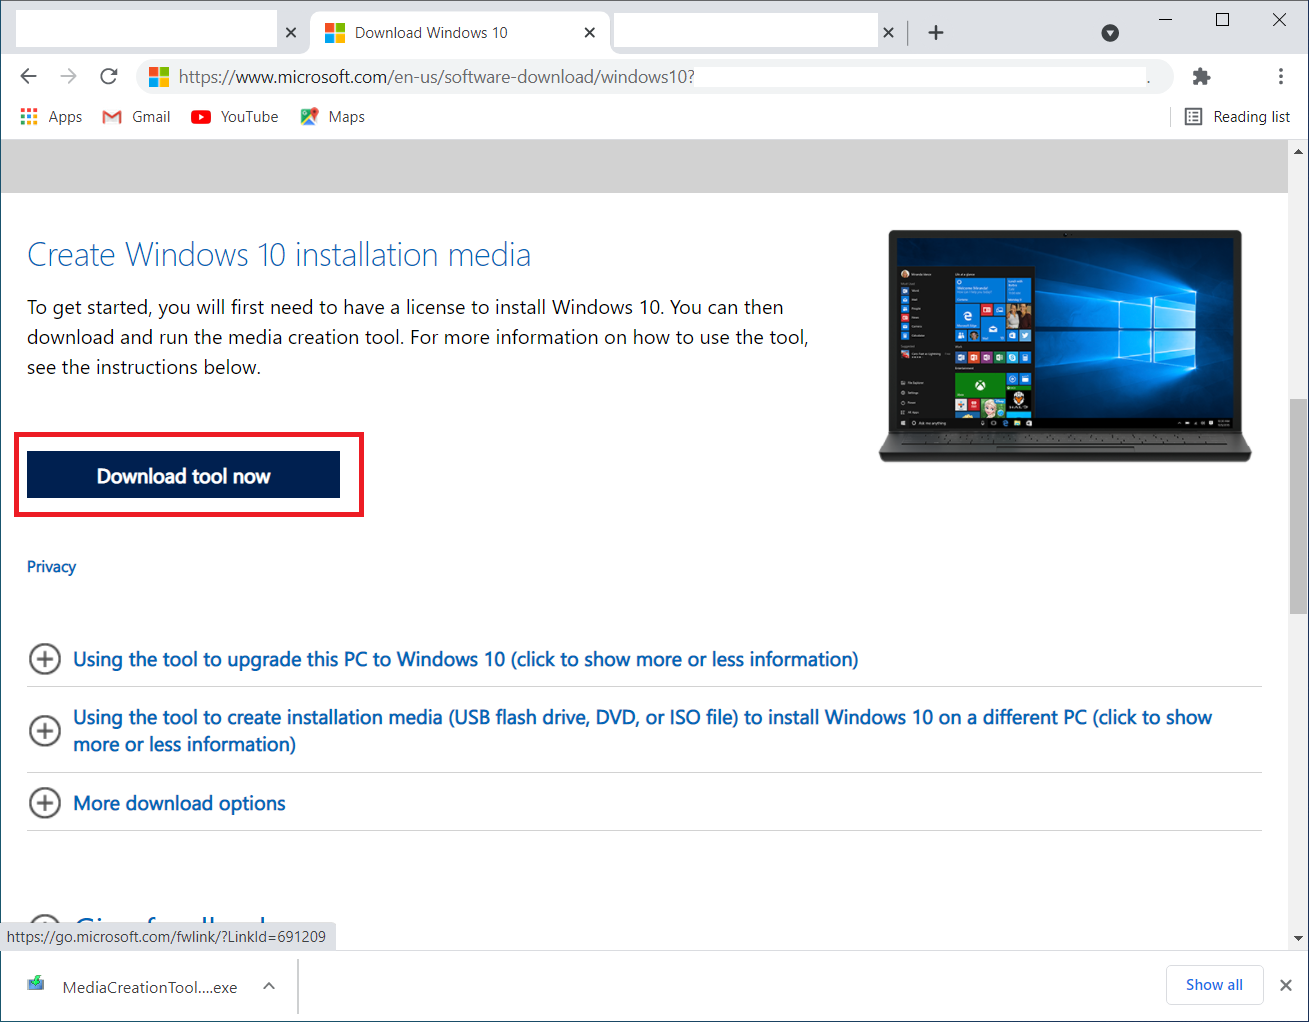
Step 1: Go to the Windows 10 Download Page.
Step 2: Navigate down and click on the ‘Download tool now’ button. This will download the MediaCreationToolxxxx.exe setup.
Step 3: Launch the setup.
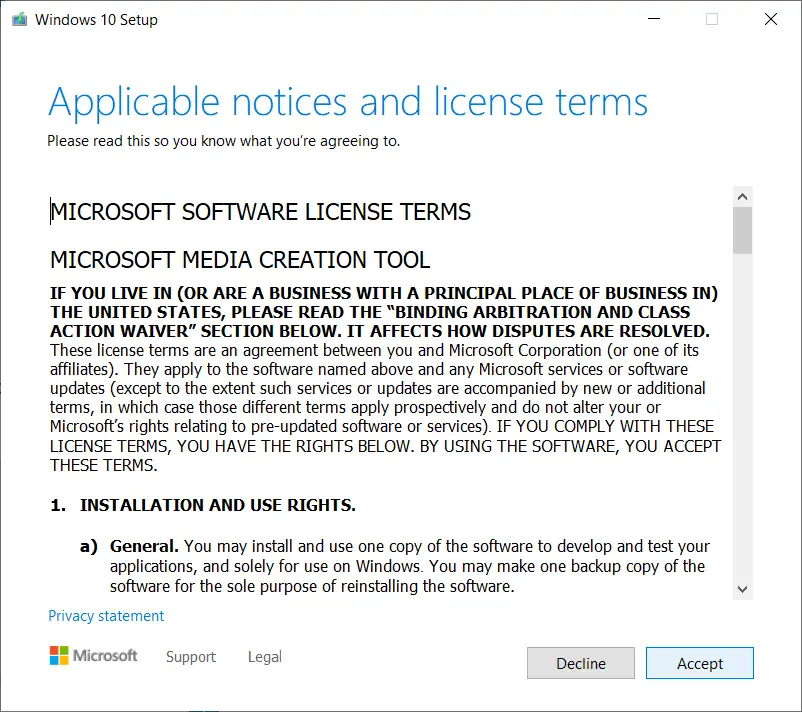
Step 4: ‘Accept’ all the terms.
Step 5: Click on ‘Create installation media (USB flash drive, DVD, or ISO file) for another PC’
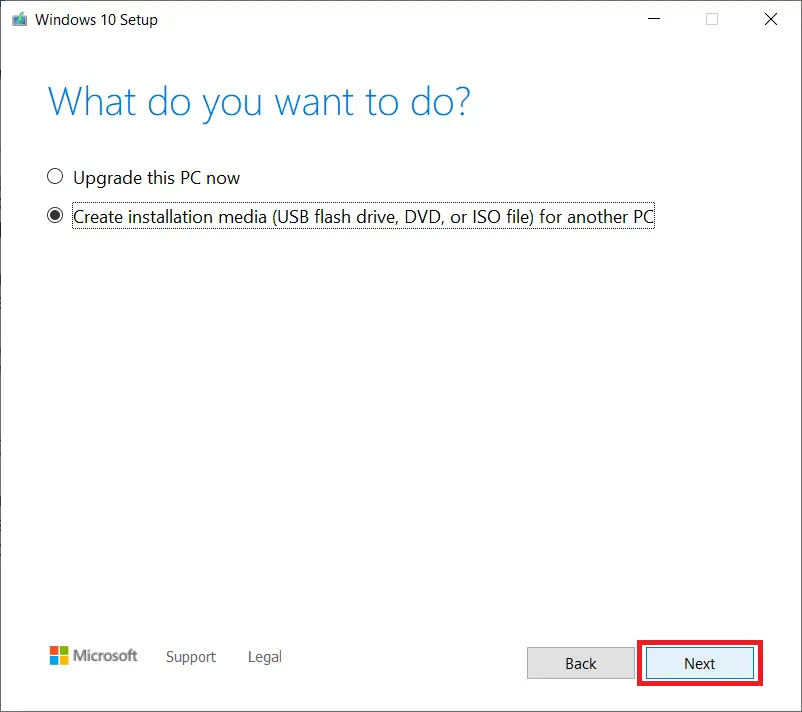
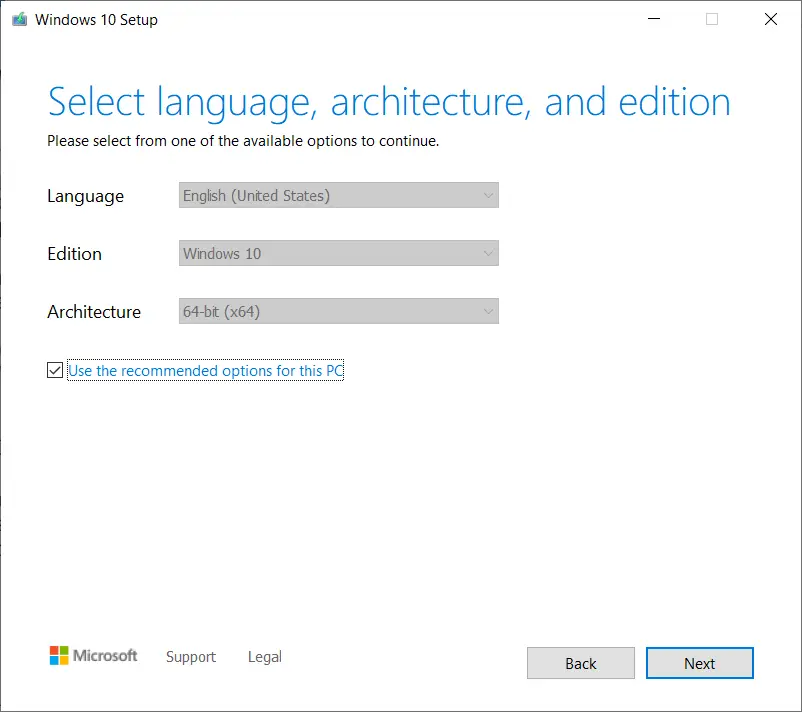
Step 6: Click on Next twice.
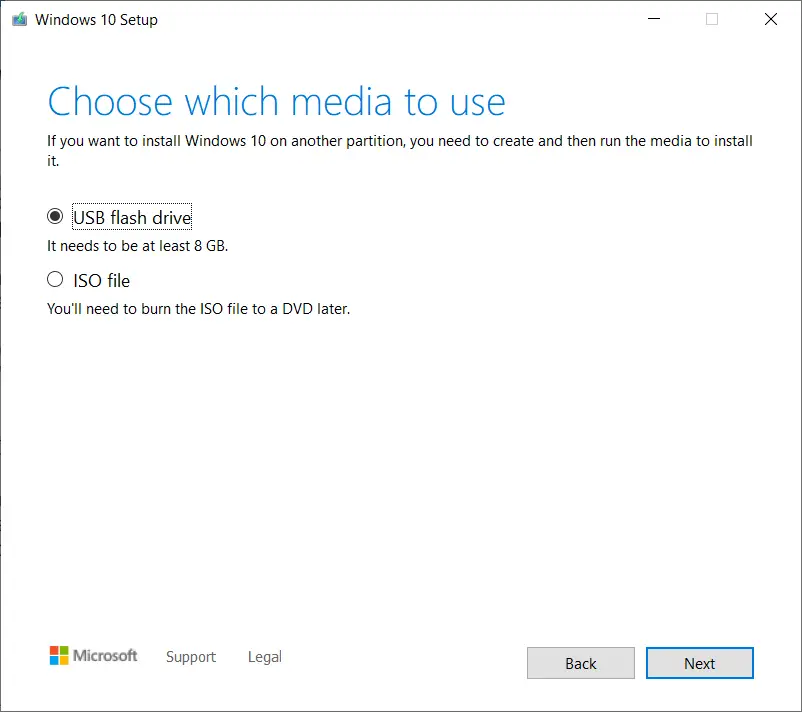
Step 7: Now select ‘USB Flash Drive’. Click on Next.
Step 8: It will take some time to burn Windows 10 to the USB flash disk. Once it is done, your disk is ready.
Using DISM Command
Now that we have completed all of the above steps and created a bootable media with Windows 10, we can use the DISM tool with the Source option. Here is how:
Step 1: Open the Windows Search bar, type “Command Prompt”, right-click on it to ‘Run as administrator’.
But if you can’t boot into Windows, then restart the PC and boot from Flash drive. Select the “Repair” option, go to Troubleshooting > Advanced options > Command prompt.
Step 2: Now enter the following command and hit enter:
DISM /Online /Cleanup-Image /RestoreHealth /Source:G:\Sources\install.wim
In addition to the above command, you can also enter the following two commands to limit the use of Windows Update:
DISM /Online /Cleanup-Image /RestoreHealth /Source:G\Sources\install.wim /LimitAccessDISM /Online /Cleanup-Image /RestoreHealth /Source:wim:G:\Sources\install.wim:1 /LimitAccessReplace the letter “G” with the drive letter or external media. That’s it, and now install.wim will scan and repair the system files.
Using SFC Command
Even if you use the DISM command to repair the image file, you will still need to run the SFC command to repair Windows. Since DISM will only fix the corrupt image file, not the corrupt Windows files.
Here is how to execute the SFC command:
Step 1: Go to the Windows Search bar, type “Command Prompt”, and right-click on it to ‘Run as administrator’.
Step 2: Now enter the following command and hit enter: “sfc /scannow”.
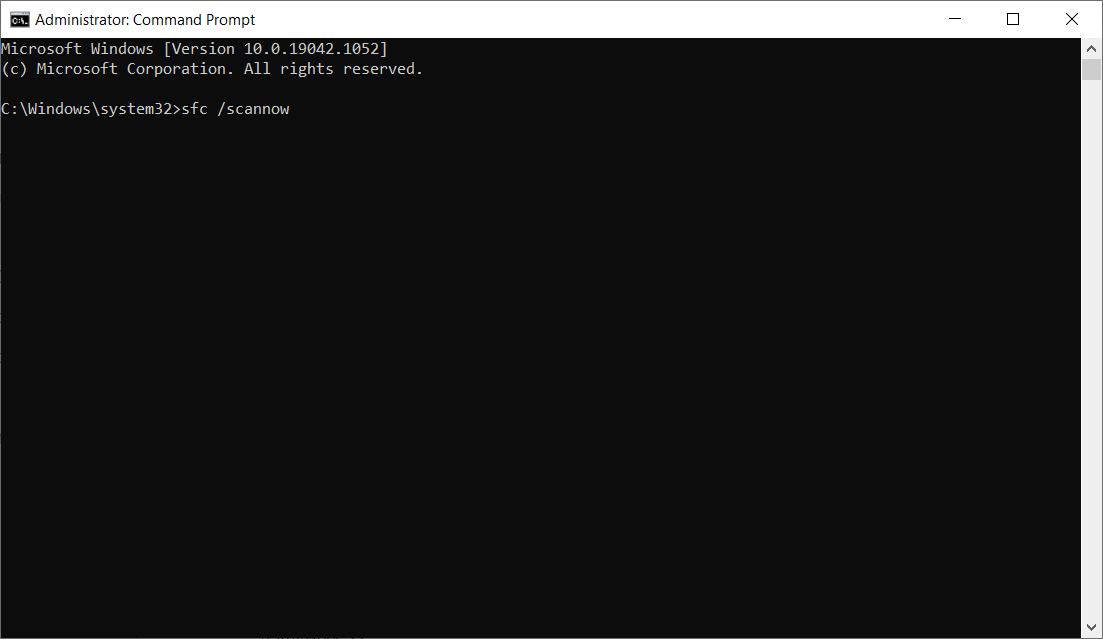
That’s it! The SFC command will now repair and replace the corrupted files. You may have to restart the PC.
Resetting your computer to Factory Defaults
In case the SFC command is not working even after repairing the Image files, and you are facing errors or performance issues with your computer, you can reset your PC. Here is how:
Before doing that, it is recommended to take a backup of your important files.
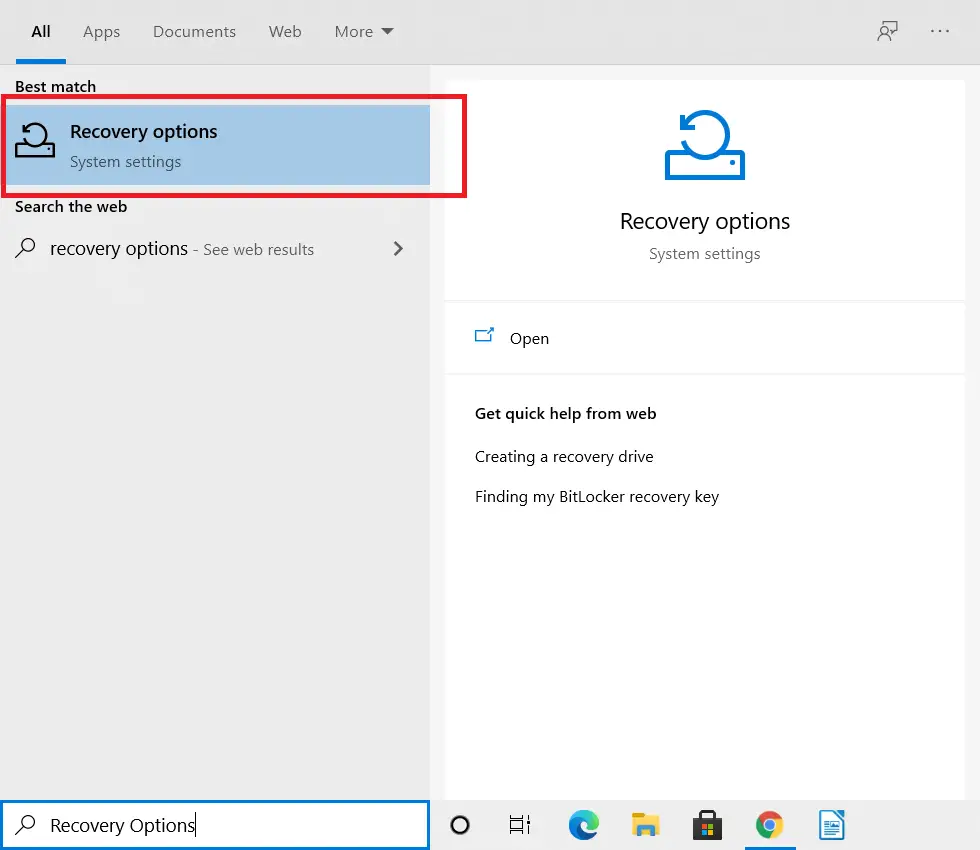
Step 1: Go to Windows Search Bar, type “Recovery options,” and hit enter.
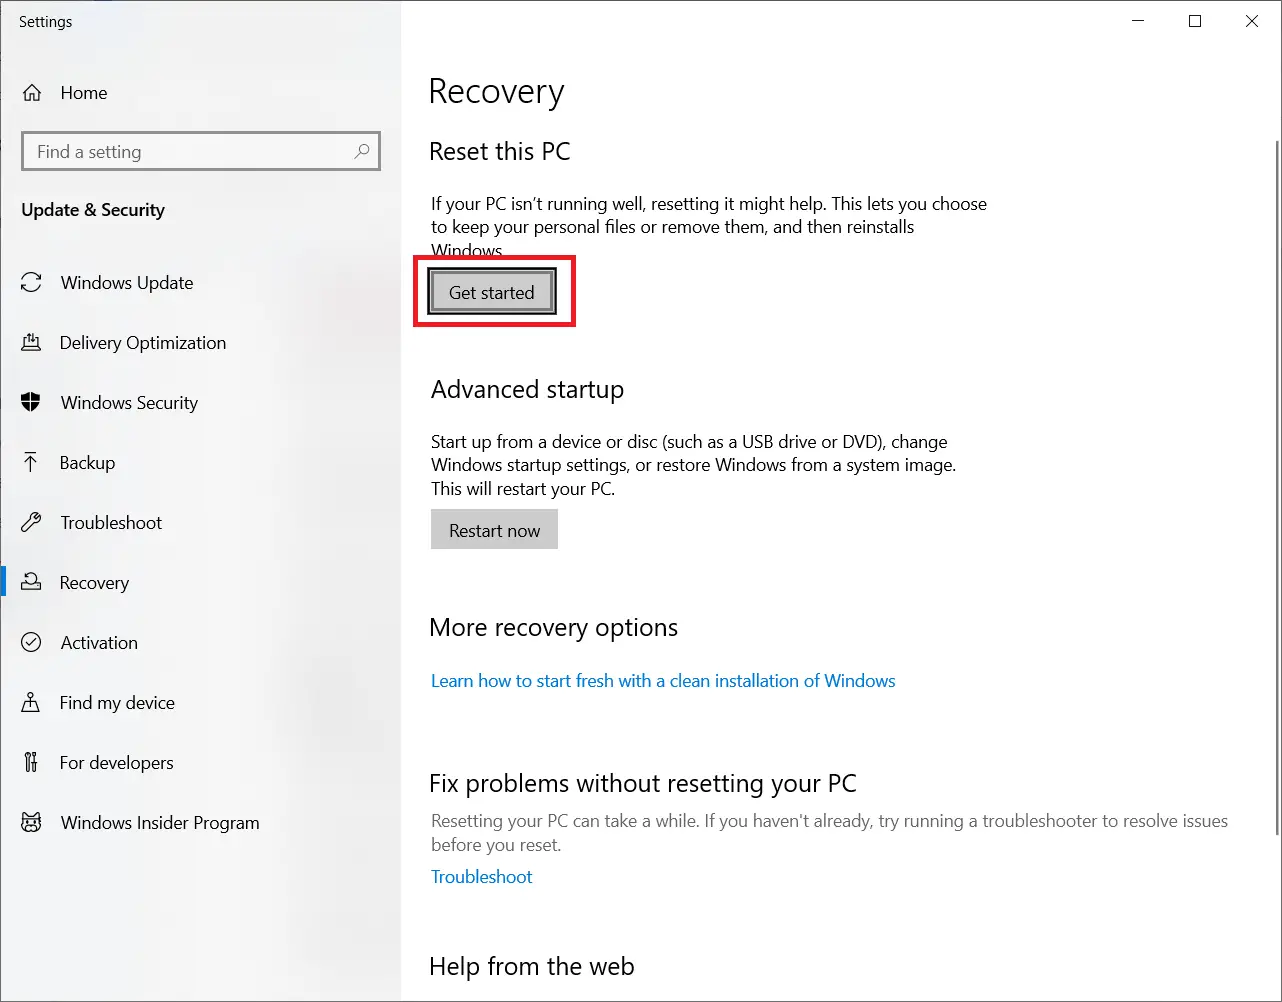
Step 2: Under the ‘Reset this PC’ option, click on ‘Get started’.
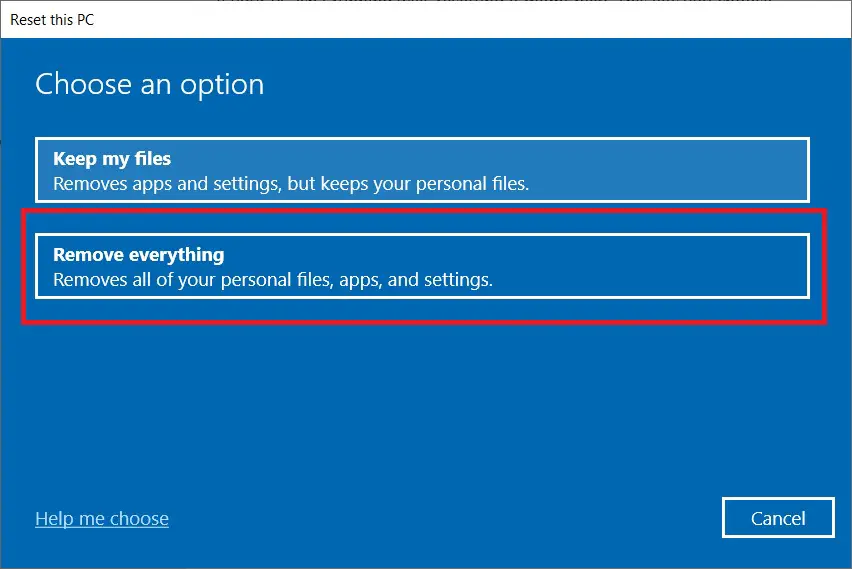
Step 3: If you have taken the backup of your important files, it is best to choose the “Remove everything” option. If you haven’t taken a backup, then select “Keep my files,” but still, it will remove all the installed software and customizations.
Now follow all the on-screen instructions to reset your PC to factory defaults, and you will now have a fresh Windows 10 on your system.
Closing Phrase
That was all about the DISM command in Windows 11/10. You can use this command to repair Windows 10 or 11 system files and fix a lot of errors. If you face any difficulty in any of the steps, feel free to reach out to us.
Also, Read: