There are many instances where you might want to change user name or user account name on Windows 10. For example, you might have given your PC to your parents, sibling, or friend. Or you just got a promotion in your office and the user name on the new computer is someone else’s. Well, whatever the case may be, we will help you out in changing the user name on Windows 10.
You can find your user account name by clicking on the Windows icon on the taskbar. On the bottom left, you will see options to shutdown/restart, Settings, and just at the top, you will see your account and username.
Method 1 – Change the User Account Name From Control Panel
You can’t change this by simply going to the Accounts in the Settings. The method to change the username on Windows 10 is a bit different. That is because it is directly connected to your Microsoft account. Here are the steps you have to follow to change your username:
Step 1: Go to the Windows 10 taskbar, type “Control Panel” in the search option, and hit enter.
Step 2: Change the View by option to Large icons from the drop-down menu on the top-right.
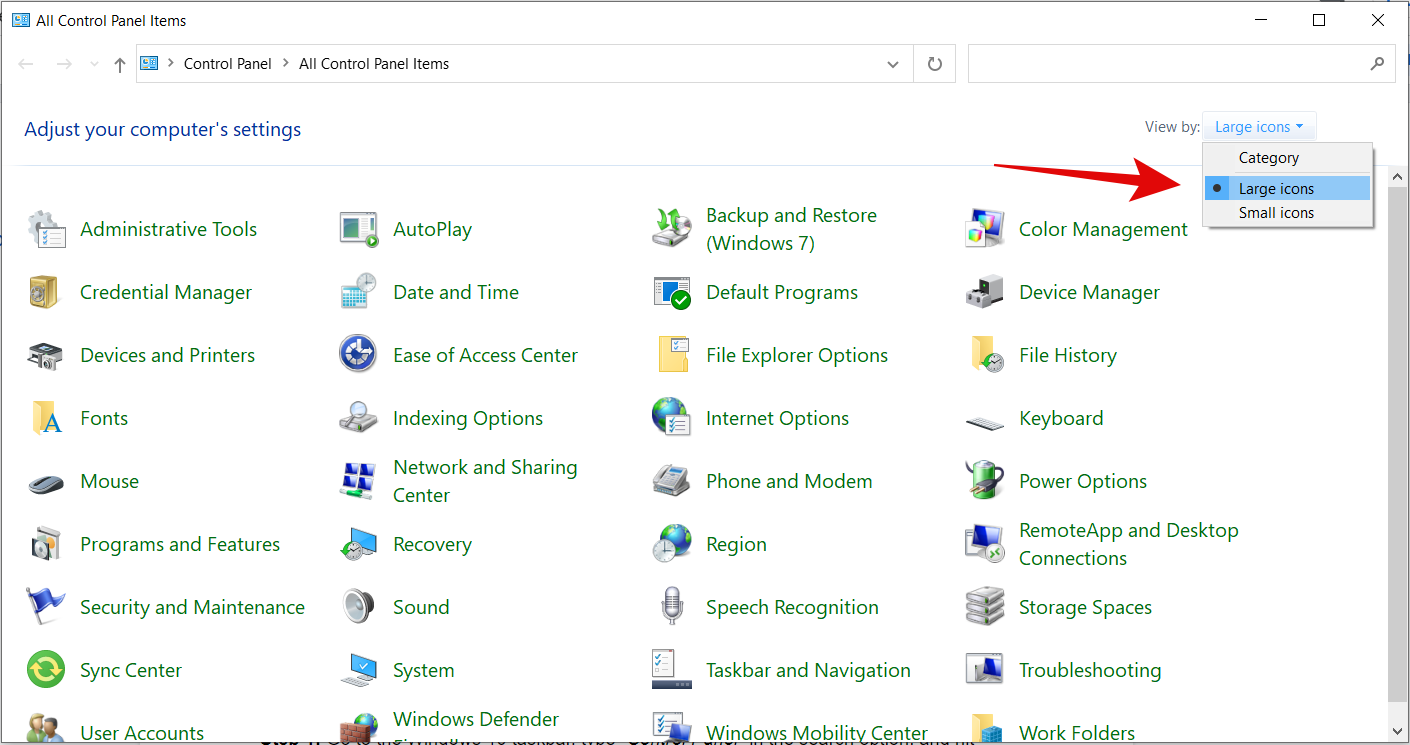
Step 3: Scroll down and click on User Accounts.

Step 4: Now you will see the option to “Change your account name” on the left side. Click on it.

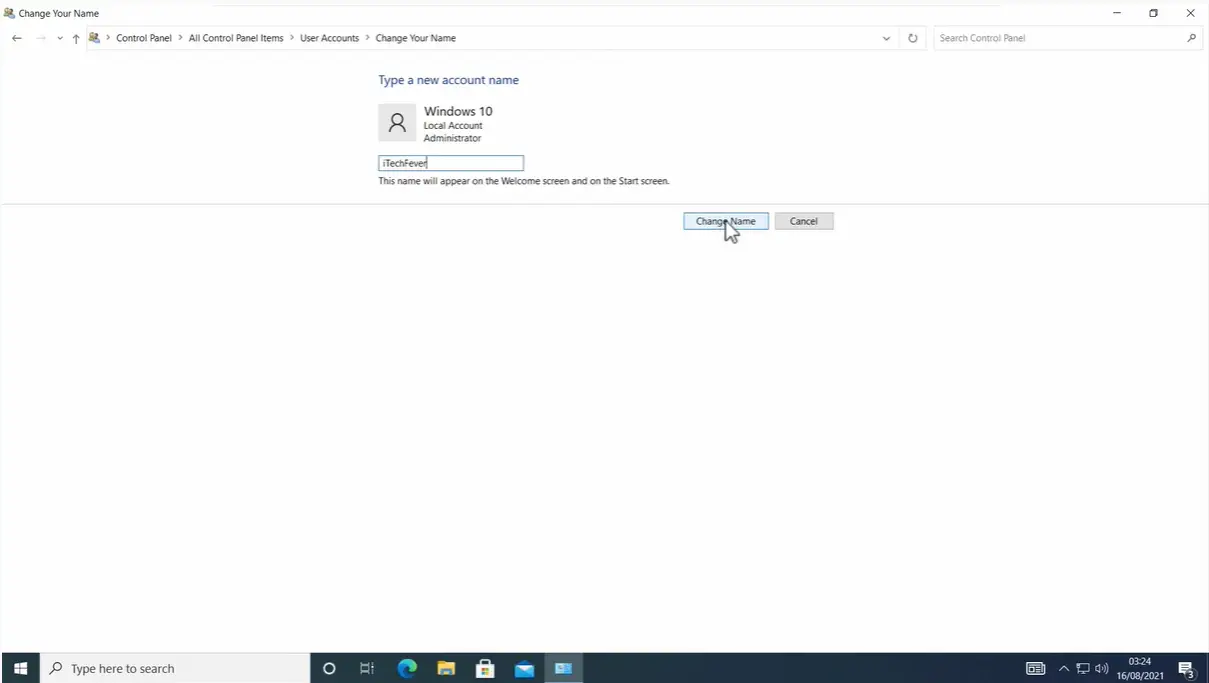
Step 5: Here type in the new user name and then click on Change Name.
That’s it! You see how easy it is to change the username on Windows 10.
Now all you have to do is sign out and then sign in again to the same account or restart your PC to make the changes effective.
In case you do not get the option to change your account name using the above method, follow the method below:
Method 2 – Change Name From User Accounts
If you have connected your Microsoft account to your Windows 10 user account, chances are you won’t get the option to change your user name in the above method. In that case, follow these steps:
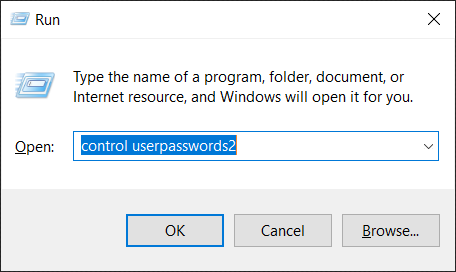
Step 1: Go to the Windows taskbar, type “Run” in the search bar, and hit enter. Alternatively, you can also press the “Windows+R” keys together to open the Run dialog box.
Step 2: In the Run dialog box, type “control userpasswords2” and hit enter.
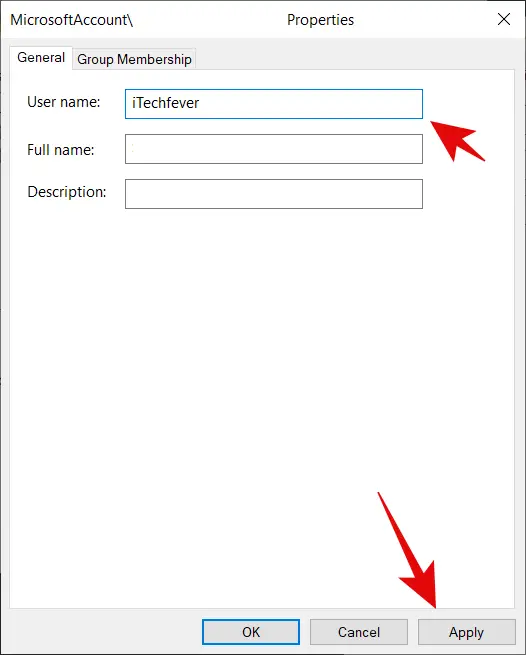
Step 3: Select the account you want to change the name for and then click on Properties.
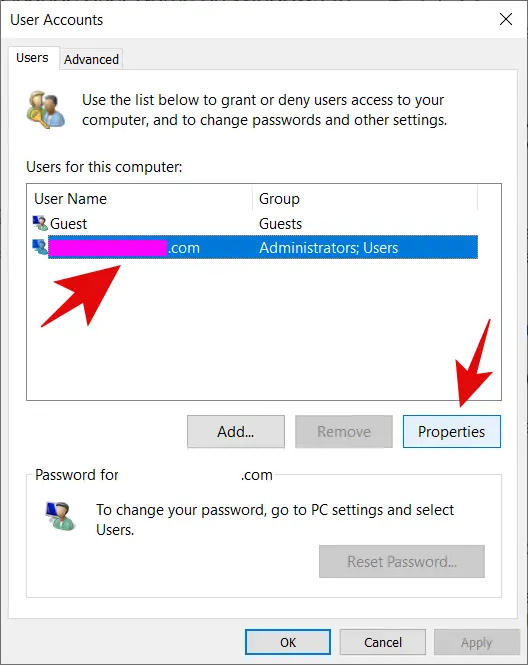
Step 4: Now you have to enter your new username in the Username and Full Name column.
Once you enter your new username, click on Apply and hit OK to save the changes. And that’s it!
The Catch
The above two methods are the simplest methods to change the user name on Windows 10. However, merely changing the user name won’t change the user account folder name. For that, there is a separate method and I will cover it in the next article.
Read – How to Change User Folder Name on Windows 10?
Closing Phrase
So this is how you can change the user name on Windows 10. The methods are simple and straightforward. If the Microsoft account is connected to Windows 10 then you can easily change it from settings as well.
Also, Read: