Many Windows users see a message reading “Some settings are managed by your organization” on various settings pages on Windows 10 or 11. If you see this message, you won’t be able to fully customize your PC. Considering that you are the PC’s owner, this is not a message you would want to see on your screen.
This guide will find some methods to fix the “Some settings are managed by your organization” error on Windows.
Now the fixes depend on where you are getting this error message and which version of Windows 10 you are using. Depending on the cases, there are different fixes. So you can find your case and apply that fix.
Fix “Some settings are managed by your organization” Error
The different versions of Windows 10 might have this error message on other setting pages; check where you are getting the error message and proceed accordingly.
Case 1: Windows 10 Pro, Error on the Update Page
If you are using Windows 10 Pro and see the “Some settings are managed by your organization” error on the Windows update page, here is what you have to do:
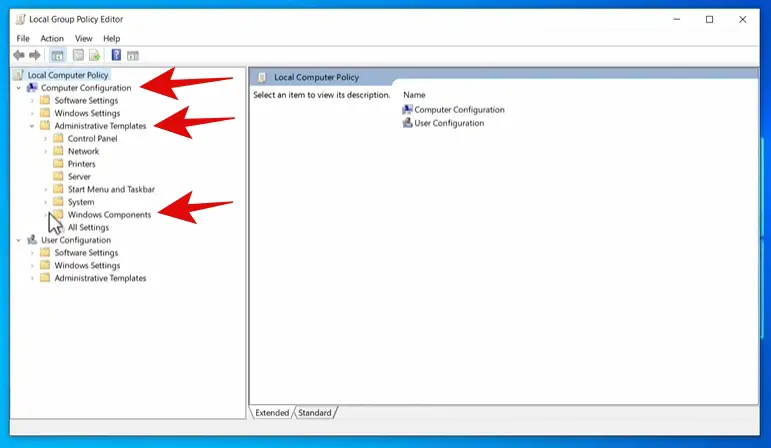
1: Go to the taskbar, type “gpedit” in the search bar, and hit enter.
2: Expand Computer Configuration and Administrative Templates from the menu on the left.
3: Now click on Windows Components to expand it. Scroll down and click on Windows Update.
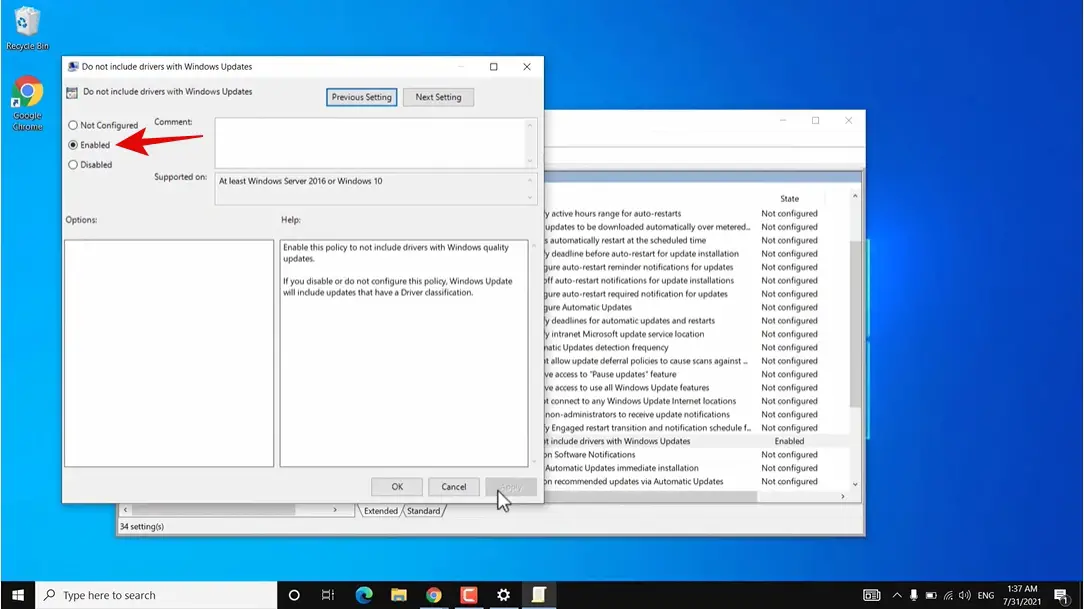
4: On the right side, navigate and click on Do not include drivers with Windows Updates. Now click on the Edit policy setting option.
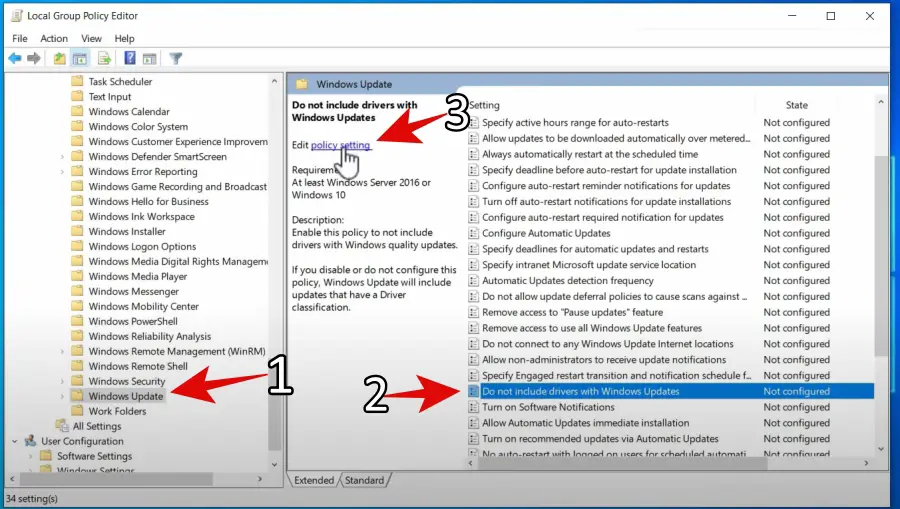
5: Click on Enabled and then Apply the setting and hit OK.
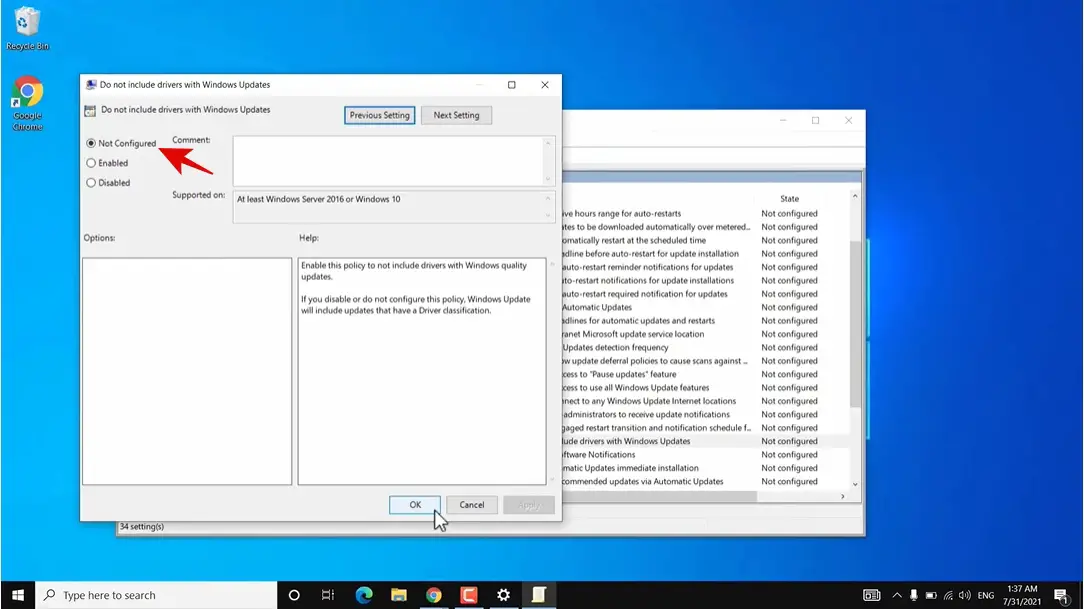
6: Now select the Do not include drivers with Windows Updates setting again and then click on the Edit policy setting option again.
7: This time, click on Not Configured, Apply the setting, and hit OK.
8: Repeat Steps 5-7 for the Configure Automatic Updates setting in Windows Update.
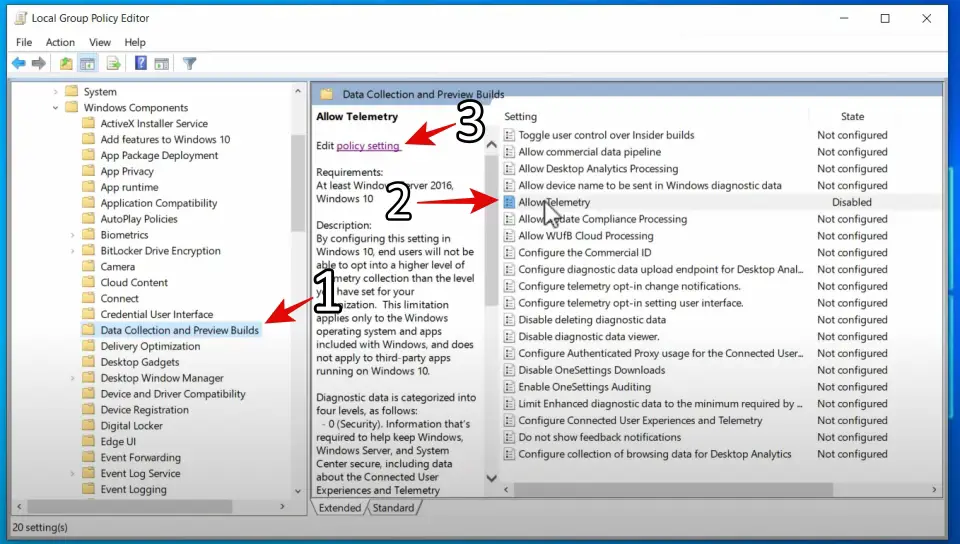
9: Now select Data Collection and Preview Builds from Windows Components.
10: Here, select and highlight the Allow Telemetry setting. Then click on the Edit policy setting option.
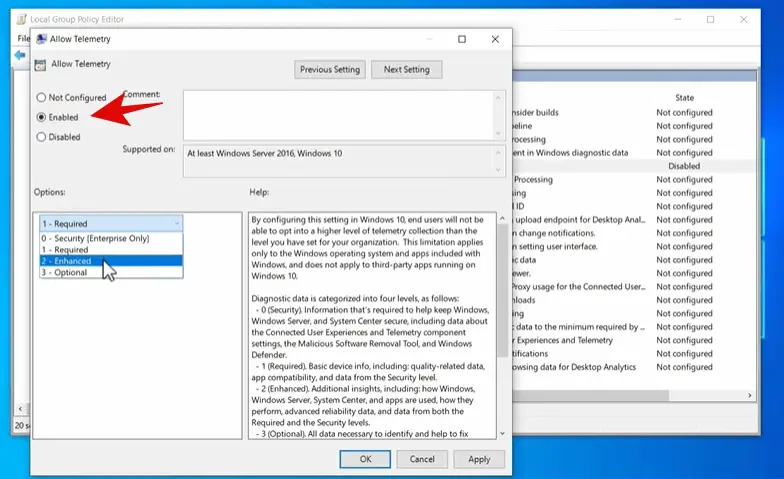
11: Select Enabled, and under the Options, select Enhanced from the drop-down menu.
12: Select the Allow Telemetry setting again and then click on the Edit policy setting option again.
13: This time, click on Not Configured, Apply the setting, and hit OK.
You have to enable and then set the settings to Not Configured.
Updating The Policy Using CMD
1: Go to the taskbar, type “cmd” in the search bar, and right-click to Run as administrator.
2: In the command prompt window, type the following command and hit enter:
gpupdate /force 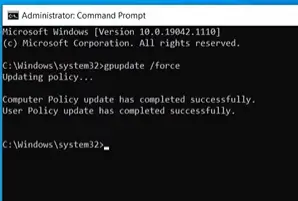
That’s it! This will update the group policy, and you will not see this error anymore.
Case 2: Any Windows 10 Home & Pro Settings Page
If you are getting the error message on Windows 10 Home or Pro on the Settings page, follow the steps below.
1: Go to the taskbar, type “services” in the search bar, and enter.
2: Scroll down and double-click on Background Intelligent Transfer Service.
3: If the service is not running, you must start it. Select the Startup type as Automatic from the drop-down menu and then click on Start. Apply the settings and hit OK.
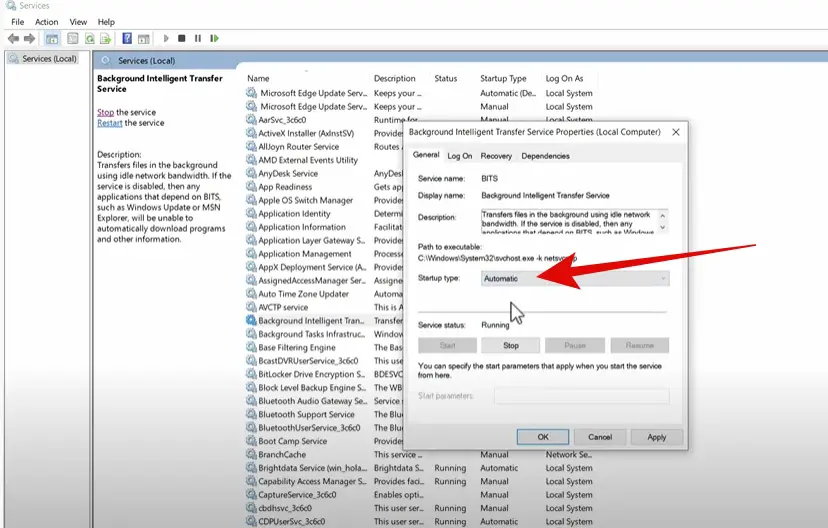
4: Find and double-click on Connected User Experiences and Telemetry service. If the service is disabled, you have to start it. Repeat Step 3 for it.
5: Go to the taskbar, type “Settings” in the search bar, and hit enter.
6: Click on Privacy.
7: Now go to Diagnostics & feedback from the left, and then you have to switch between the two top options on the right side under Diagnostic data.
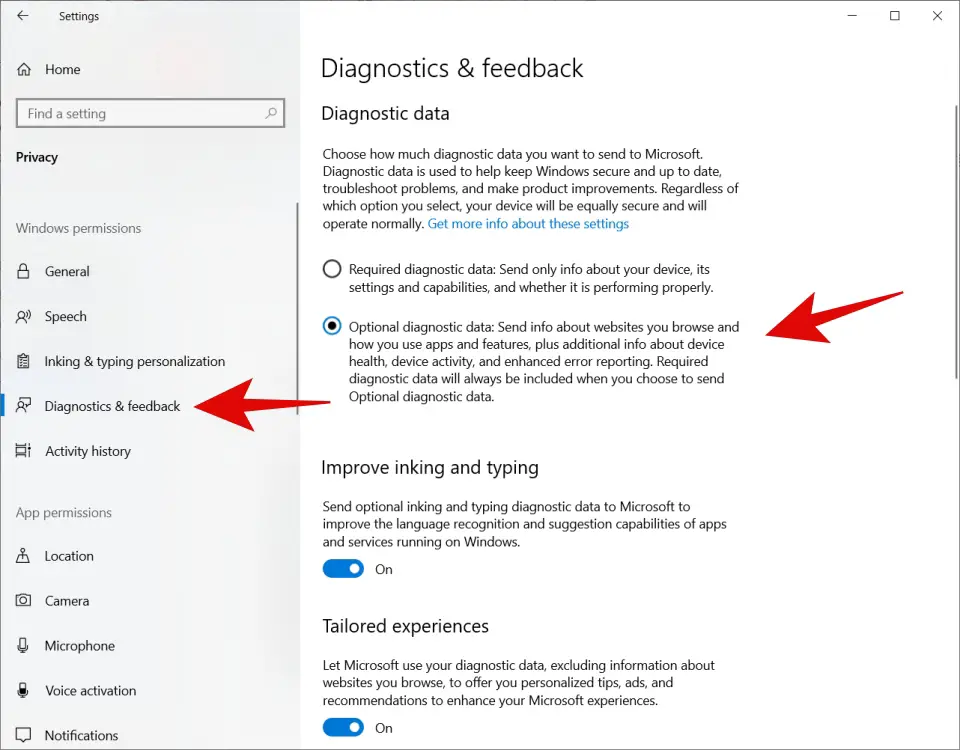
8: If you have selected the first option, you have to select the second option now and vice-versa.
That’s it! This will solve your PC’s “Some settings are managed by your organization” error.
Case 3: Windows 10 Pro, Error on Lock Screen Settings
If you are getting this error on the lock screen setting page, here is what you can do:
1: Go to the taskbar, type “gpedit” in the search bar, and hit enter.
2: Expand Computer Configuration and Administrative Templates from the menu on the left.
3: Further expand Control Panel and then Personalization.
4: Now select the Do not display the lock screen setting and click on the Edit policy setting option.
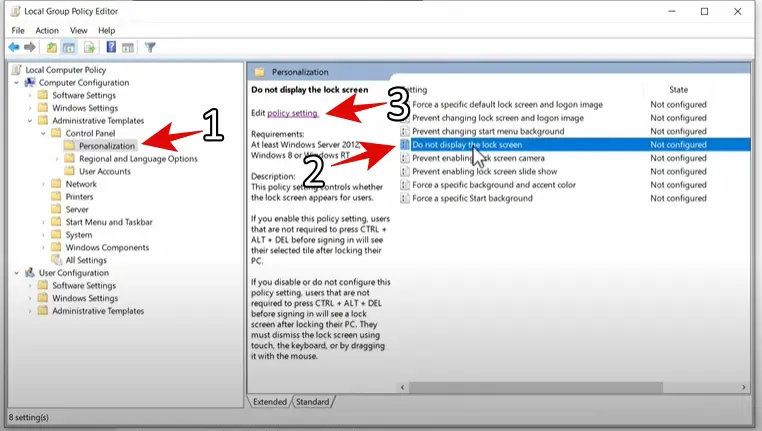
5: Click on Enabled and then Apply the setting and hit OK.
6: Now select the Do not display the lock screen setting again and then click on the Edit policy setting option again.
7: This time, click on Not Configured, Apply the setting, and hit OK.
Updating The Policy Using CMD
1: Go to the taskbar, type “cmd” in the search bar, and right-click to Run as administrator.
2: In the command prompt window, type the following command and hit enter:
gpupdate /force That’s it! This will update the group policy, and you will not see this error anymore.
Case 4: Windows 10 Home, Some Settings Are Managed By Your Organization Error on Update Page
Windows 10/11 Home editions don’t have a Group Policy editor interface, but you can still change the settings using the registry editor. Follow the below steps if you are using Home Edition.
Tip: You can enable Group Policy Editor on Windows 10 Home with some workaround.
1: Go to the taskbar, type “regedit” in the search bar, and hit enter.
2: Go to the following path:
HKEY_LOCAL_MACHINE\SOFTWARE\Policies\Microsoft\Windows
3: Scroll down; if you find the WindowsUpdate registry key, it is good. Otherwise you have to create it.
4: Select Windows registry, right-click on it and then click on New>Key.
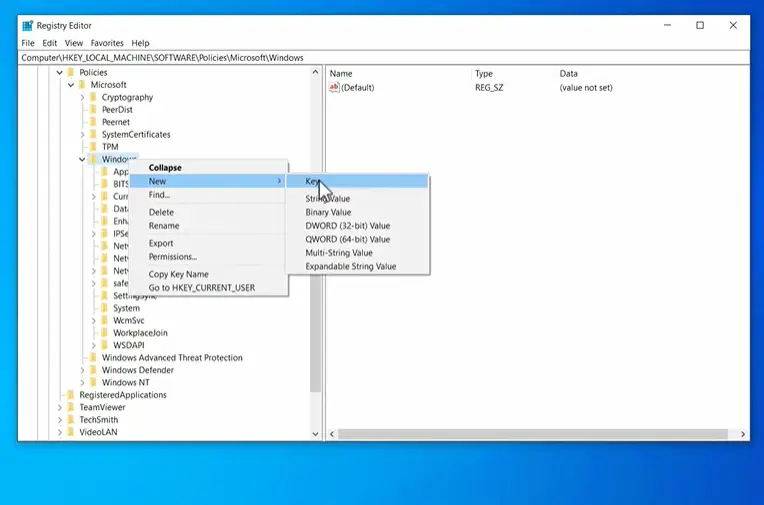
5: Name this key “WindowsUpdate” and click outside it.
6: Select this WindowsUpdate key, right-click, and then click on New>Key.
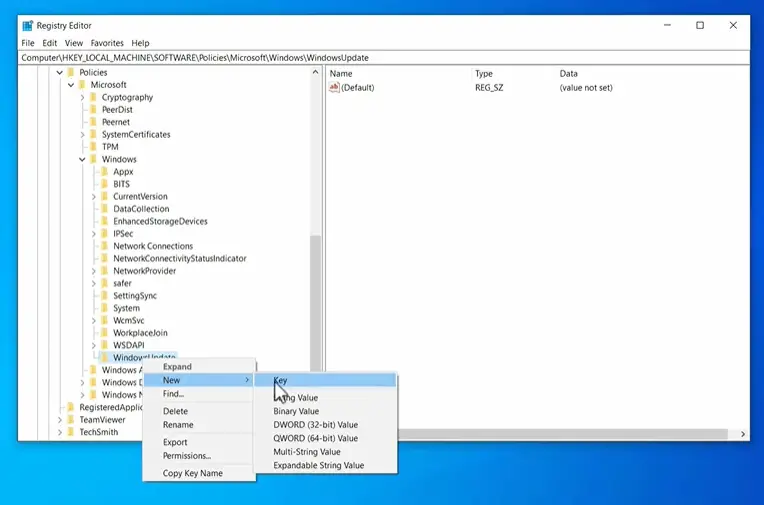
7: Name it “AU” and click outside it.
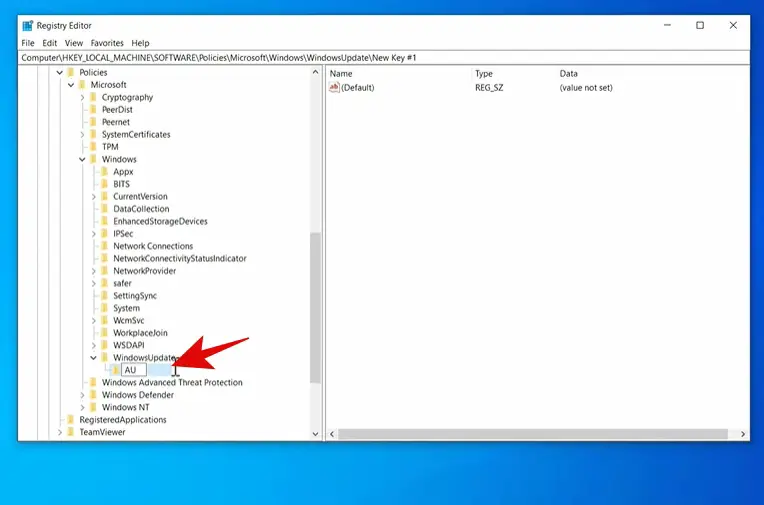
You will see the AU key in the Windows registry if you already have it.
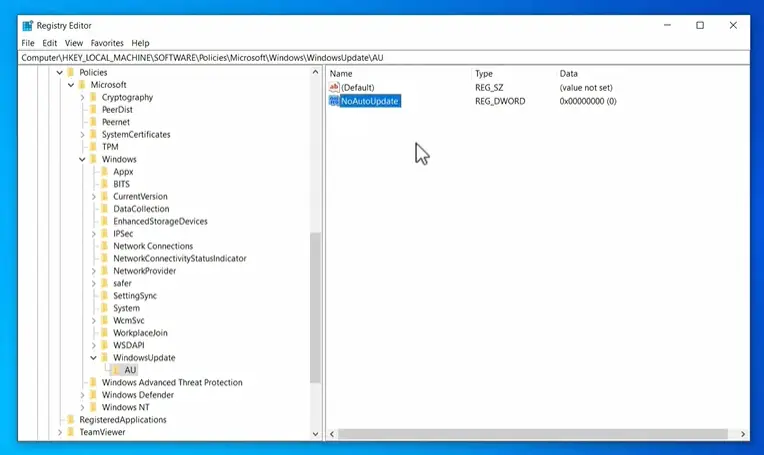
8: Select the AU registry and then right-click on the space on the right menu, and then click on New > DWORD(32-bit) Value.
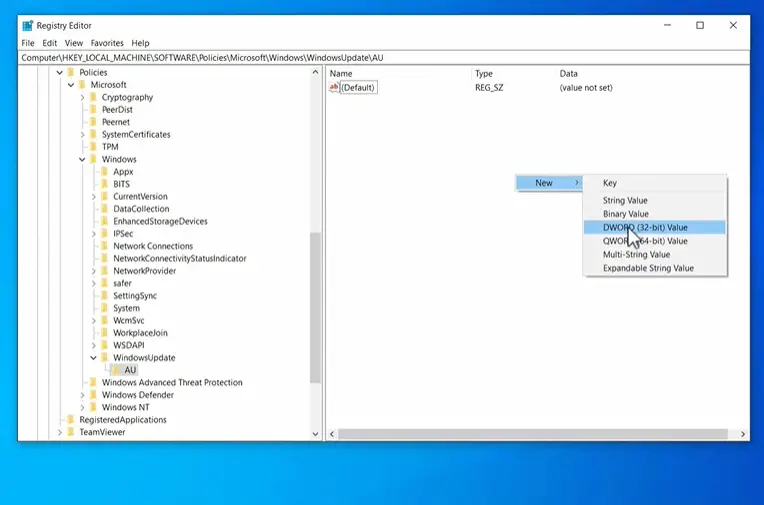
9: Name it “NoAutoUpdate” and click outside it.
10: Again, right-click in the space, and click on New > DWORD(32-bit) Value.
11: Name it “AUOptions” and click outside it.
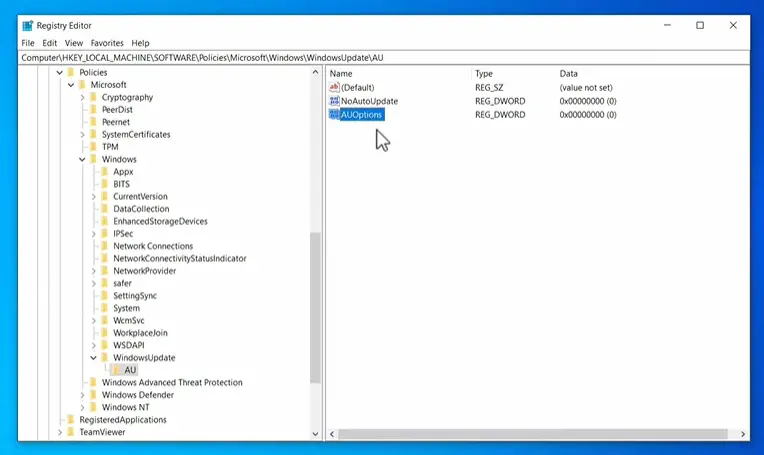
12: Double click on the AUOptions registry key and then set the Value data accordingly.
The Value data depends on how you want to configure the automatic updates. Here is what value data will configure which setting:
| Value Data | Setting |
| 2 | Notify for download and auto-install |
| 3 | Auto download and notify for installation |
| 4 | Auto download and schedule the install |
| 5 | Allow local admin to choose the settings |
You can select any value per your choice, but the best option is 2. So I recommend that you choose 2 as Value data and click on OK.

This will fix the “Some settings are managed by your organization” error on your PC.
Case 5: Windows 10 Home, Error on Lock Screen Settings
1: Go to the taskbar, type “regedit” in the search bar, and hit enter.
2: Navigate to the following path:
HKEY_LOCAL_MACHINE\SOFTWARE\Policies\\Microsoft\Windows\Personalization
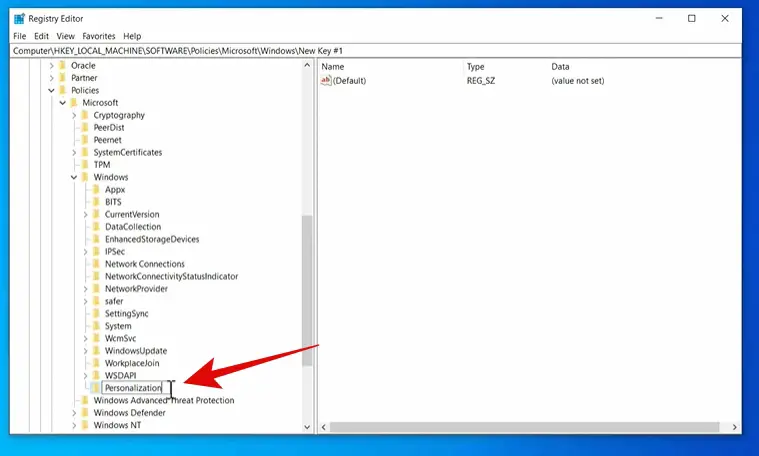
3: If you do not see the Personalization registry key, you can create it.
4: Select Windows registry, right-click on it and then click on New >Key.
5: Name this key “Personalization” and click outside it.
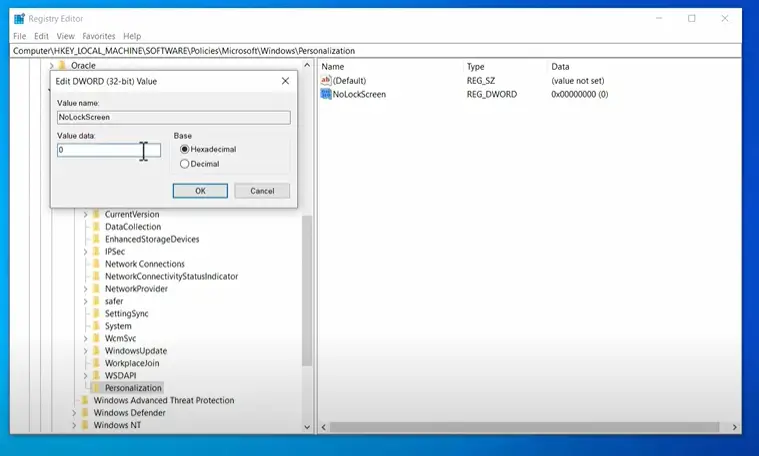
6: Select the Personalization registry, right-click on the space on the right menu, and click on New > DWORD(32-bit) Value.
7: Name it “NoLockScreen” and click outside it.
8: Double-click on the NoLockScreen registry key, set the Value data to 0 and hit OK.
That’s it! This will solve the “Some settings are managed by your organization” error on Windows 10 or 11.
Verdict
You might get the “Some settings are managed by your organization” error on Windows 10 or 11 on different setting pages. You can fix the issue by editing specific values using the Group Policy editor in Windows 10 Pro.
If you are on Windows Home edition, you must change the settings using the registry editor. Do note that changing the wrong registry keys might face issues, so follow all the steps carefully.
Also, Read: