This is another common WiFi issue with Windows 10 that sometimes it says Can’t connect to this network when you try to join a WiFi network. It may happen with a particular network or all the wireless networks.
In some cases, the issue may occur when you try to join a smartphone hotspot.
Reasons why you are unable to connect to WiFi networks-
- A third-party firewall blocking the network.
- Incorrect WiFi password.
- Different types of malware.
- Corrupt network driver.
- Incorrect IP & DNS address.
- Unwanted proxy servers.
- Disabled WiFi services.
- Windows updates.
Fix Can’t Connect To This Network Error In Windows 10
As mentioned there may be different reasons behind the WiFi connection problem, so you have to try these fixes one by one. Any of these methods may work for your Windows 10.
1. Forget The WiFi Network
Did you change the WiFi password from the router? Or the security type? Then this is the first thing you need to check.
1. Click on the WiFi icon on the right-bottom corner.
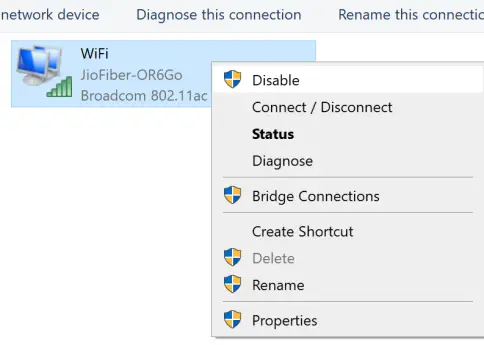
2. Open the WiFi networks and right-click on the WiFi Name (SSID) you are trying to connect.
3. Click on Forget.
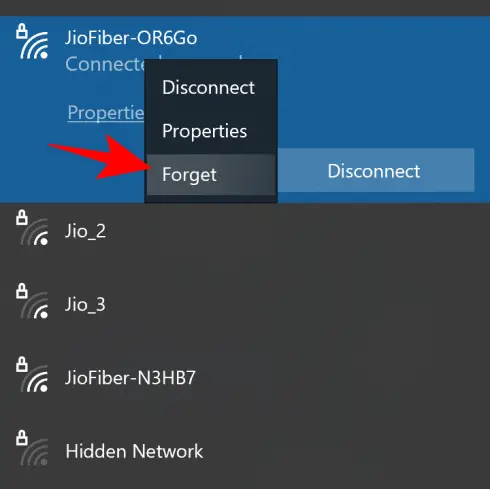
This will remove the saved password and security type from your PC and you have to enter the WiFi password again. Now check if you are able to connect or not.
If not follow the next method.
2. Check IP & DNS Settings
An incorrect IP or DNS setting may prevent you from connecting to a particular network. Generally, WiFi networks obtain the IP and DNS settings automatically but if you have changed the settings or any malware has affected these settings then reset it back to automatic.
Follow these steps-
1. Go to Start > Settings and open Network & Internet.
2. Click Change Adapter Options.
3. You will see WiFi Adapter, right-click on it and go to Properties.
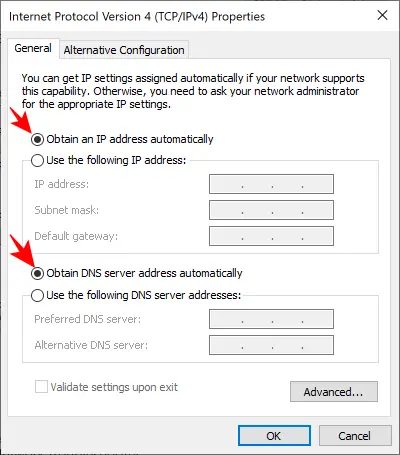
4. Double click on Internet Protocol Version 4 (TCP/IPv4).
5. Check, if there is any manual IP & DNS value present.
6. Remove the values and select Obtain an IP Address Automatically and Obtain DNS server address automatically.
7. Click on OK on every dialog box.
Enable & Disable WiFi Adapter
Open the WiFi adapter (Follow above steps 1-3).
Right-click on it and click Disable.
Again right-click and select Enable.
Now, check if you can connect to the desired network or not.
3. Network Reset To Fix Can’t Connect to Network Issue
Windows 10 creates a network profile for every network you connect. For any reason, if these network profiles get corrupt then you won’t be able to join any network.
You can reset all network profiles, which will delete all the saved settings for every network ever connected to the PC. If you have connected to a network months ago then you will lose the saved passwords as well.
But you can export all the WiFi passwords to XML files that will help to find the passwords.
1. Go to Start and open Settings.
2. Select Open Network & Internet.
3. Go to the bottom of opened Window and find Network Reset and click on it.
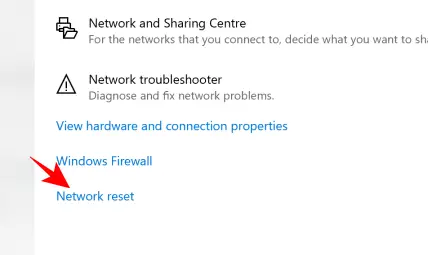
4. Select “Reset Now” then click Yes on the confirmation box.
It will reset all network settings on Windows 10 and restart itself.
After the restart, try to connect with the WiFi network.
4. Fix Socket API Errors, IP Reset & Flush DNS
There may be some problem with Windows Socket API, that you can reset to fix any such problems. Apart from resetting WinSock, you can also reset the IP logs and clear the DNS cache as well.
Reset Winsock
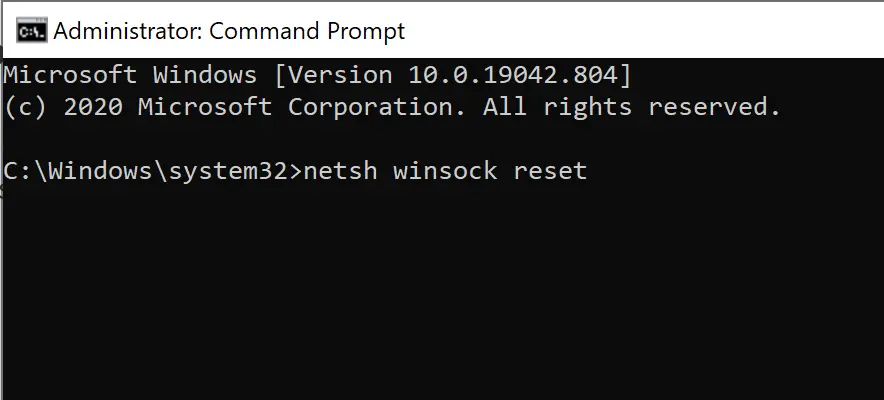
1. Open cmd (command prompt) as admin.
2. Type netsh winsock reset and hit enter on the keyboard.
Reset IP logs
1. Make sure you have opened an elevated command prompt.
2. Type netsh int ip reset then hit enter.
3. You can instruct IP logs to reset directly by typing netsh int ip reset resetlog.txt OR netsh int ipv4 reset resetlog.txt and hit enter.
Clear DNS Cache
Type netsh /flushdns on cmd and hit enter. It will clear the DNS cache for the networks you are trying to connect.
5. Update / Reinstall Network Driver
If the above methods do not help then you can try to update or reinstall the network driver from a list of the available drivers on your PC. These are the different versions of network drivers saved on your Windows 10.
1. Go to Start and search for Device Manager and open it.
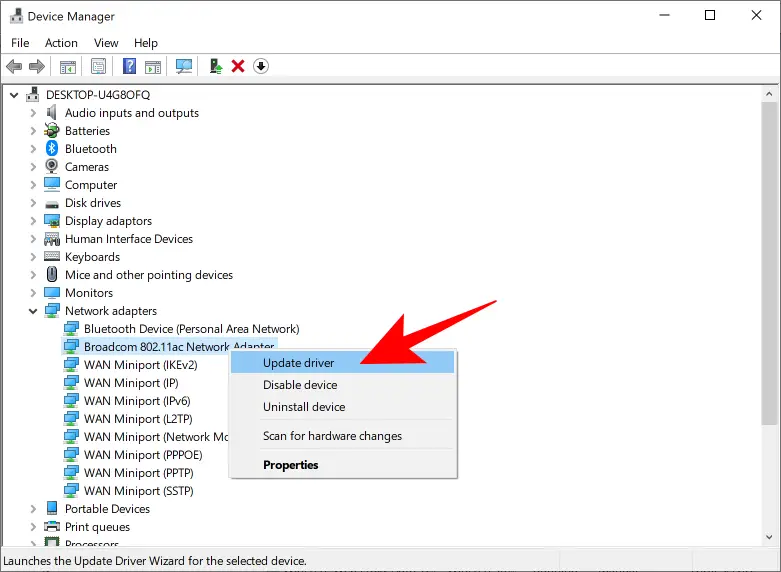
2. Expand the Network Adapters option and look for your WiFi driver. It may be Broadcom, Atheros, Realtek, or any other driver, look for 802.11ac network adapter.
3. Right-click on the wifi adapter and click on Update. Then click on “Browse my computer for drivers”.
4. Select “Let me pick from a list of available drivers on my computer“.
5. Choose the driver to the date when your WiFi was working, or just select the older version of the driver.
6. Click Next to install the driver.
Restart!
You can try different versions of the driver if the selected one doesn’t work.
If updating the driver doesn’t work then uninstall the driver.
1. Right-click on Network Adapter and click Uninstall.
2. Restart the PC and Windows will automatically install it again.
After these steps, you shouldn’t see can’t connect to this network error anymore and you would be able to link with different wifi networks.
6. Run Network Troubleshooter
If you are really unlucky then the above 5 methods may not work in some cases then you can try to run the network troubleshooter.
Now, Windows has advanced troubleshooting options that were hardly worked in the earlier version of Windows. You can take advantage of it.
1. Go to Start and open Network & Internet.
2. Find and click on the “Network Troubleshooter” option.
It will try to find the issue with your PC/Network and provide you an option to fix the problem. You just have to click on Apply Fix, once the process is done restart the PC.
Some Additional Things to Check
1. If you have any third-party firewall enabled then try to disable it. Like Mcafee, Norton firewalls.
2. Try turning off your antivirus.
3. Check for the proxy servers, if there is any proxy server enabled then select Automatically detect settings, from the Internet Options.
4. Search for “Services” and make sure all the network-related services are running like WLAN Autoconfig, WWAN Autoconfig, and other network services.
Issue With Mobile Hotspot
If you are using a hotspot created on your smartphone then before following the above methods try to change the Name and Password of your WiFi hotspot.
Final Words
You may run into this problem anytime due to different reasons, you may not find the specific reason why you can’t connect to a WiFi network. Follow the given methods in order to fix this issue, any of these methods may work for you.
Also Read:-