Windows 11 has to be one of the best versions of Windows so far. From its UI to its new features, everything is simply awesome. But it comes with a lot of bloatware that you might never use. The thing is, these bloatware apps use unnecessary system resources that will make Windows 11 slow, so you can debloat your Windows 11 to unlock the maximum performance on your PC.
In this guide, I will be showing you some easy methods by which you can seamlessly debloat your Windows 11 and make it faster. So follow all the steps carefully.
Creating a System Restore Point
Before we uninstall any default apps or change some settings, it is always a good idea to create a system restore point especially if you are on your primary PC. A system restore point helps you to revert back to a version where everything was normal and working fine.
Here is how you can do it:
Step 1: Open the Run dialog box by pressing Windows+R keys together.
Step 2: Now type “sysdm.cpl” and hit enter.
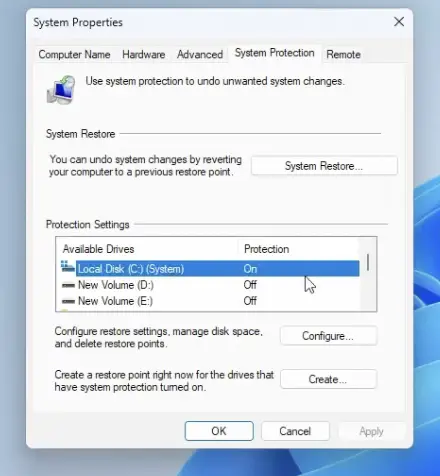
Step 3: Head to the System Protection tab.
Step 4: Under Protection Settings, make sure that Protection is turned On for the C: drive or the system drive.
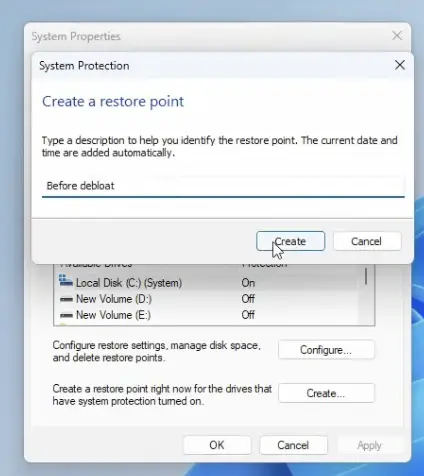
Step 5: Now click on Create.
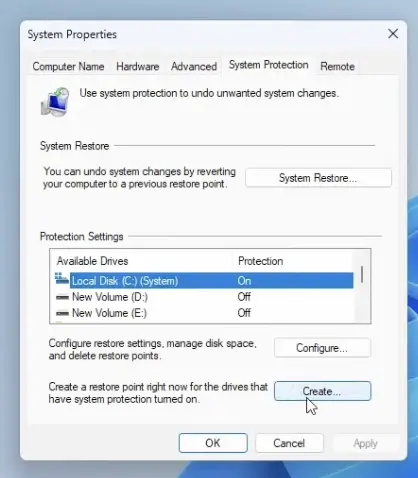
Step 6: In the new window, give your system restore point a name.
Step 7: Then click on Create.
Wait for a while as this process can take a few minutes. Once the system restore point is created successfully, you are all good to debloat your Windows 11.
How To Fully Debloat Windows 11
To debloat Windows 11, we will be using a debloater tool from GitHub and although it is for Windows 10, the tool works just fine on Windows 11 as well.
Just make sure that you know how you are going to use your Windows 11 and if you are going to uninstall all the bloatware, make sure that you do it at the very beginning.
To install the tool, we will be using PowerShell, and here are all the steps you need to follow:
Stage 1: Installing the Debloater
Step 1: In the search bar, type “PowerShell”, right-click on it to Run as administrator.
Step 2: Type the following command and hit enter:
Set-ExecutionPolicy Unrestricted -Force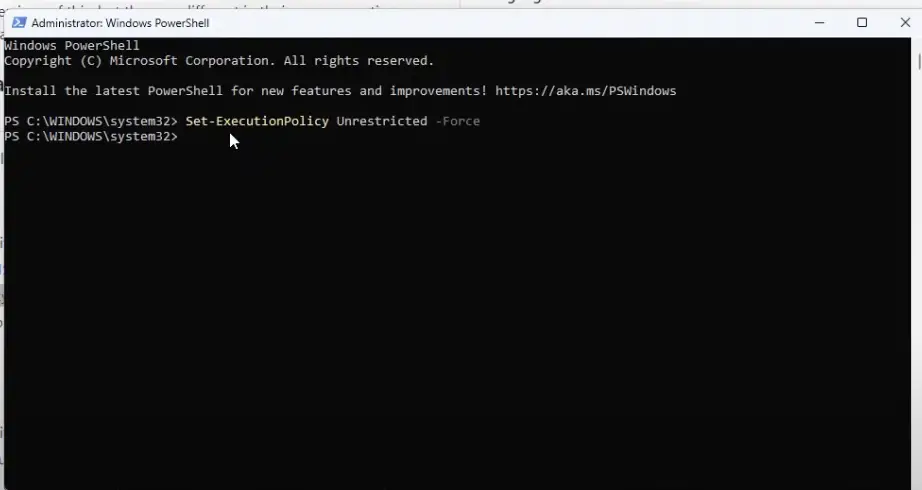
Step 3: Once this is done, you have to paste the following command in PowerShell and hit enter:
iwr -useb https://git.io/debloat|iex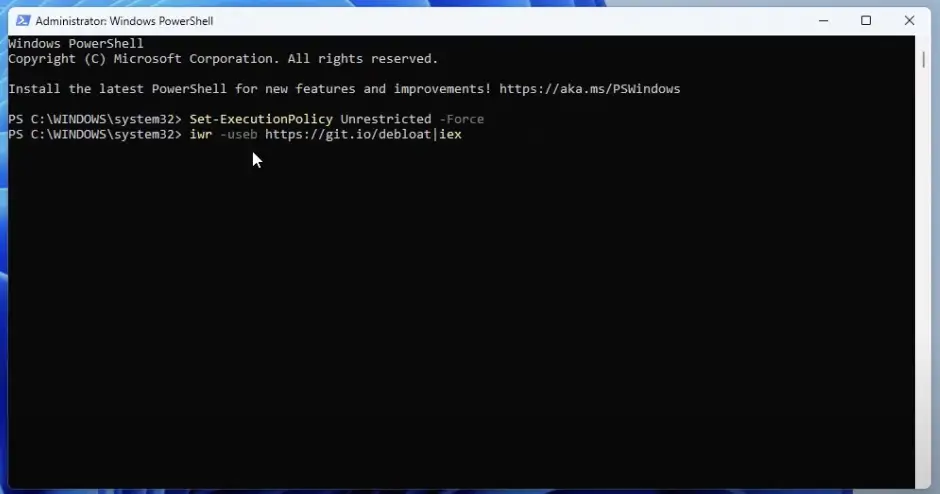
This command will download and install the Windows 11 debloater on your PC, just give it a little time to download and install.
Once the process is complete, you will see the UI of the debloater on your screen.
Stage 2: Uninstalling All Bloatware
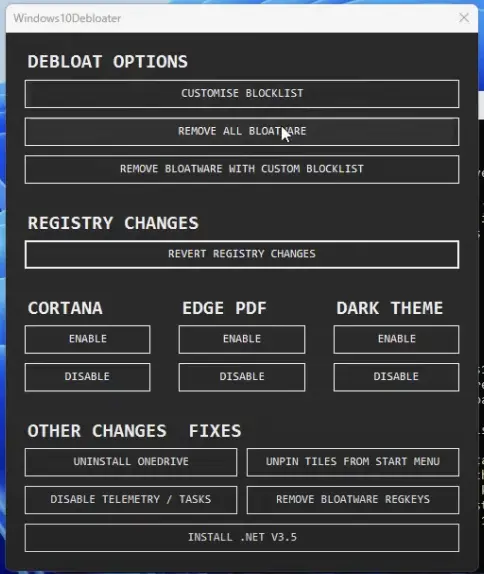
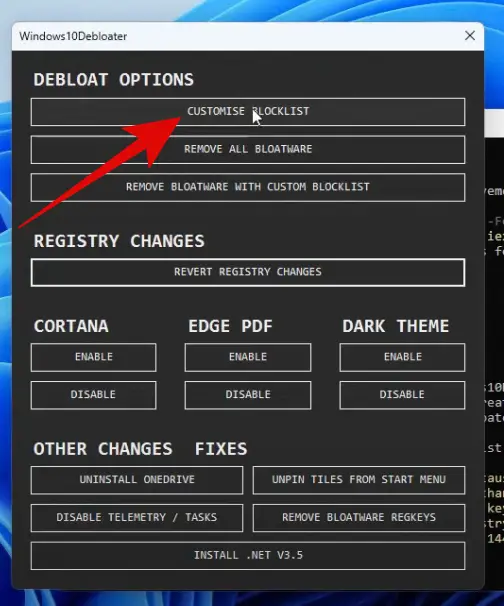
Once the debloater tool opens, you will see all sorts of options to customize your Windows. Here, we have to customize the blocklist so that we do not uninstall necessary apps like OneDrive because the documents and pictures are directly linked to OneDrive on Windows 11. So here is how you can use the tool:
Step 1: Click on CUSTOMISE BLOCKLIST.
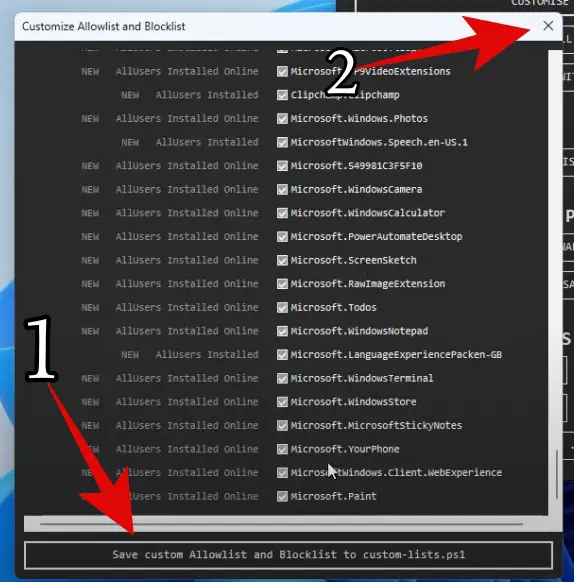
Step 2: You will see the list of all the bloatware on your Windows 11. Some of them might be selected by default and some might not.
Remember that the check options here will get uninstalled. So you can scroll through the entire list and select the bloatware you want to uninstall. Make sure to uncheck OneDrive so that it doesn’t uninstall.
Step 3: Once you have selected all the bloatware you want to remove, click on Save at the bottom and close this option.
Step 4: Now click on REMOVE BLOATWARE WITH CUSTOM BLOCKLIST.
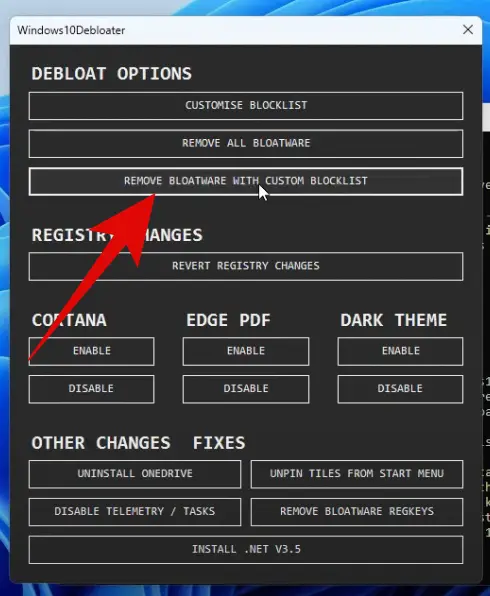
This might take a while as the tool will uninstall all the bloatware. Ideally, it should take about 20-30 minutes to remove the bloatware.
Furthermore
Once the process of uninstalling all the bloatware is finished, you can also use the debloater tool to optimize your Windows 11 even further.
If you don’t use Cortana, you can disable it using the tool and you can also click on DISABLE TELEMETRY/TASKS. This option will disable all the tracking and data collection services from Microsoft.
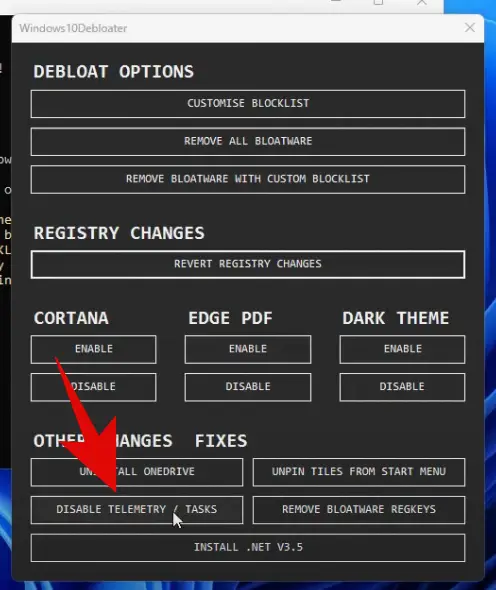
Other than that, we do not recommend you to uninstall or disable any other options as they might be crucial for the overall Windows experience.
Closing Phrase
So that was all about how to debloat your Windows 11 to unlock maximum performance. The process is simple and all you have to do is install the debloater tool to do the entire process. Just make sure to create a system restore point before doing so and make sure that you uncheck all the apps from the custom block list that you are going to use. We hope this guide helps you to optimize your Windows. In case of any difficulty, feel free to reach out to us.
Read More About
Debloat Windows 11 FAQs
Yes, you can debloat Windows 11 by uninstalling all the unnecessary apps. It will free the system resources for other important apps and services.
Yes, it is safe to debloat Windows 11. Although, make sure to keep the important apps like OneDrive, MS Paint, and other apps that you will use. To be on the safer side create a system restore point.
Yes, the debloater tool is completely safe to use, it does not remove any important apps or Windows services. If you face any issue you can always restore your PC to an earlier date.