If you are using Windows 11 for a while now then you must have noticed the new context menu on Windows 11. Don’t get me wrong, the new context menu is great as it has some easy options to copy, paste, delete, etc. But what if you want to get the old right-click menu back on your Windows 11?
As of now, you have to make one extra step to bring the classic context menu on Windows 11. Users have to either press Shift+f10 or click on Show more options to see the classic context menu on Windows 11.
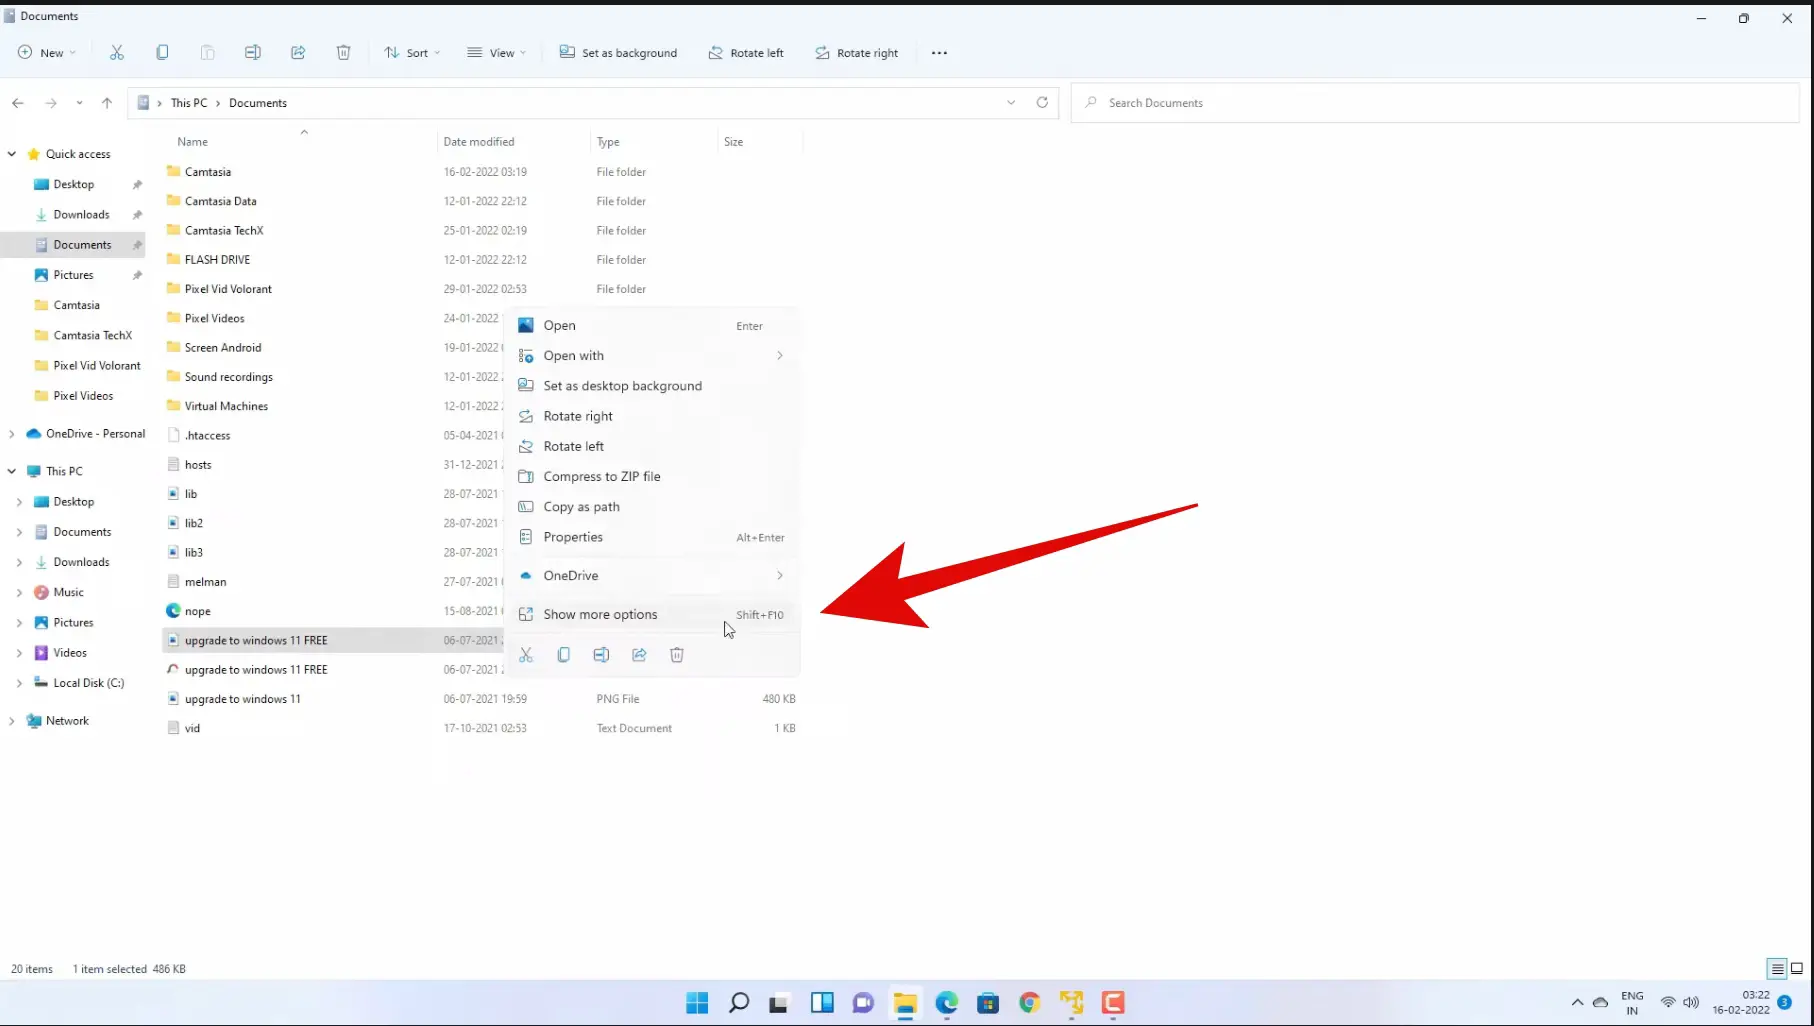
In case you want to bring Windows 10 right-click menu to Windows 11 then this guide is for you.
Get Back the Windows 10 Right Click Menu on Windows 11
As we have mentioned in one of our articles how you can move the taskbar on the left, right, or the top of the screen using the registry editor, you can get back the full right-click menu on Windows 11 using registry editor as well.
1. Using the Registry Editor
To get the old right-click menu on your Windows 11, you will have to follow these steps:
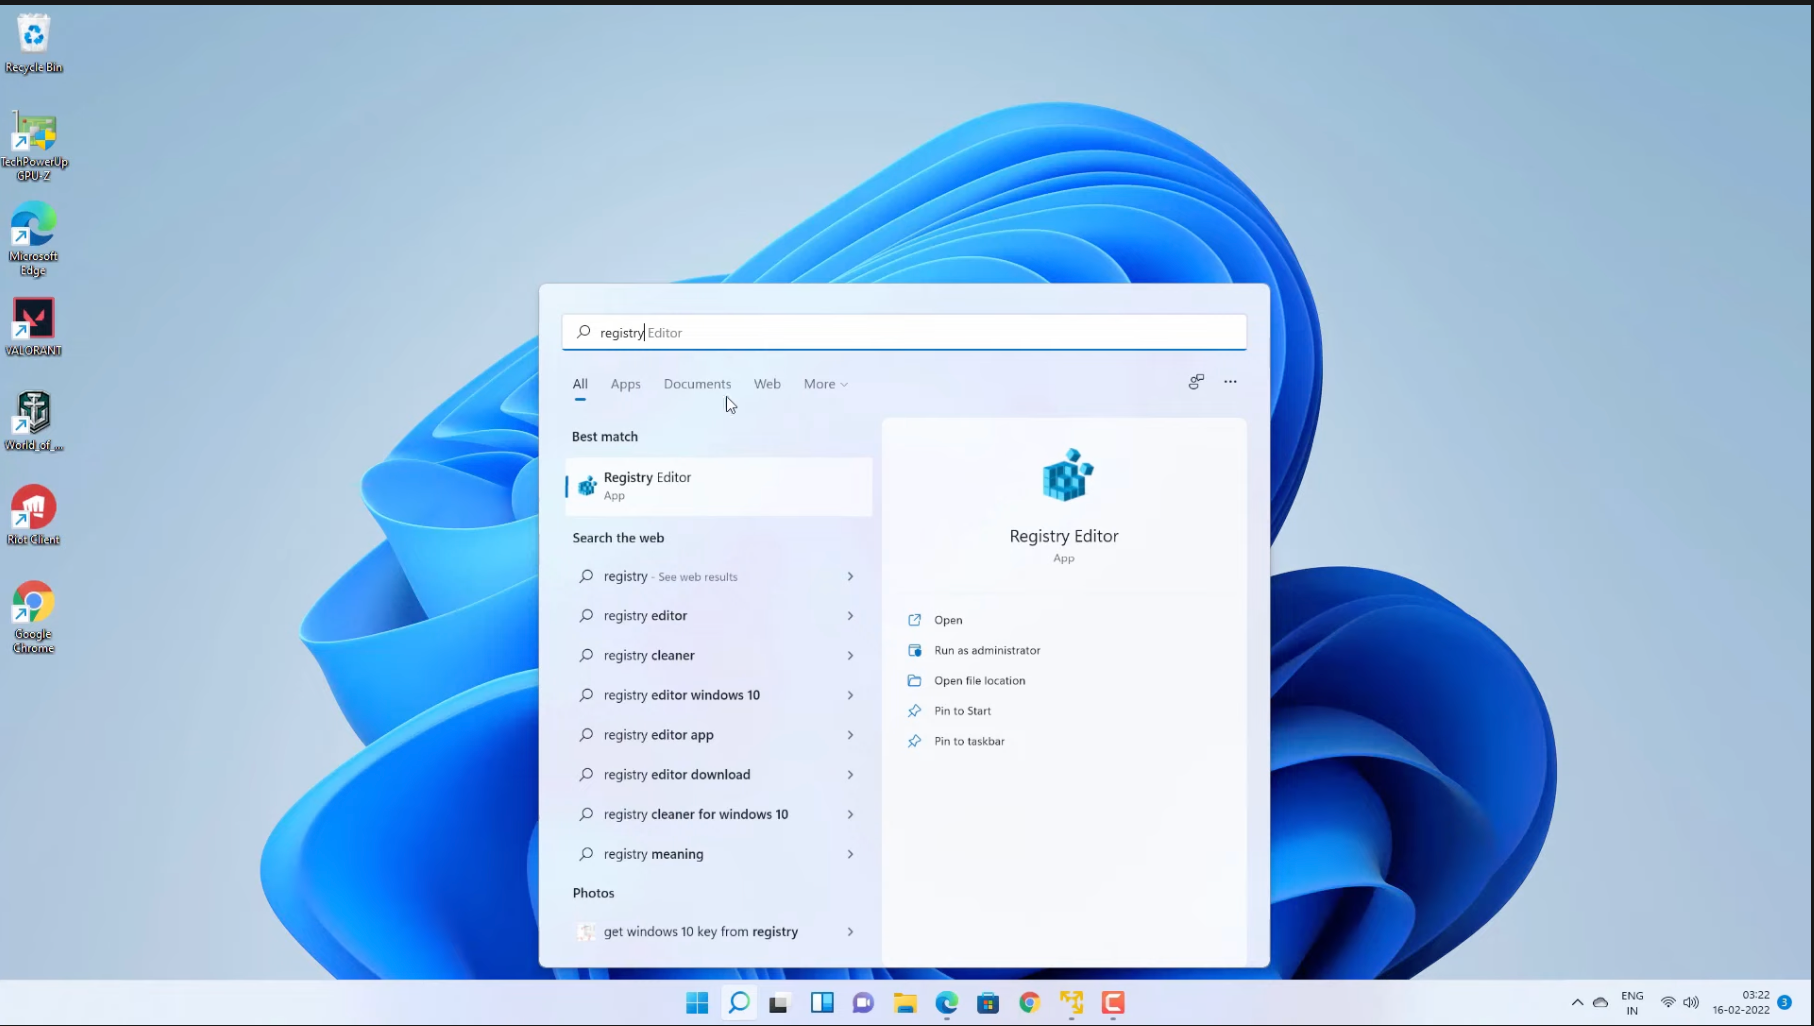
1: Click on the Search icon on the Taskbar, type “registry editor” and hit Enter.
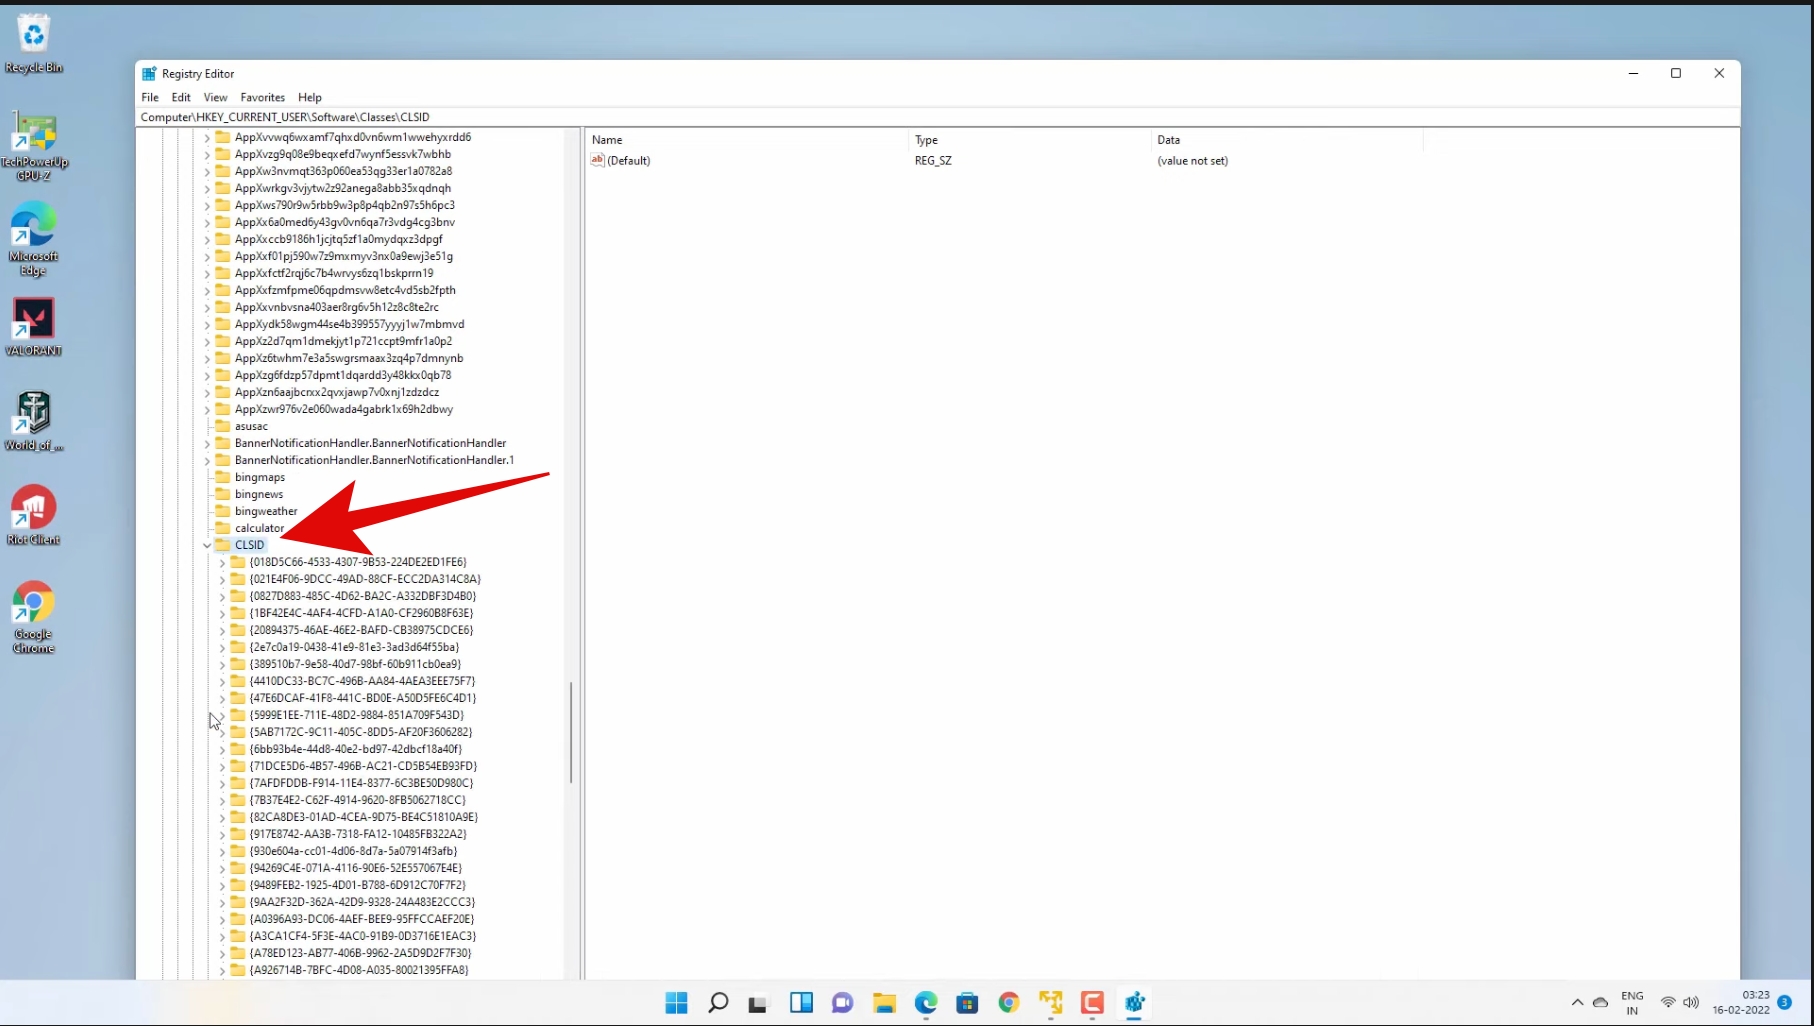
2: Open the registry editor and navigate to the following path using the drop-down arrow, by expanding the registry keys.
Computer\HKEY_CURRENT_USER\Software\Classes\CLSID3: Simply highlight the CLSID registry key.
4: Right-click on it then click on New and then click on Key.
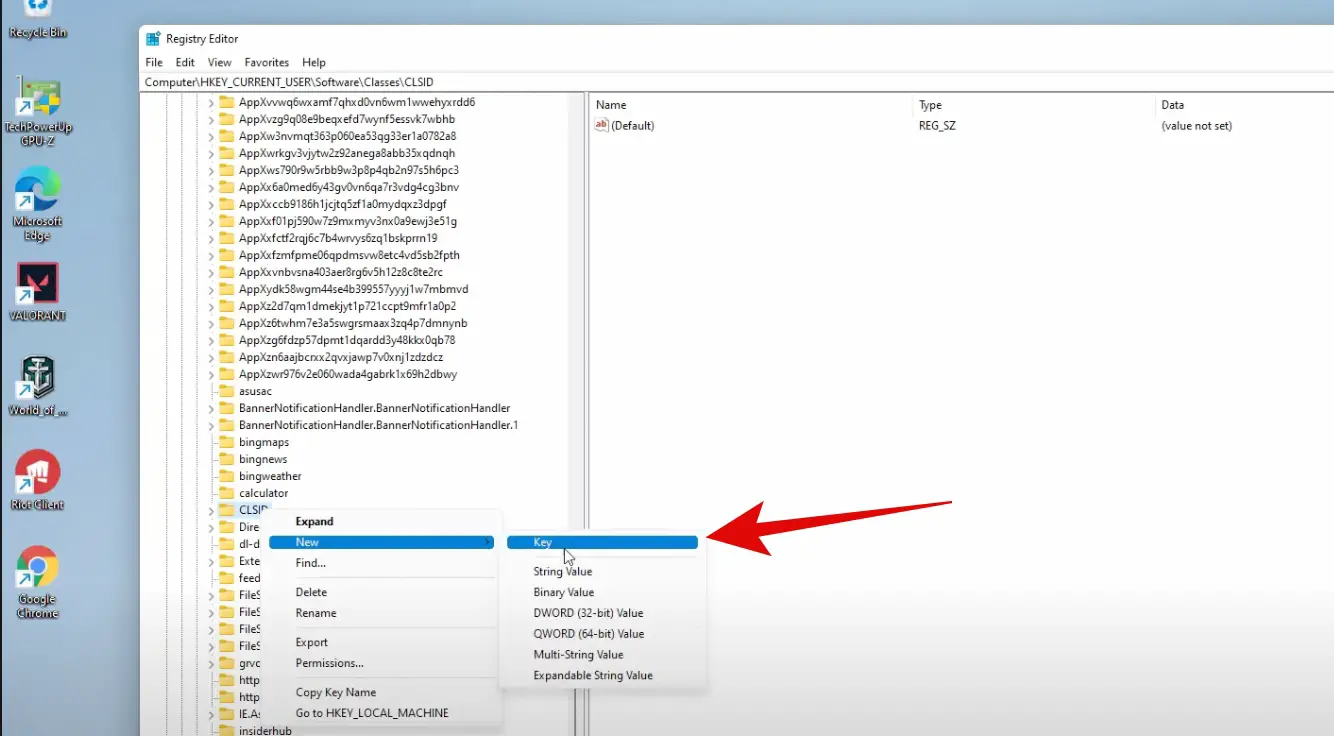
5: Scroll down and you will find a new registry key with the name New Key #1.
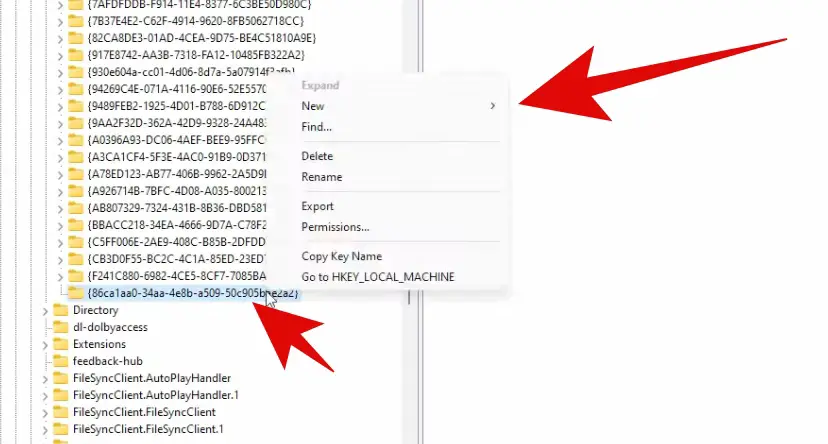
6: Right-click on it and then click on Rename and name this key as:
{86ca1aa0-34aa-4e8b-a509-50c905bae2a2}7: Once you rename the key, right-click on it, click on New and then click on Key again.
8: Name this new key as:
InprocServer32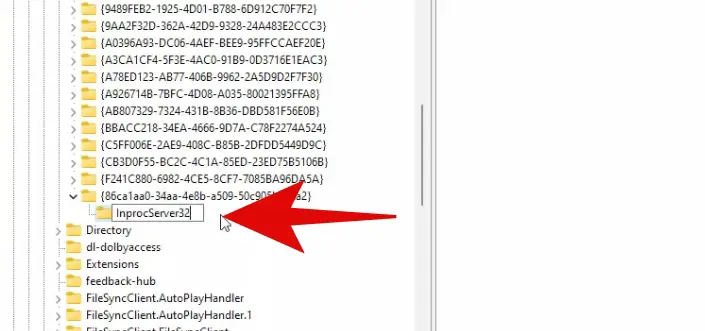
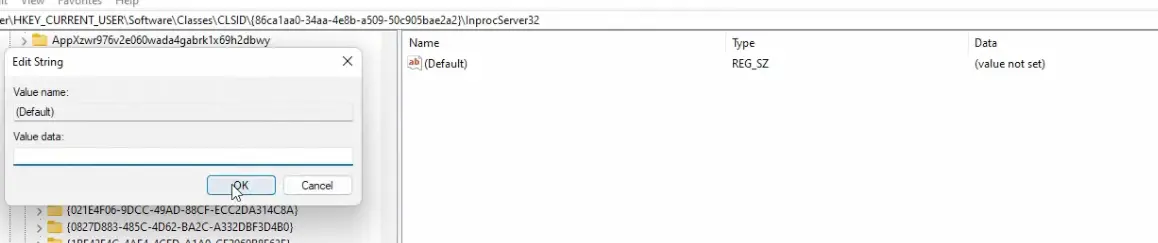
9: Once you successfully rename the key, click on the key to highlight it.
10: Now look at the menu on the right side, under Name, you will see Default with Data as Value not set.
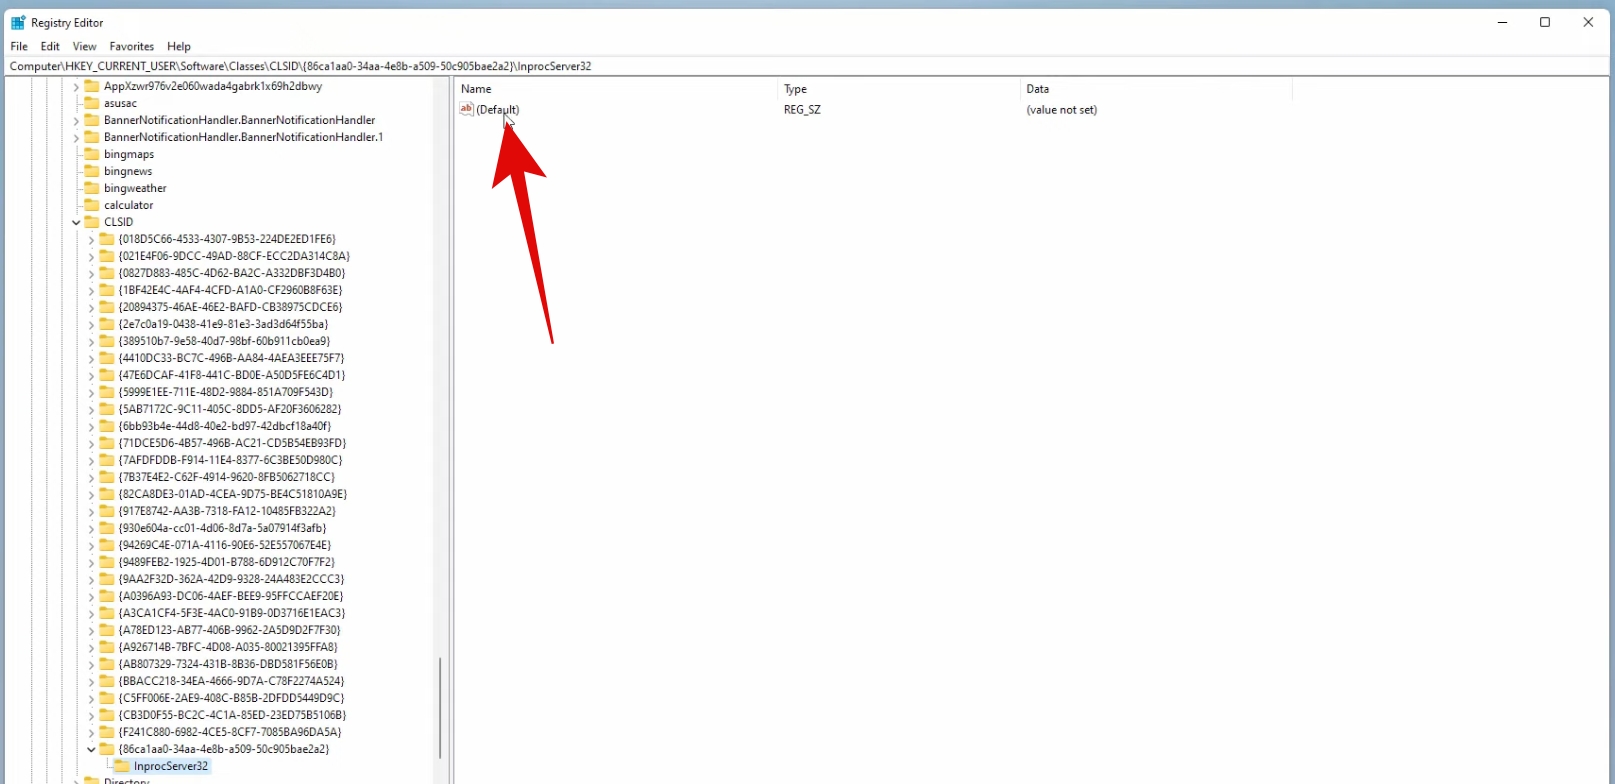
11: Double-click to open the Default key, leave the Value data blank and click on OK.
That’s it! Now all you have to do is restart your PC again and this will bring back the Windows 10 right-click menu to Windows 11.
2. Get Back Old Right Click Menu Using Command Prompt (cmd)
You can create the same registry keys and set the value data using the cmd as well. If you are uncomfortable with the registry editor then you can do the same thing using cmd.
1: Click on the Search icon on the Taskbar, type “CMD”, right-click to Run as administrator.
2: Once the command prompt window opens, paste the following command and hit enter:
reg.exe add "HKCU\Software\Classes\CLSID\{86ca1aa0-34aa-4e8b-a509-50c905bae2a2}\InprocServer32" /f /ve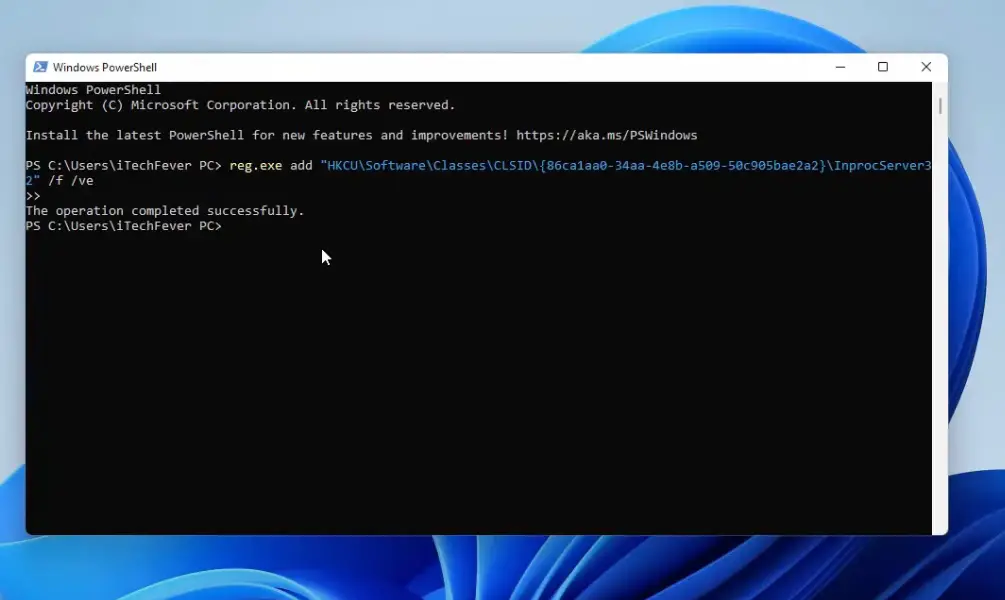
Now you just have to restart your PC to bring back the classic context menu on Windows 11.
How to Revert the Changes
In case you want the new Windows 11 context menu back, you can revert the changes easily. All you have to do is delete the new key you created which is {86ca1aa0-34aa-4e8b-a509-50c905bae2a2}.
You can easily delete it by going to the same path and then right-click to delete the key.
If you want to revert the changes using CMD, then open CMD(Admin) and enter the following command:
reg.exe delete "HKCU\Software\Classes\CLSID\{86ca1aa0-34aa-4e8b-a509-50c905bae2a2}" /fThe above command will enable the new context menu again.
Closing Phrase
The new context menu is great but you have to go one step extra to access the full right-click menu. If you want to bring back the classic context menu on Windows 11 you can do it from the registry. You can either do it by the registry editor or you can also use CMD or Powershell for it. I hope this guide helps you to get the old right-click menu on Windows 11.
Read More