Windows 11 is the latest version of Windows OS and it got launched last year in October. All the existing compatible PCs with Windows 10 have the option to upgrade from Windows 10 to Windows 11 and if you are also looking for an easy way to upgrade to Windows 11, this guide is for you.
In this guide, you will see some easy and straightforward methods by which you can upgrade from Windows 10 to Windows 11.
About Windows 11 Update
Windows 11 is a free update for all Windows 10 users who have compatible PCs. The public update for Windows 11 has been out for a while and it is delivered just like any other Windows update from Microsoft.
Windows 11 is more secure and feature-rich that is why it has some minimum system requirements your Windows PC must meet.
Minimum System Requirements
Now before you get yourself all excited and create Windows 11 bootable media it is important to check if your PC can run Windows 11, here are the minimum system requirements:
- Minimum 4GB RAM
- Minimum 65 GB Storage
- UEFI with Secure Boot
- Graphics card with DirectX 12 with WDDM 2.0 Driver.
- Trusted Platform Module (TPM) version 2.0
- SSD storage
- High definition (720p) display that is greater than 9” diagonally, 8 bits per color channel.
The bottom line is that your computer system should be modern and must have UEFI with Secure Boot and the TPM 2.0 chip. Most modern laptops/computers come equipped with it.
To check if your PC is compatible with Windows 11, you can also download the official PC Health Check App from Microsoft. The app checks and lets you know if your system is compatible with Windows 11 or not.
Once you know that your PC is ready for Windows 11, we can move toward the steps to upgrade from Windows 10 to Windows 11.
Upgrade to Windows 11 from Windows 10
There are some ways to upgrade your PC to Windows 11, depending on the situation with your PC you can use any of the following methods.
Using the Windows Update
As mentioned earlier, Microsoft has rolled out the Windows 11 update for pretty much all PCs and if your PC is eligible for it, it will be in your Windows Updates section. Here is how to upgrade to Windows 11 from your settings:
Step 1: Go to the Windows Search Bar, type “Settings” and hit enter.
Step 2: Now click on Update & Security.
Step 3: Then click on Windows Update.
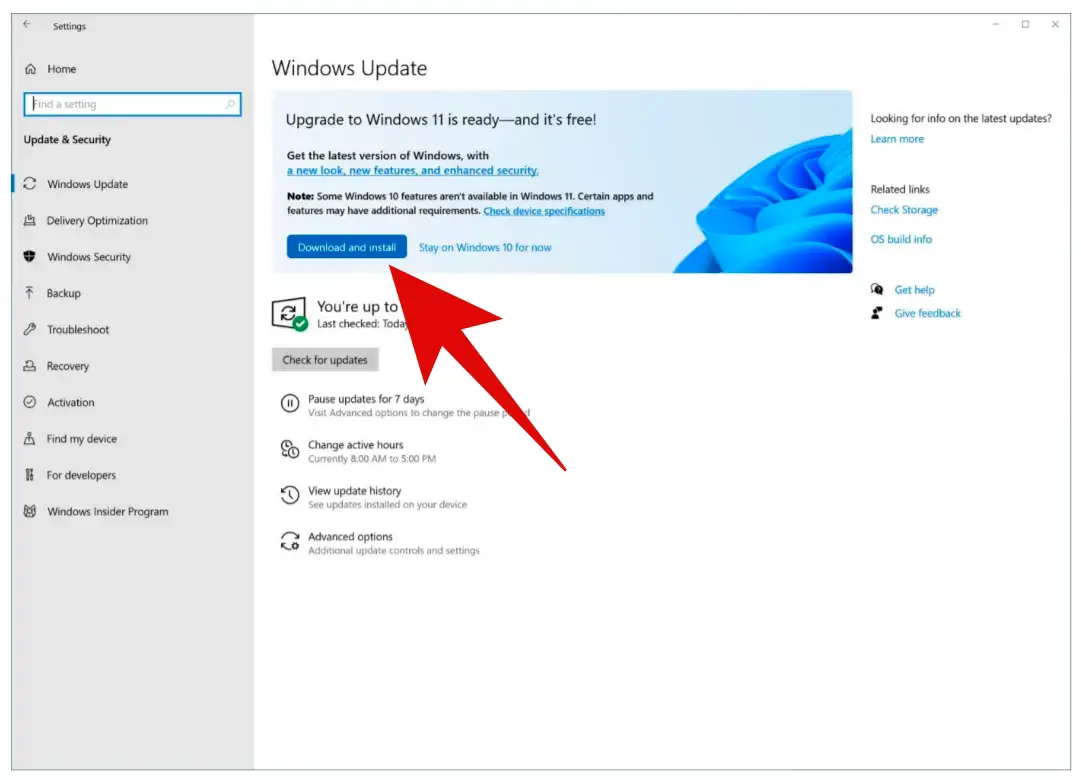
Step 4: You can click on Check for updates.
If your PC is eligible for Windows 11, you will see the option to download and install Windows 11 on your PC. Just click on Download and install button and follow all the steps.
The process of downloading might take some time because Windows 11 is a big update and chances are that your PC might restart a bunch of times.
This is by far the easiest way to upgrade from Windows 10 to Windows 11.
Upgrade to Windows 11 Using Installation Assistant
Sometimes users do not get the option to upgrade to Windows 11 directly in the Windows Update section. Even if they do, the update takes a lot of time and doesn’t really finish up because there might be some issues in the Windows files.
To make things easier, Microsoft also has a Windows 11 Installation Assistant which is a simple tool that you can install to upgrade to Windows 11.
Here is how you can install the Windows 11 Installation Assistant:
Step 1: First of all, go to the Windows 11 download page.
Step 2: Here, you will see Windows 11 Installation Assistant.
Step 3: Click on Download Now.

Step 4: Once the tool downloads, double-click to open it.
Step 5: Click on Run.
Step 6: The tool will check the hardware compatibility, once it is done, you will see the license terms. Simply click on Accept and Install.
Step 7: Once the tool is ready to work, click on Restart Now.
Wait for the installation to complete and it might take a little time to install the update.
Using Media Creation Tool
If both of the above methods are not working for you, installing Windows 11 using bootable media from the ISO file is the final method you can use. Before you do this, make sure that your PC is compatible with Windows 11 and you can do that by using the PC Health Check App.
Once you create a Windows 11 bootable media, you can install Windows 11 just like you install Windows 10 or any other Windows.
Luckily, Microsoft has made it very easy for users to create Windows 11 bootable media using the Media Creation Tool. Here is how you can upgrade from Windows 10 to Windows 11 using the Media Creation Tool:
Step 1: Plug a USB drive into your PC. Make sure that it is at least 8GB in size.
Step 2: Download the Media Creation Tool from the official Microsoft site.
Step 3: Now open the tool by double-clicking it.
Step 4: Grant all the permissions and click on Accept.
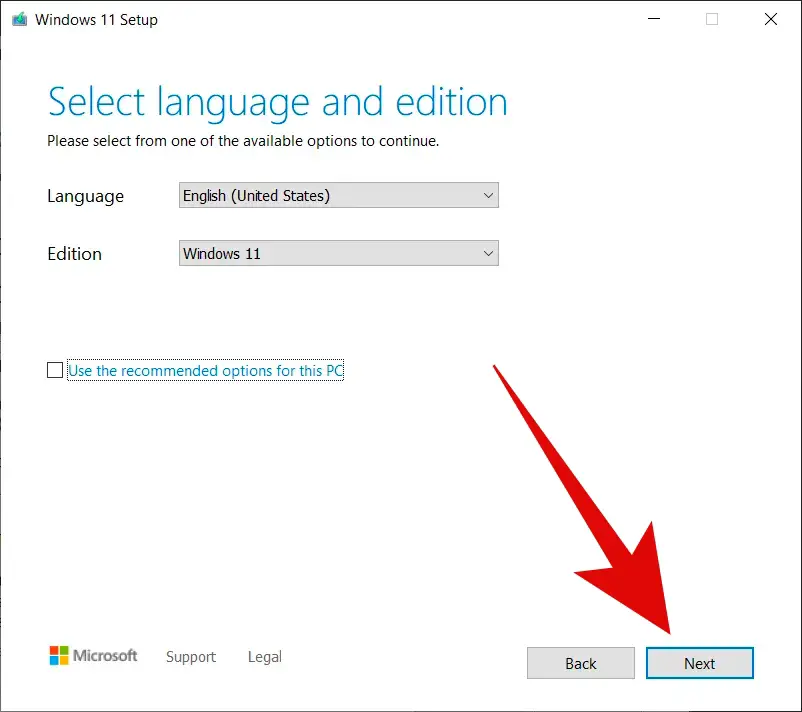
Step 5: Select language and Windows edition then click on Next.
Step 6: Here select the USB flash drive option.

Step 7: From the list, select the USB drive you want to make bootable media. Click on Next.
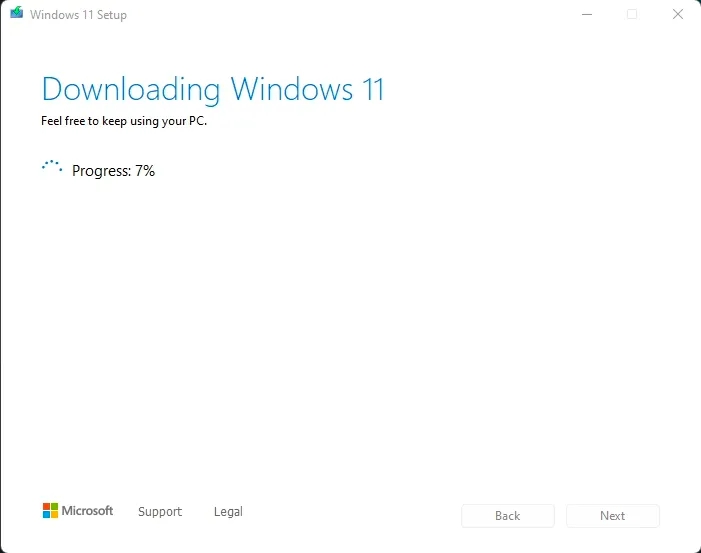
Step 8: The tool will now download Windows 11 and create bootable media for you.
Once it is done, you will get a message reading, “Your USB flash drive is ready”.
Once you are done, click on Finish.
Once the Windows 11 bootable media is ready, you can install Windows 11 just like you install any other Windows. You have to enter the boot menu and then install Windows 11.
To Sum Up
If your PC meets the requirements for Windows 11, you will receive Windows 11 as a normal Windows update and you get the choice to upgrade from Windows 10 to Windows 11 or just stay on Windows 10. Other than that, you can also use Windows 11 Installation Assistant or Windows Media Creation Tool. In case of any difficulties, feel free to reach out to us.
Read Next:-