Windows 11 is available for everyone, but is it compatible with your PC? If you want to upgrade from Windows 10 to Windows 11, then you need to check the compatibility with the latest OS by Microsoft.
Since Microsoft has made additional requirements apart from the usual PC configuration for the new operating system, you need to perform Windows 11 compatibility check before you upgrade to Windows 11 or install it on a new PC.
Windows 11 Minimum System Requirments
The new OS has some additional requirements compared to Windows 10. Here are the full system requirements for Windows 11.
| Processor | 1 GHz, 2 cores, and 64 bit Chip |
| RAM | 4 Gigabytes |
| System Firmware | UEFI & Secure Boot Enabled |
| Hard Disk Space | 64 GB |
| Graphics Card | DirectX 12, WDDM 2.0 driver |
| TPM | Trusted Platform Module 2.0 or above |
| Display | 9 inches, HD (720p) with at least 8 bit/channel |
Remember these are the minimum requirements, to run Windows 11 smoothly your PC should have a higher configuration.
How to Check Compatibility For Windows 11
Before you plan to upgrade, you have to check your PC for the minimum system requirements. However, if your laptop/desktop PC is not too old then it should have all these components.
Check CPU, RAM & System Type
1. Open file explorer and go to “This PC“
2. Right-click on the blank space and select “Properties“
3. A “System Properties” window will appear, where you can view basic information about your computer. Here, you can check the processor model & frequency, installed RAM & System type (OS architecture, whether it is 64-bit or 32-bit OS).
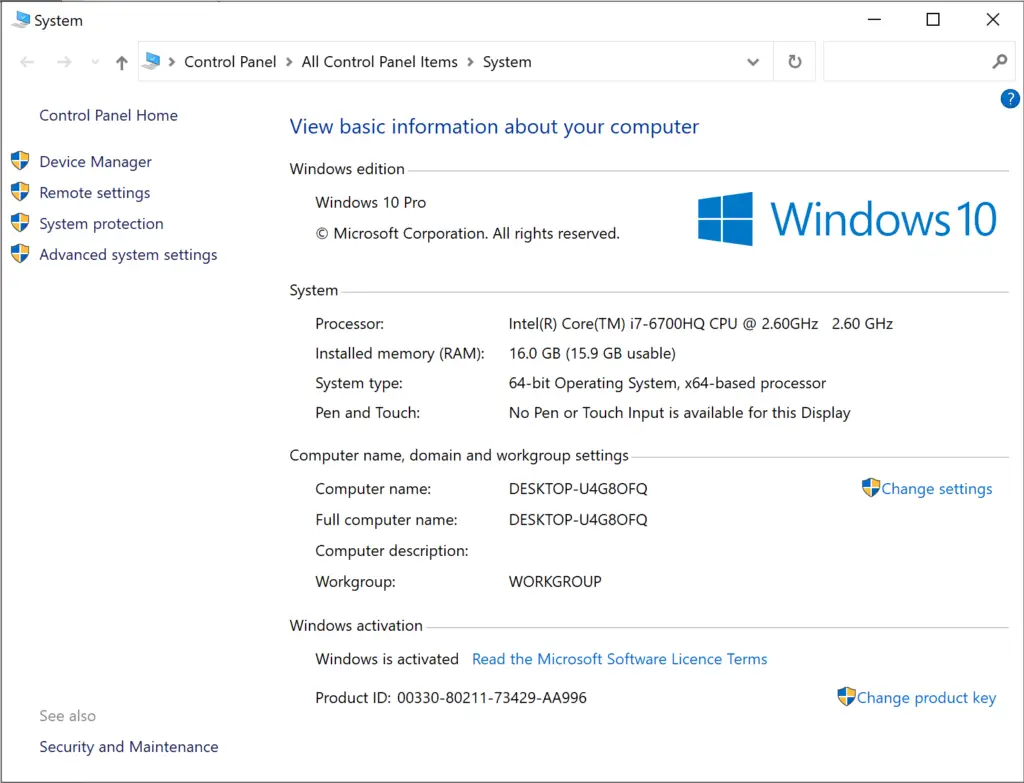
If the System Type is 64-bit, then your CPU can handle both 32-bit and 64-bit OS and is compatible with Windows 11.
Check System Firmware, Secure Boot Status & Display
1. Go to Start and search for “msinfo32” and open the System Information.
2. You will see “System Summary“, on this screen, you can find detailed information about your computer as “OS Information, version, device model, manufacturer, BIOS version, memory, etc.
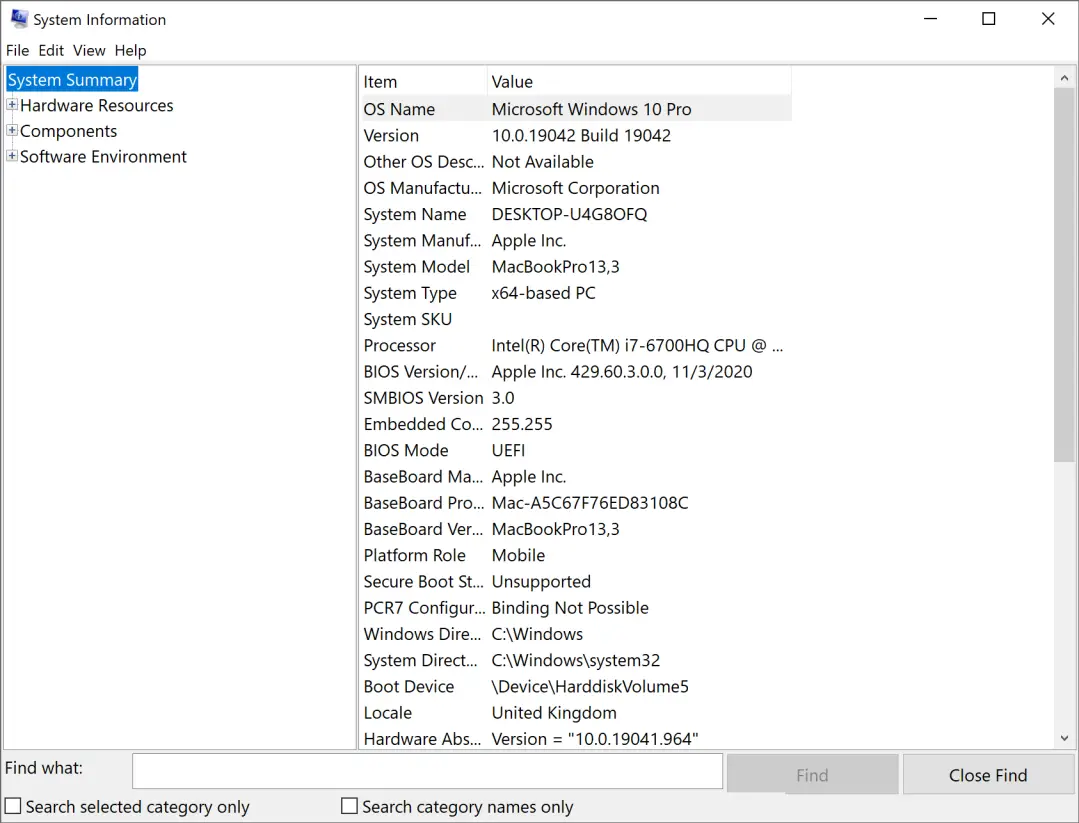
3. Look for BIOS Mode; if it is UEFI, then your PC will support Windows 11. But if the BIOS mode is Legacy, then you need to check if your motherboard can support UEFI or not.
4. Check Secure Boot State if it is OFF. You need to enable it from UEFI BIOS.
Now, expand the component option from the left dropdown menu of the System Information window.
5. Select “Display“, to check the display properties. It will show Graphics card manufacturers, driver versions, Adapter RAM, Screen resolution, and some other info.
Look for Bits/Pixel. If it is more than 8, then the display can handle Windows 11.
Find DirectX and WDDM Versions
It is necessary to check the DirectX and Windows Display Driver Model (WDDM) before you proceed to the upgrade.
1. Press the Win+R key together on your keyboard to open the “Run” dialog box.
2. Type “dxdiag” and click “OK“.
3. It will open DirectX Diagnostic Tool. Under the System Information, you will find the DirectX version. In most cases, it will be Direct X 12. If not, go to Microsoft and download the DirectX updater.
In case your PC supports DirectX version 12, then it will update the driver. If not, you won’t be able to install Windows 11.
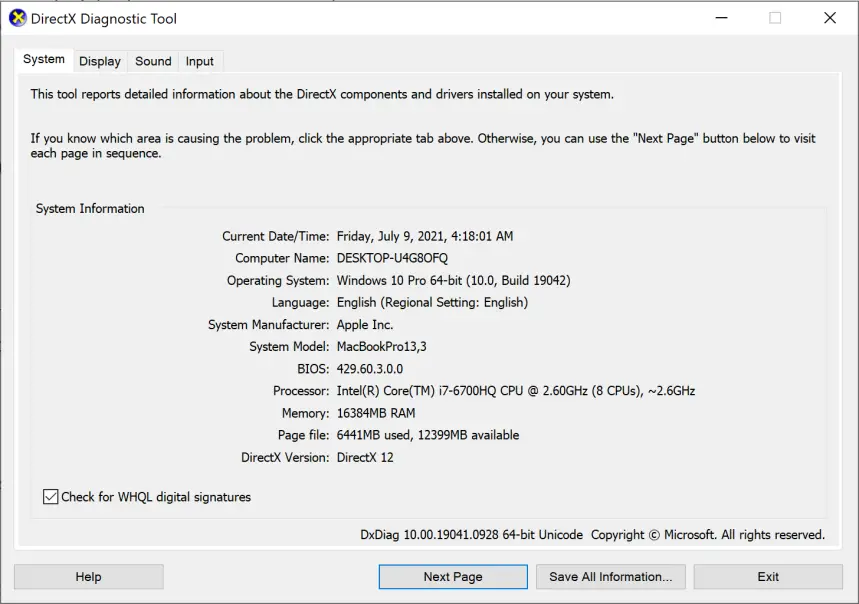
4. Now select the “Display” tab, and you will find the “Device” & “Driver” options. Under the Driver, check for Driver Model. If it is WDDM 2.0 or above, then it is good to go.
Check TPM (Trusted Platform Module) Version
TPM is a secure cryptoprocessor mainly designed to secure your hardware through an integrated cryptographic key. It is a small chip on your motherboard. Microsoft wants you to have TPM 2.0 before upgrading to Windows 11.
If your laptop/desktop motherboard is not too old (2-3 years), then the motherboard should have a TPM chip.
1. Press the Win+R key to open the Run dialog box.
2. Type tpm.msc and hit OK.
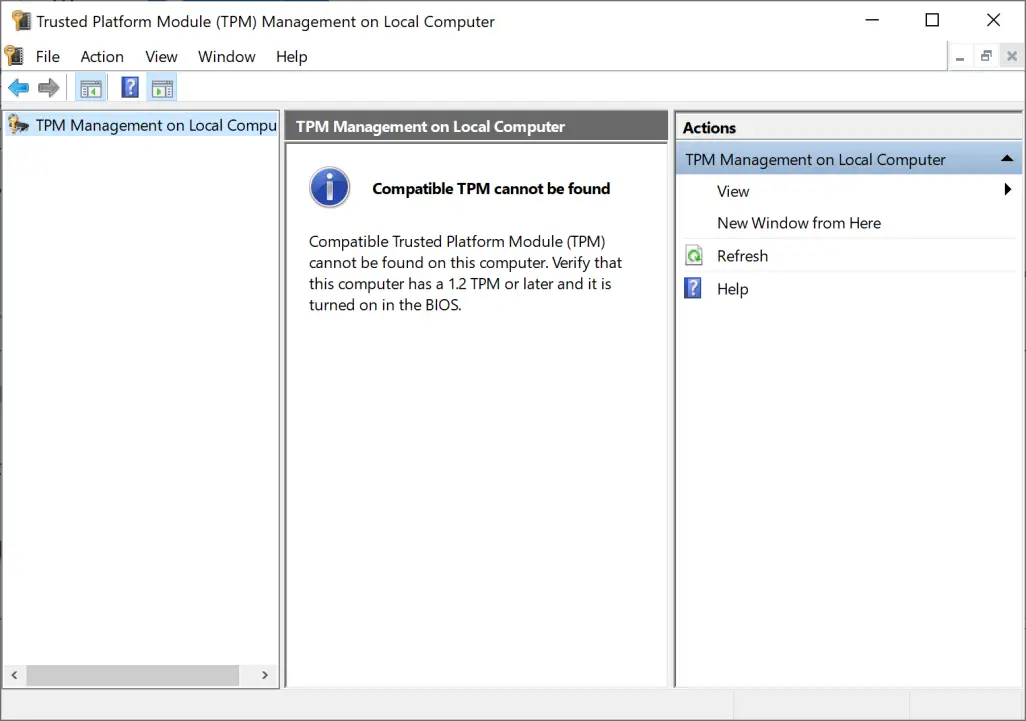
3. TPM management window will appear if you see “Compatible TPM cannot be found” Then you should check the UEFI BIOS, if the TPM is present in UEFI, then you can enable it.
Windows 11 Compatibility Checker By Microsoft
Microsoft has released a PC Health Checker tool to check Windows 11 compatibility. Download and run the program, and you will find details about your PC, whether it can run Windows 11 or not. What are the missing components, and how can you upgrade the PC to install Windows 11?
How To Enable Trusted Platform Module (TPM)
To check if the motherboard has TPM, you have to boot your PC in BIOS/UEFI, and if it is present, then it is easy to enable it.
Restart your Windows PC, and while restarting, press the boot key on your keyboard.
The boot key depends on the laptop manufacturer; if you have a custom-built PC, then check the boot key for the mobo manufacturer.
Here are the boot keys for some brands –
| Laptop/ MoBo Brands | Boot Key |
| Asus | Del or F2 |
| Dell | F12 or F2 |
| HP | F9 or Esc |
| Lenovo | F12 |
| Acer | F12 |
| MSI | F11 |
| Razer Blade | F12 |
| ASRock | F8 or F11 |
Once you are in UEFI or BIOS, select the Advanced tab. You have to navigate using the arrow keys on the keyboard.
Some motherboards support GUI, where you can select the option using a mouse. Anyhow select the “Advanced” option.
Note: Asus users will see UEFI BIOS Utility EZ-Mode; click on Advanced Mode in the bottom right corner or press F7 to open Advanced Mode.
Options will be different for different Motherboards.
In the Advanced options, look for PCH-FW Configuration. You will see “TPM device selection“.
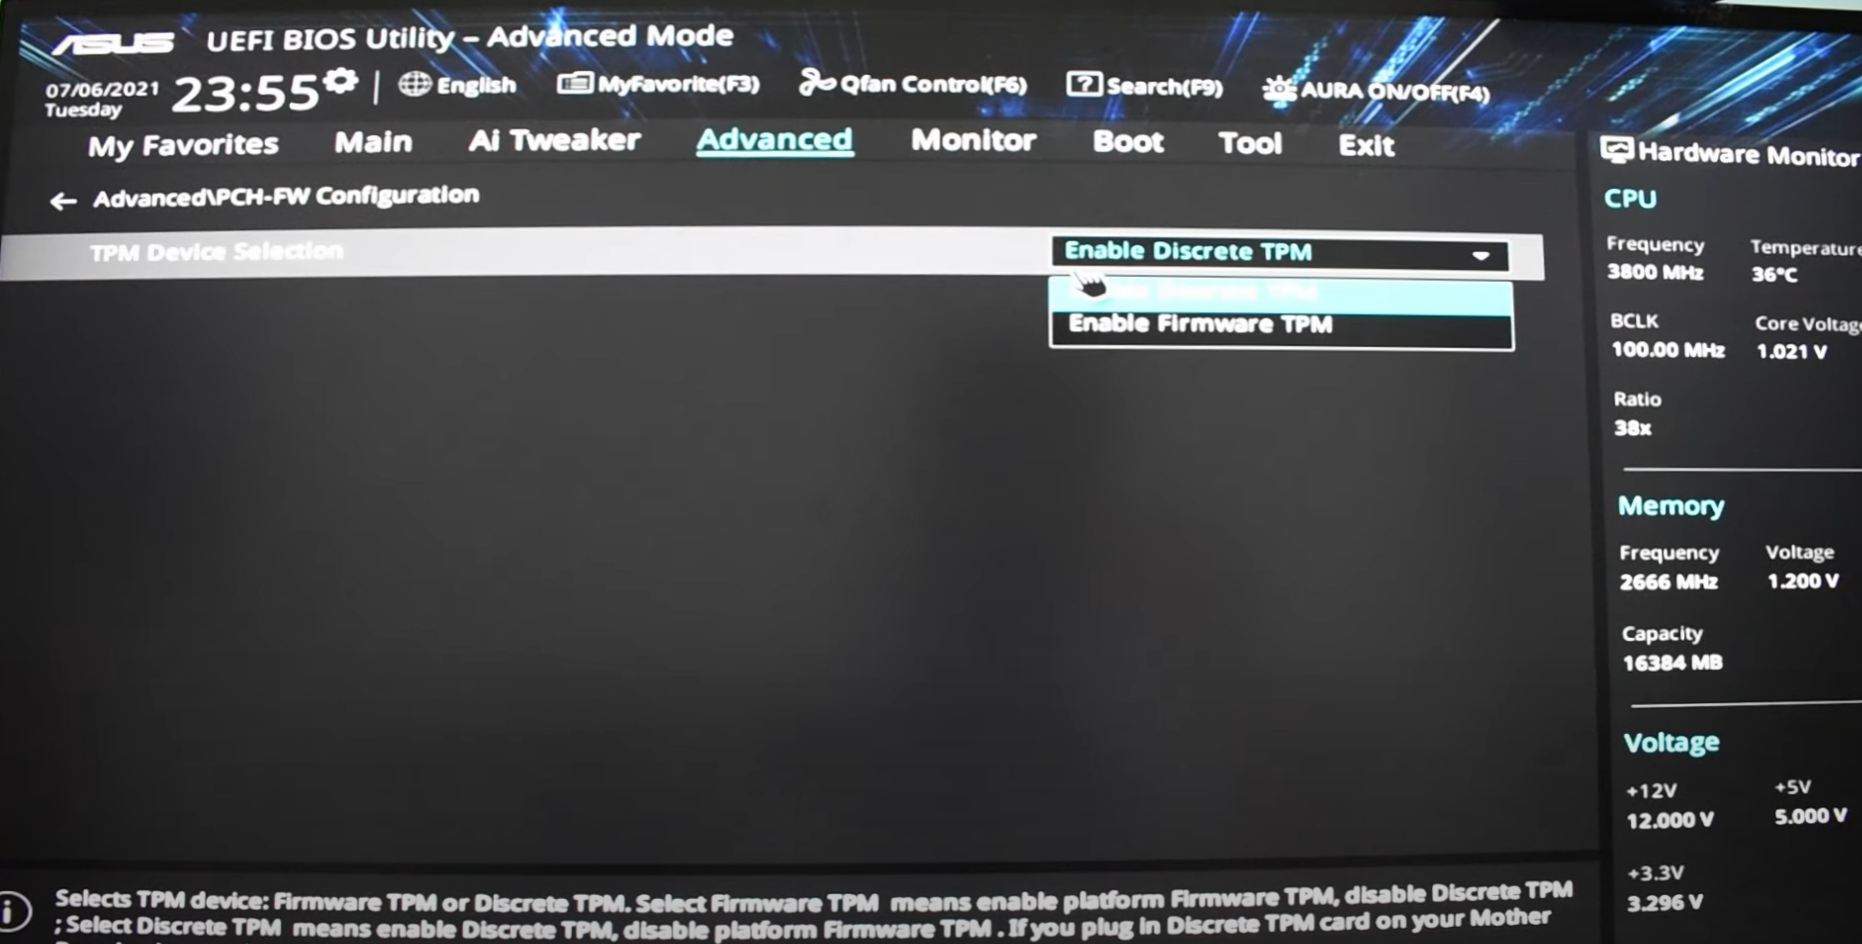
Select “Discrete TPM” if you have AMD CPU and “Firmware TPM” if you have an Intel processor.
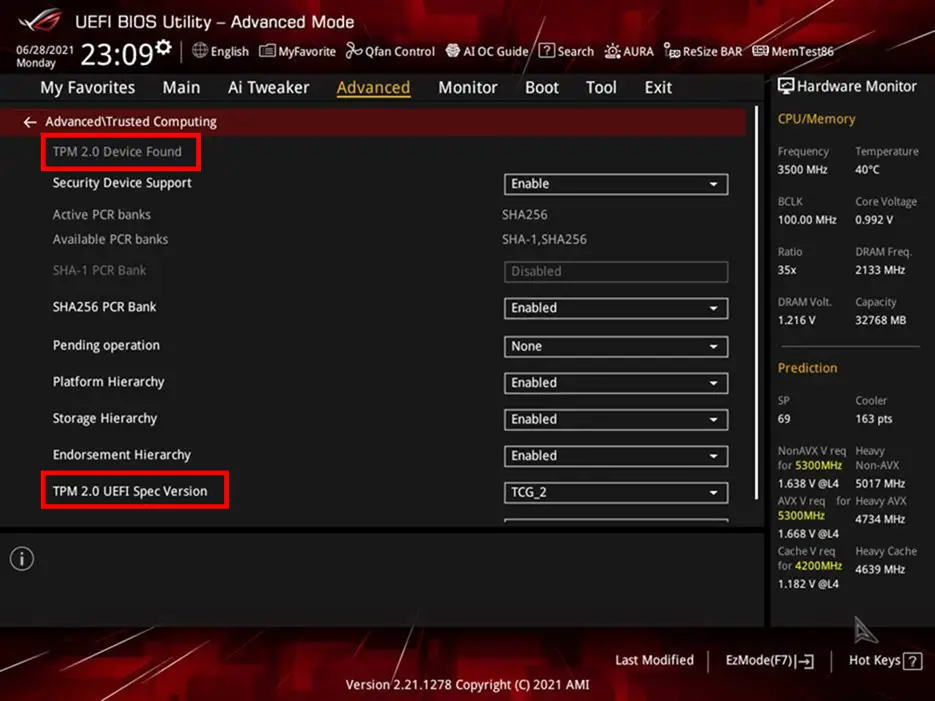
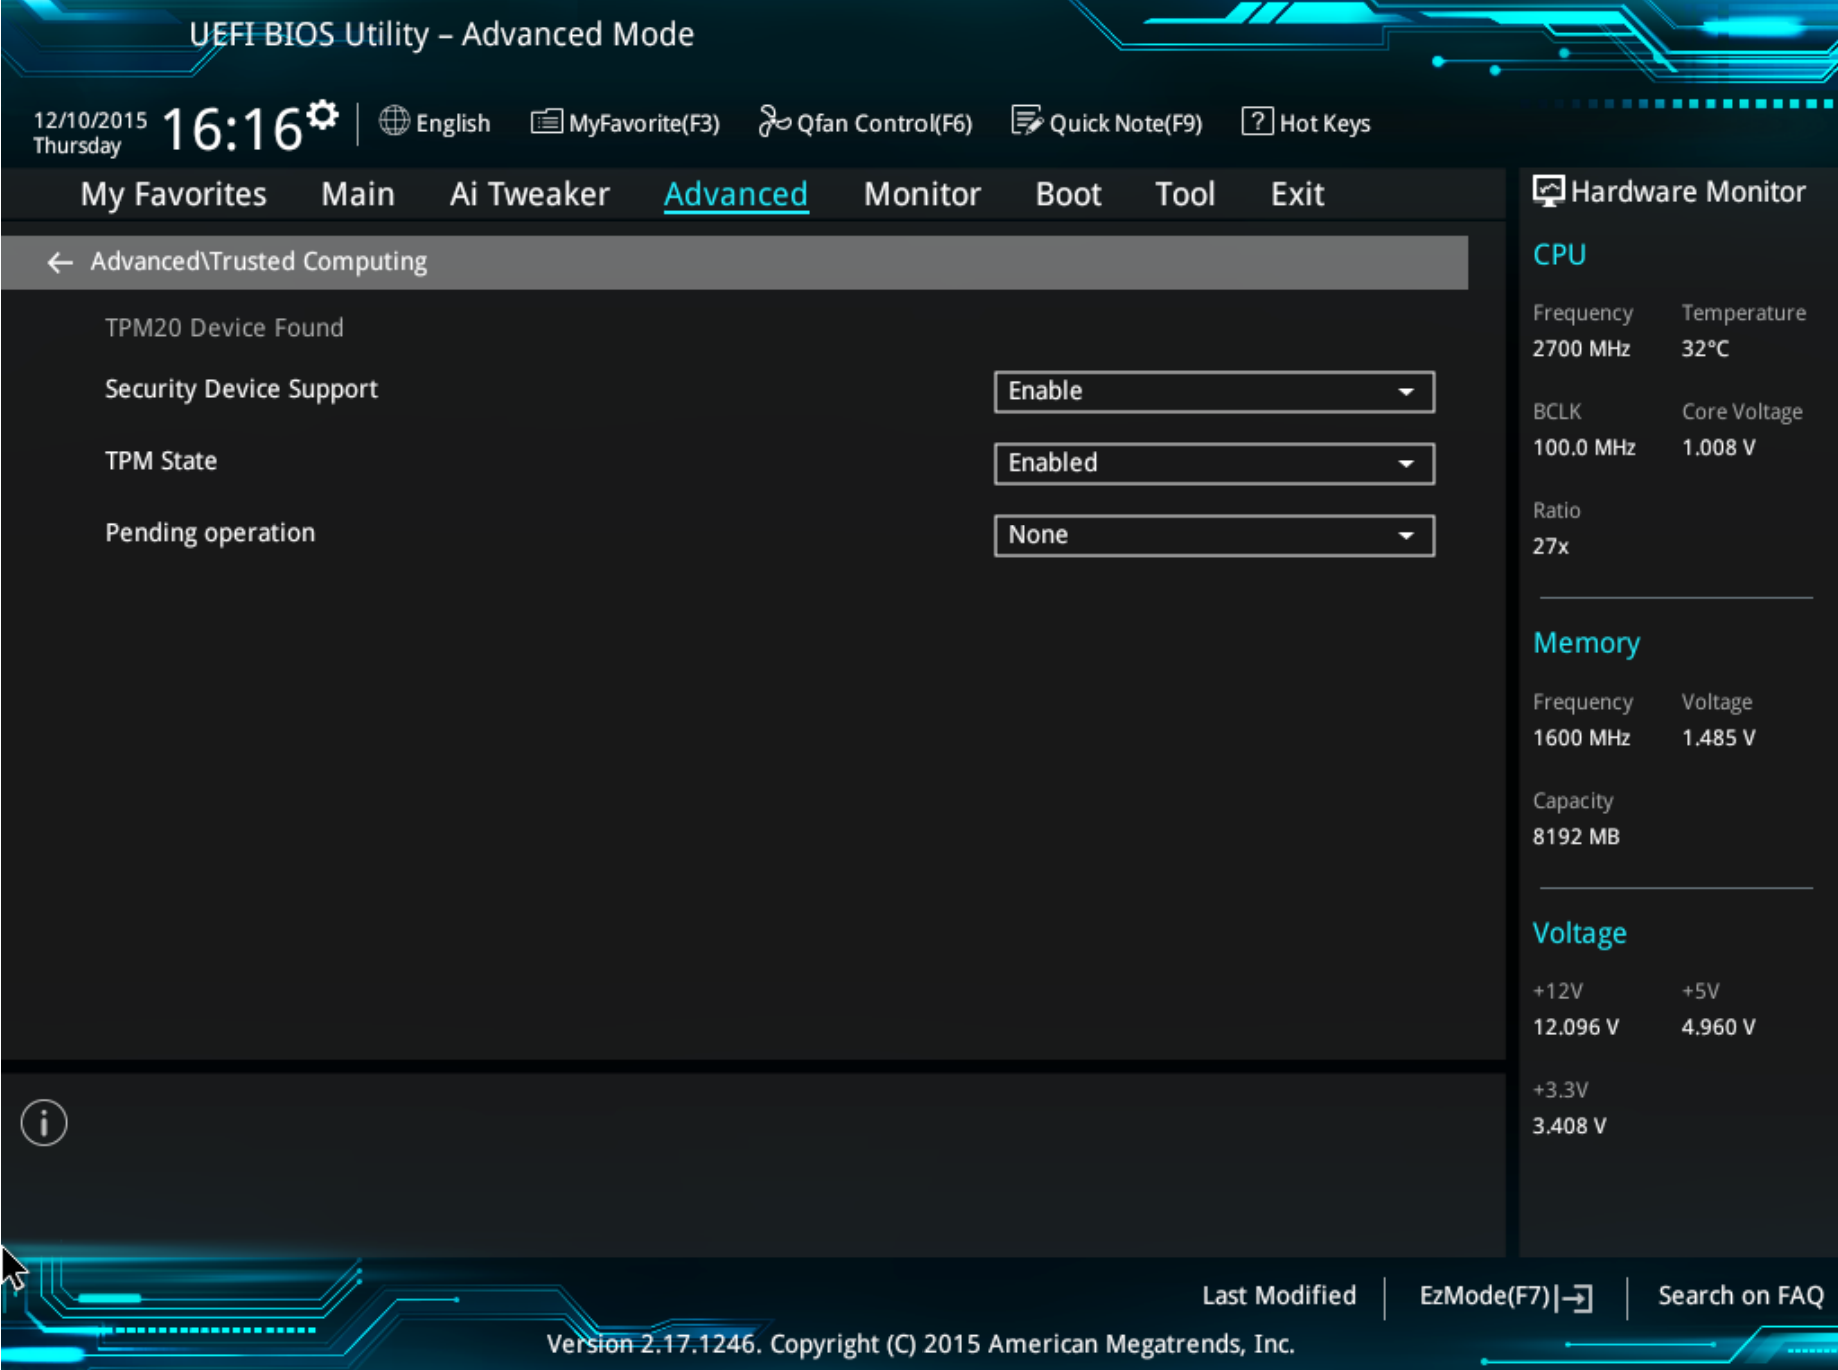
In some Asus motherboards, you will see “Advance Trusted Computing” under the Advanced tab. Here, Enable “Security Device Support“
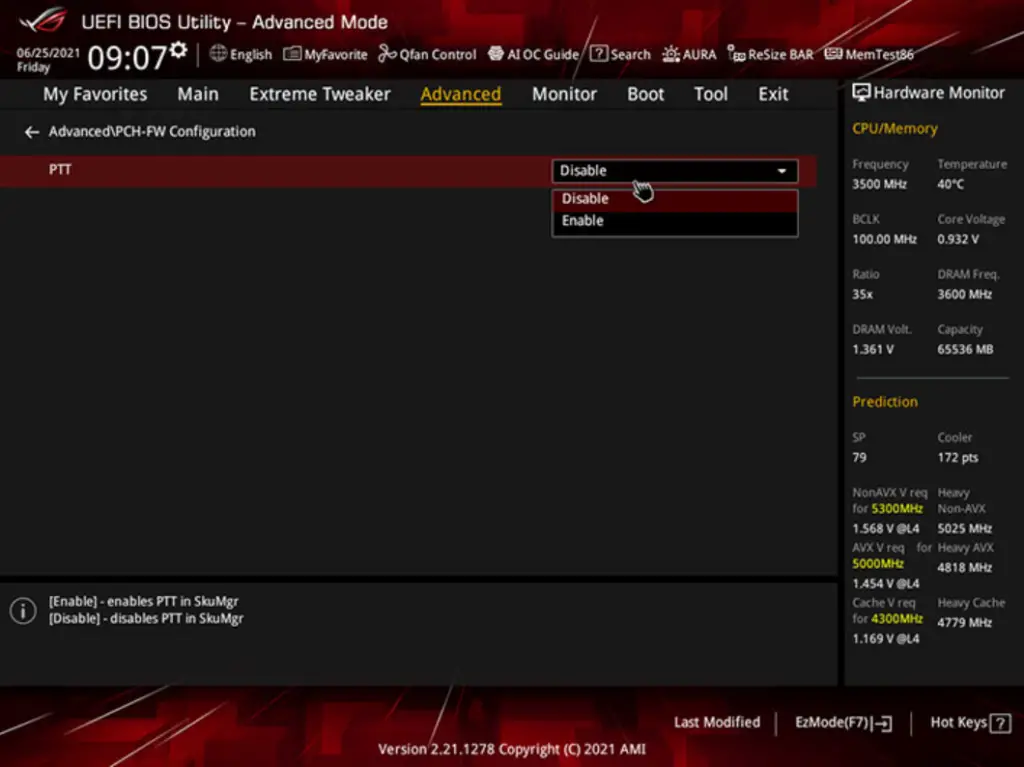
In the Asus ROG motherboard, Enable PTT under PCH-FW Configuration.
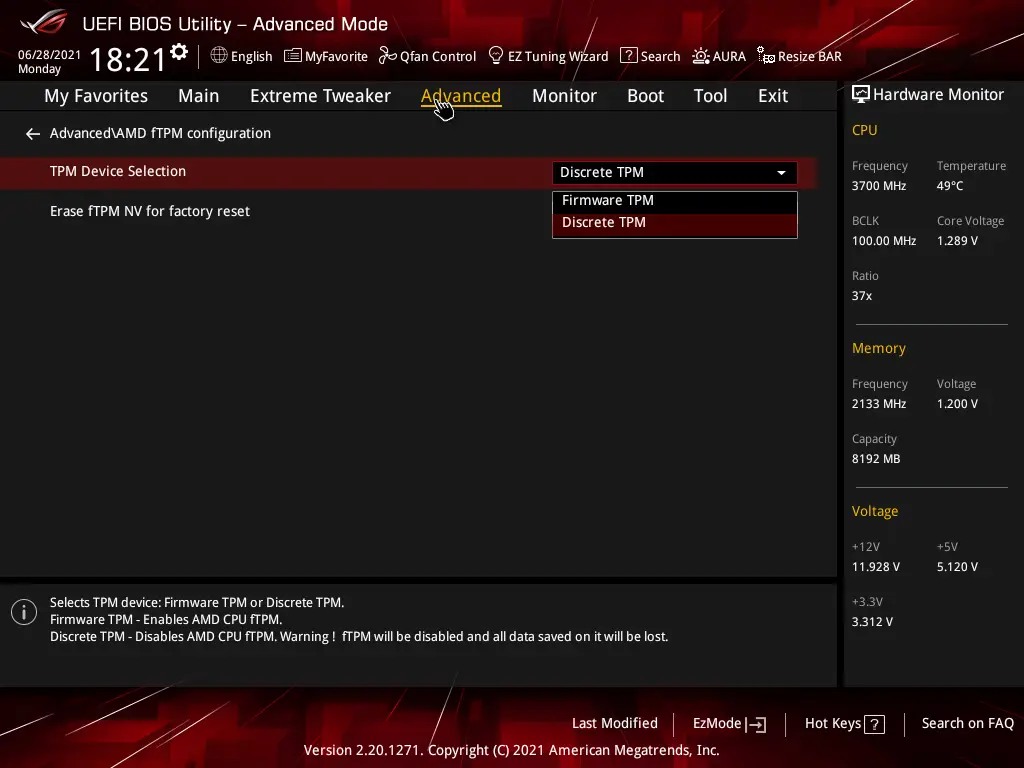
AMD Chip with Asus Motherboards – Select Advanced\AMD fTPM Configuration, and Select Discrete TPM under TPM device selection.
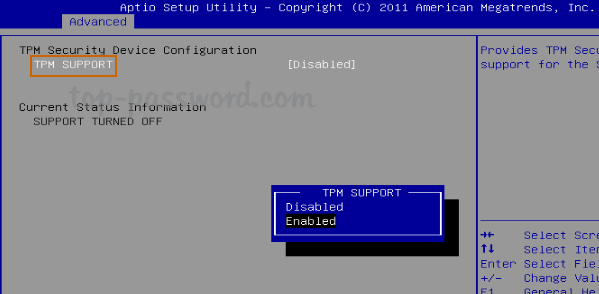
Other Motherboard where you see blue background – Enable TPM Support
Some MoBo will have – Trusted Computing option; select it, and then Enable Security Device Support and TPM State.
Anyhow, you need to access Advanced options and look for TPM or similar terms and enable it.
How To Enable Secure Boot
Secure boot is a feature that verifies a device boots using only software that is trusted by OEM (Original Equipment Manufacturer). You can enable it for UEFI BIOS.
1. Access the Advanced options in your firmware interface (UEFI/BIOS).
2. Select the Boot option.
3. Find and Enable Secure Boot.

Additionally, you can find if your device supports UEFI or Legacy BIOS. You will find this option in the Boot tab itself.
Select UEFI if it is selected as Legacy BIOS.
Now you need to save all the changes, select Exit, and a prompt will appear to “Save & Exit,” or you can press F10 to save the options.
Now, the PC will restart; after that, verify the TPM version; it should be TPM 2.0, Secure Boot State, and Boot Mode.
Finally, your PC is ready for the upgrade.
Windows 11 is available as an insider preview on the developer channel only; if you find any ISO file on a non-Microsoft website, then don’t download and install it. It may contain different types of malware and may infect your PC.
Your PC should be compatible with Windows 11 if it is 2-3 years old. The PC should have all the required components. You can easily enable TPM and secure boot from BIOS, and you are ready for the upgrade. Also, Microsoft will launch a compatibility checker tool in the coming months.
Also Read:-