Taking screenshots is an important part of the workflow for many PC users. Sometimes you might want to show something important or use it for other purposes. With the introduction of Windows 11, you might think that the methods to take screenshots on Windows 11 might be different, right? Well, not exactly!
In this guide, I will be showing you 5 methods to take screenshots on Windows 11 with ease. For this, you don’t need any third-party app.
Taking Screenshots on Windows 11
To take screenshots on Windows 11, you first have to understand the “Print Screen” button on your keyboard. In laptops, you will find it in the row of the function keys at the top reading “prt src” or “prt sc”. On a full-size keyboard, you will find a separate button named “Print Screen”.
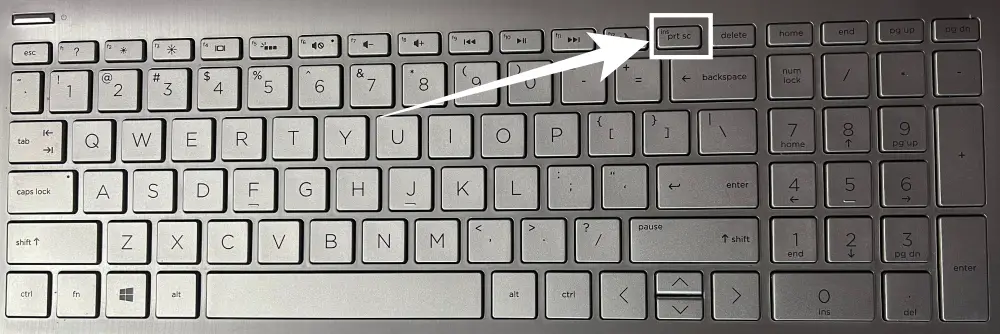
The reason why I am mentioning this is that this button is what allows you to take screenshots on your PC.
Method 1: Capturing the Entire Screen
If you want to capture your entire screen at once:
- Open the screen you want to capture
- Then all you have to do is press the “prt sc” button on your keyboard.
Now it might look like nothing happened, but pressing the button takes a screenshot of your entire screen.
The screenshot is saved on your clipboard, and you can directly paste the image into your document. Or you can paste it into any image editing software like Paint or PhotoScape and then edit and save it.
Method 2: Capturing the Entire Screen and Save it By Default
In the above method, your screenshot is not saved anywhere by default; it is only saved to the clipboard. If you want to save the screenshot for later use, here is how you do it:
- Open the screen you want to capture.
- Press the “Windows+prt src” buttons together.
That’s it! This will take a screenshot of your entire screen and save it to This PC> Picture> Screenshots.
Method 3: Take a Screenshot of the Active Windows Only
What if you just want to capture the active window on your screen and nothing else? That can also be done easily.
- Open the window you want to capture.
- Now press the “alt+prt src” buttons on your PC.
Just like the very first method, this will only copy the image on your clipboard. You can directly paste it into a document. Or you can paste it into an image editing tool and then edit and save it for later use.
Method 4: Capturing Active Window and Saving it By Default
Again if you just want to save the screenshot of active windows for later use, you have to use this method:
- Open the window you want to capture.
- Press the “Windows+alt+prt src” keys together.
- You will see a popup saying “Screenshot saved, Press Windows+G for Xbox Game Bar”.
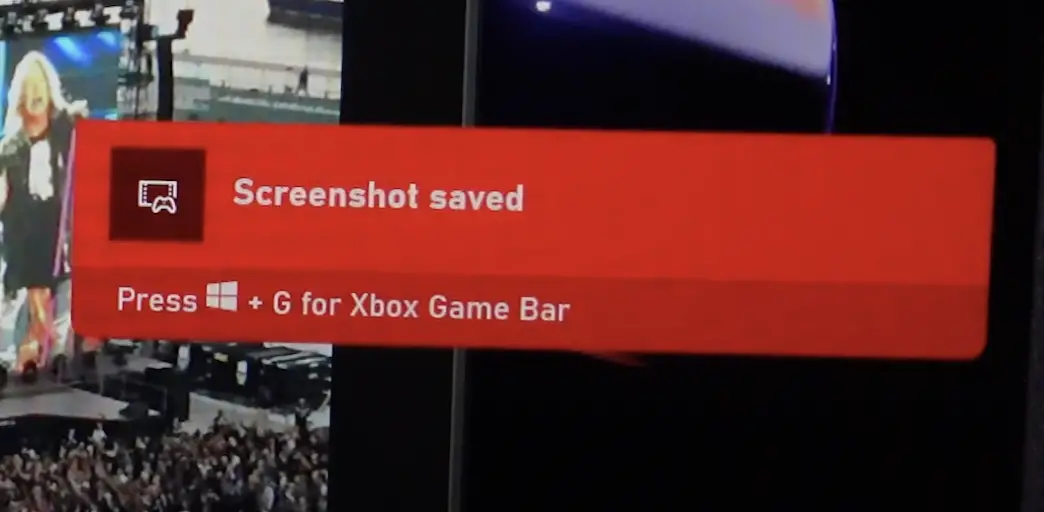
- Press Windows+G to open Xbox Gamebar.
- You will find your screenshot in this galley. Alternatively, you can also access the screenshot by going to this path: This PC> Videos> Captures.
Method 5: Using the Snipping Tool
- Go to the Windows Search button, type “Snipping tool,” and hit enter.
- Here go to Mode and select either of the selection methods you prefer.
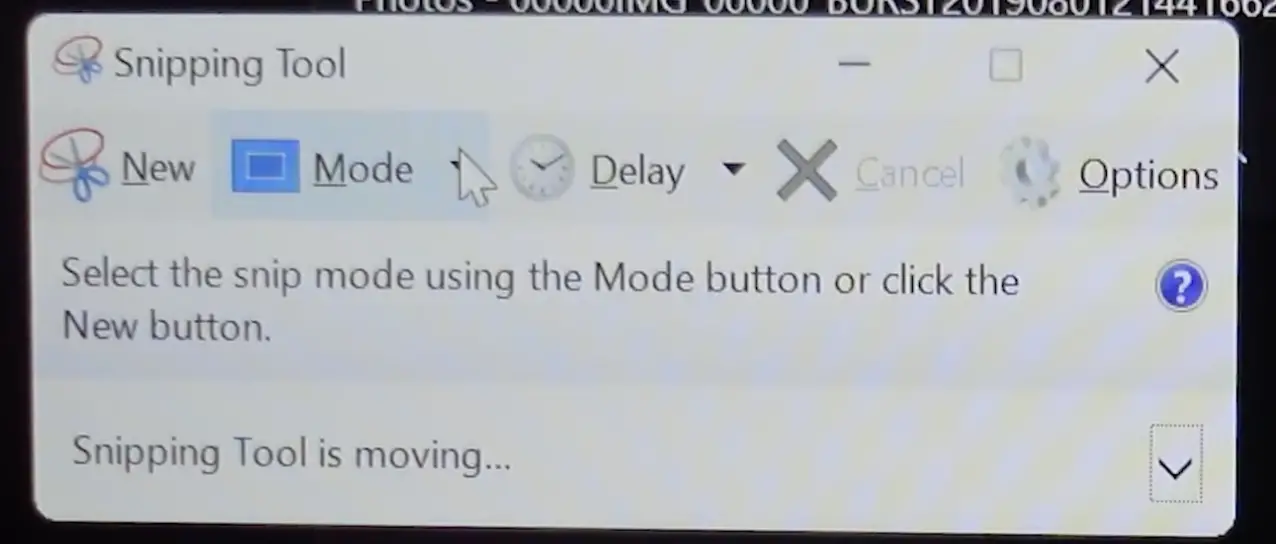
- The snip that you take will be opened in the snip tool gallery.
- From here, you can edit, share or save it easily.
Method 6: Using the Snip & Sketch Tool
- Press the shortcut key “Windows+Shift+S” keys together to launch the Snip & Sketch tool.
- You will now see the four snipping tools at the top of your screen.
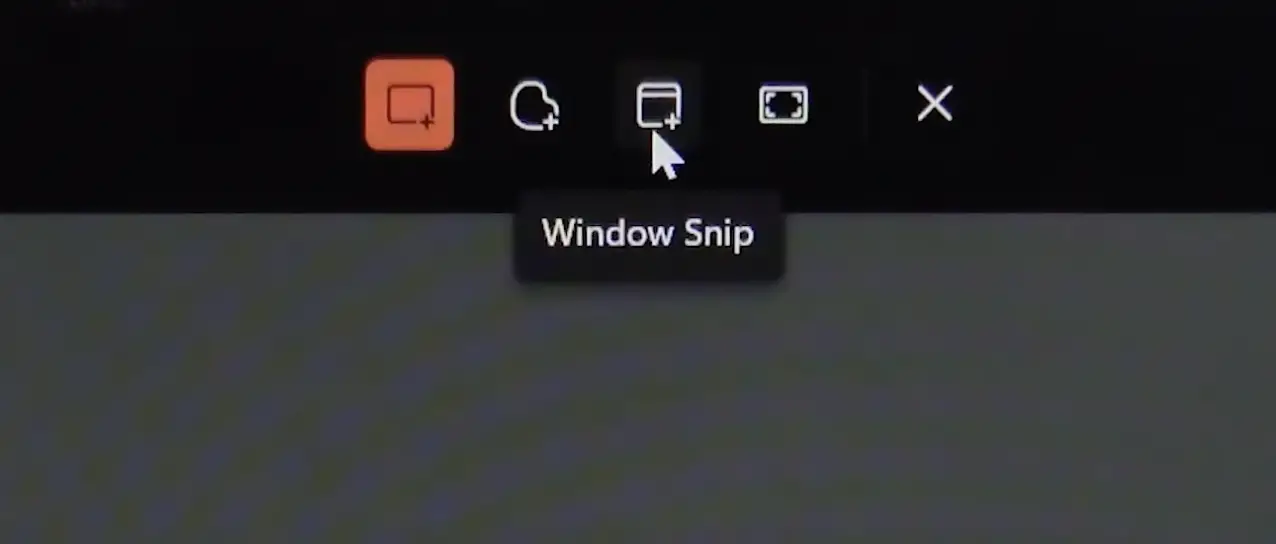
- Select either of your preferred options.
- You can then edit, share or save the screenshot easily.
Closing Phrase
So that was all about how to take screenshots on Windows 11. The methods and process of taking screenshots are fairly simple. I hope this guide helps you in capturing the screen with ease on your PC. In case of any difficulty, feel free to reach out to us.
Also, Read: