One of the reasons why people love the Windows operating system is its customization features, as it allows enthusiasts to play with many things. Virtualization is one of those features, and today we will discuss it all.
This guide will also show you a step-by-step process to enable Virtualization (VT-x) on Windows 11. But first, let’s understand what virtualization is and whether you need it.
What is Virtualization?
I have been dealing with different operating systems for several years; I often need to test/run different apps on different operating systems. However, it is hard to use multiple computers to switch the OS. This is where the power of virtualization truly shines.
Imagine you are in the same situation as me, working on a Windows laptop, and want to use different operating systems to run/test some code or apps.
To ensure seamless compatibility and performance, you require an isolated environment for testing. This is exactly what virtualization offers.
If we talk about Windows 11 specifically, virtualization is a technology that enables creating and managing virtual machines (VMs).
A virtual machine is a software emulation of a computer system that allows you to run multiple operating systems or applications simultaneously on a single physical computer. So you can run Android, Linux, or any other operating system simultaneously on your Windows PC with virtualization.
Windows 11 provides built-in virtualization features allowing users to create, configure, and run virtual machines easily. These virtual machines operate independently, as if they were separate physical computers, enabling users to utilize different operating systems, test software, and isolate environments for various purposes.
When combined with appropriate hardware, Windows 11’s virtualization capabilities provide users with flexibility, efficiency, and the ability to create virtualized environments tailored to their needs.
Who Can Benefit from It?
As a regular user who wants Windows OS for everyday use, like watching videos, editing text, etc., you won’t benefit from virtualization on your Windows PC.
However, if you are a software tester, developer, or gamer, enabling virtualization can help in many ways.
Enabling virtualization on a Windows 11 PC can provide several benefits, primarily for users who actively engage in virtualization tasks or use virtual machines. Here are a few cases in which virtualization can help you tremendously:
Running Virtual Machines:
Virtualization technology enables you to run multiple operating systems simultaneously within a virtual machine (VM). This means you can have different operating systems on the same computer, allowing you to test software, create isolated environments, or explore various configurations. Enabling virtualization greatly enhances your ability to efficiently use virtual machines, opening up new possibilities and flexibility.
Software Development and Testing:
Virtual machines are invaluable for developers and software testers. They provide isolated environments for testing applications and ensuring software compatibility.
By enabling virtualization, you can experience smoother performance and optimize resource utilization when working with these virtual environments. It allows you to create a controlled software development or testing setup, leading to more efficient workflows and reliable results.
IT Professionals and System Administrators:
Virtualization plays a vital role in enterprise IT environments. IT professionals and system administrators rely on virtualization for server virtualization, network virtualization, and managing virtualized infrastructure.
These professionals can efficiently manage virtualized systems by enabling virtualization, improving overall performance, and streamlining processes. It empowers them to optimize resource allocation, simplify maintenance, and enhance the scalability of IT infrastructure.
Enhanced Security:
Combining virtualization technology with security features like virtualization-based security (VBS) strengthens system security.
It helps isolate critical processes within virtual machines, making it more challenging for malware to compromise the entire system. Although these security features are particularly relevant for enterprise or advanced users, they contribute to a safer computing environment overall.
People also use virtualization as it enables them to play games at the highest graphics settings and also eliminates stutter and FPS lag.
Does Your System Support Virtualization?
Although Windows 11 comes with virtualization support, your CPU should also support virtualization to use it. When we talk about Virtualization (VT-x), we talk about Intel Virtualization Technology.
As the name suggests, this is for Intel CPUs only. Before you start making any changes on your PC, make sure that you check whether your PC supports virtualization or not.
The good thing is that you can do this by going to the Intel Processor Identification Utility site. Just click on the CPU Technologies tab. If there is a tick next to “Intel® Virtualization Technology,” you are all good.
Moreover, you can also do a simple Google search to find whether your CPU supports virtualization.
How to Enable Virtualization (VT-x) on Windows 11?
To enable virtualization on your Intel CPU laptop or desktop, these are the steps that you have to follow:
Stage 1: Entering in BIOS
Step 1: Open your PC.
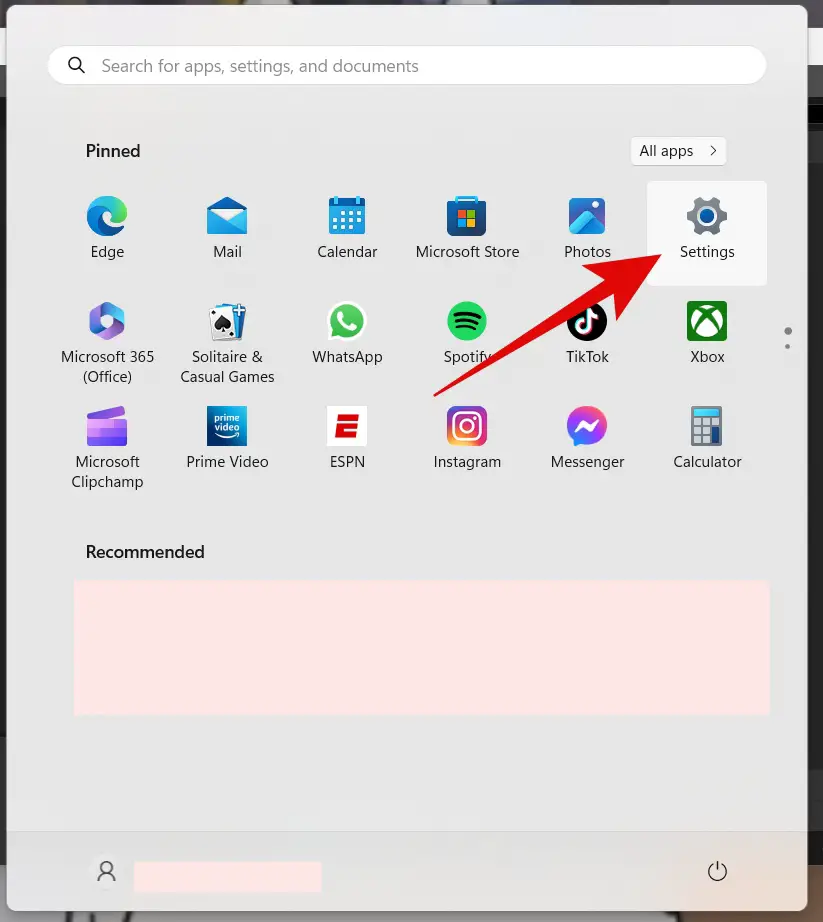
Step 2: Now go to Start, then click on Settings.
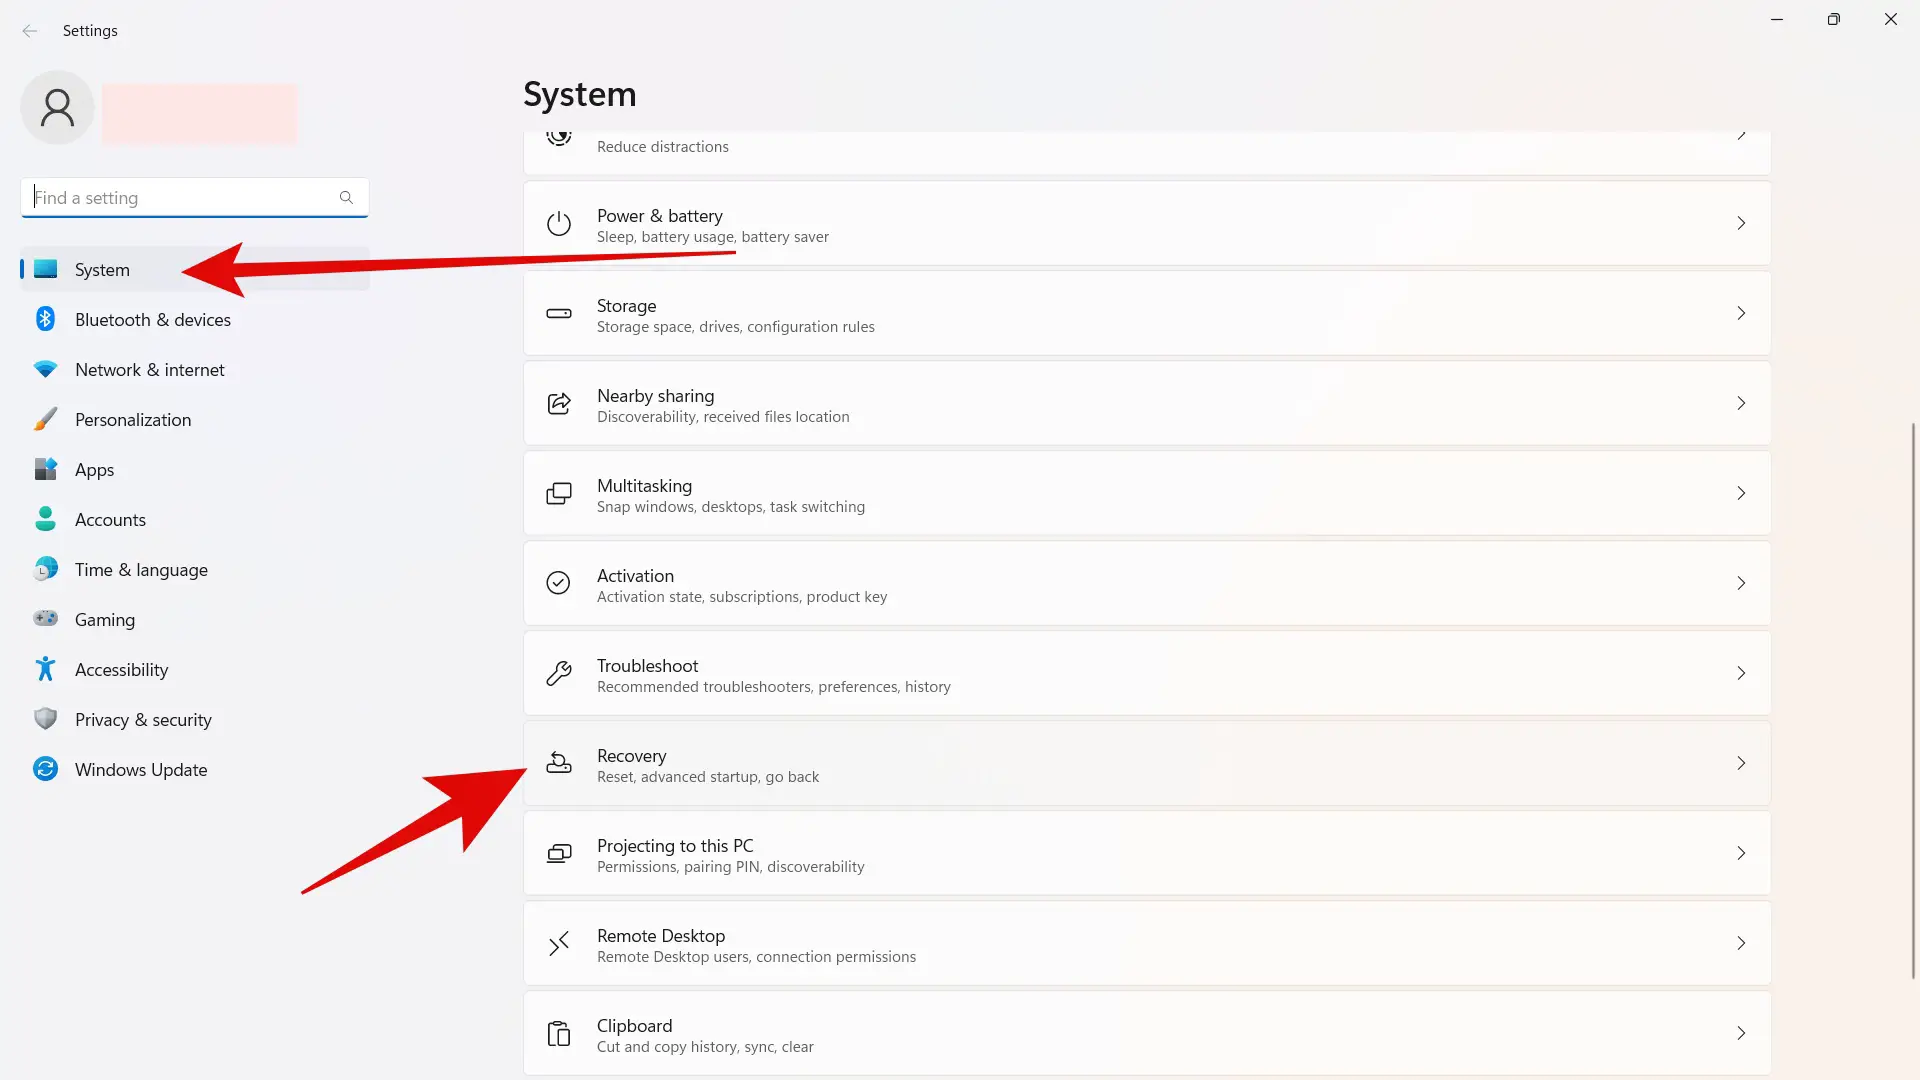
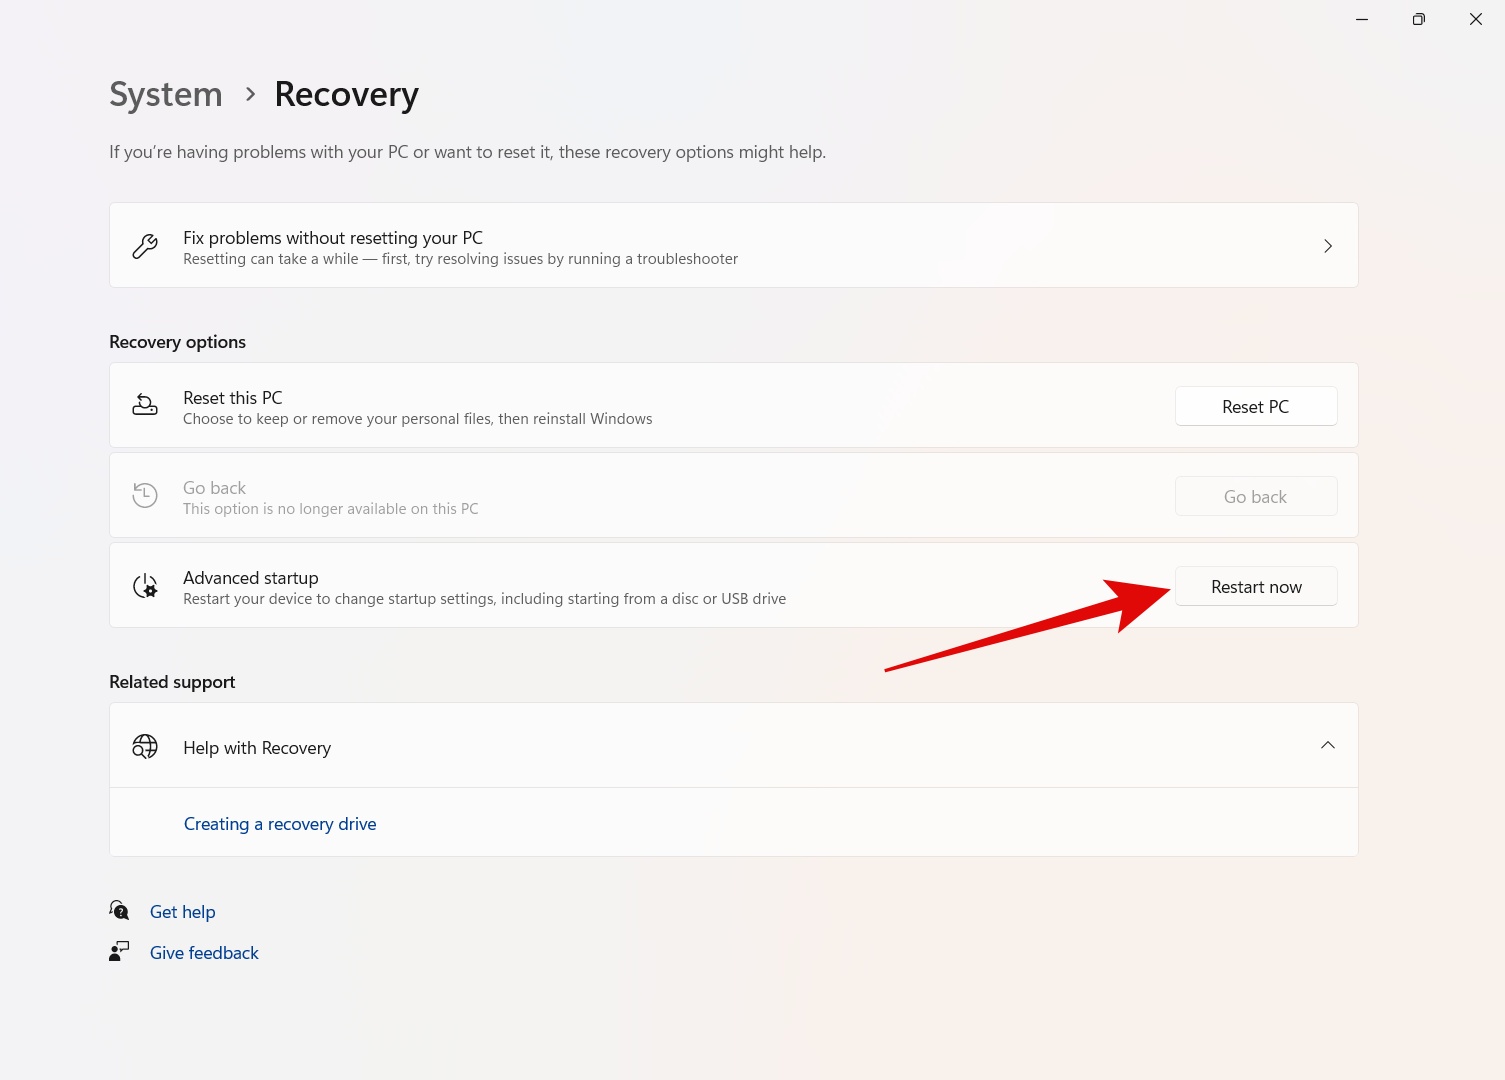
Step 3: Click on System and then go to Recovery.
Step 4: Now click on Advanced Startup from the main menu and then click on Restart Now.
Step 5: Upon the restart, you will see a blue screen with some options.
Step 6: Here click on Troubleshoot.
Step 7: Go to Advanced options, click on UEFI Settings, and then click on Restart.
Step 8: Upon the restart, you will now enter the BIOS of your PC.
There is also a shortcut method for doing this. Each manufacturer has assigned a shortcut key that takes users directly to the BIOS. All they have to do is press the key when their system is starting.
Here are the shortcut keys for BIOS for major manufacturers:
| Brand Name | BIOS Shortcut Key |
| Acer | F2 or Delete |
| ASUS | F2 or Delete |
| Dell | F2 or F12 |
| HP (Hewlett-Packard) | F10 or Esc |
| Lenovo | F1 or F2 |
| MSI | Delete or F11 |
| Samsung | F2 |
| Sony | F2 |
| Toshiba | F2 |
If your manufacturer isn’t listed here, you can just do a simple Google search and find out the BIOS shortcut key for your laptop/desktop.
Stage 2: Enabling Virtualization
Step 1: Now that you’re in the BIOS setup utility, use the arrow keys on your keyboard for navigation. Look for the “System Configuration” or “Advanced” tab.
Step 2: Locate the “Virtualization Technology” or “Intel Virtualization Technology” option.
It may be listed under different names depending on the BIOS version.
Step 3: Select the “Virtualization Technology” option and Enter the sub-menu.
Step 4: Depending on the BIOS, you may see options like “Enabled” or “Disabled”
Step 5: Use the arrow keys to highlight the “Enabled” option.
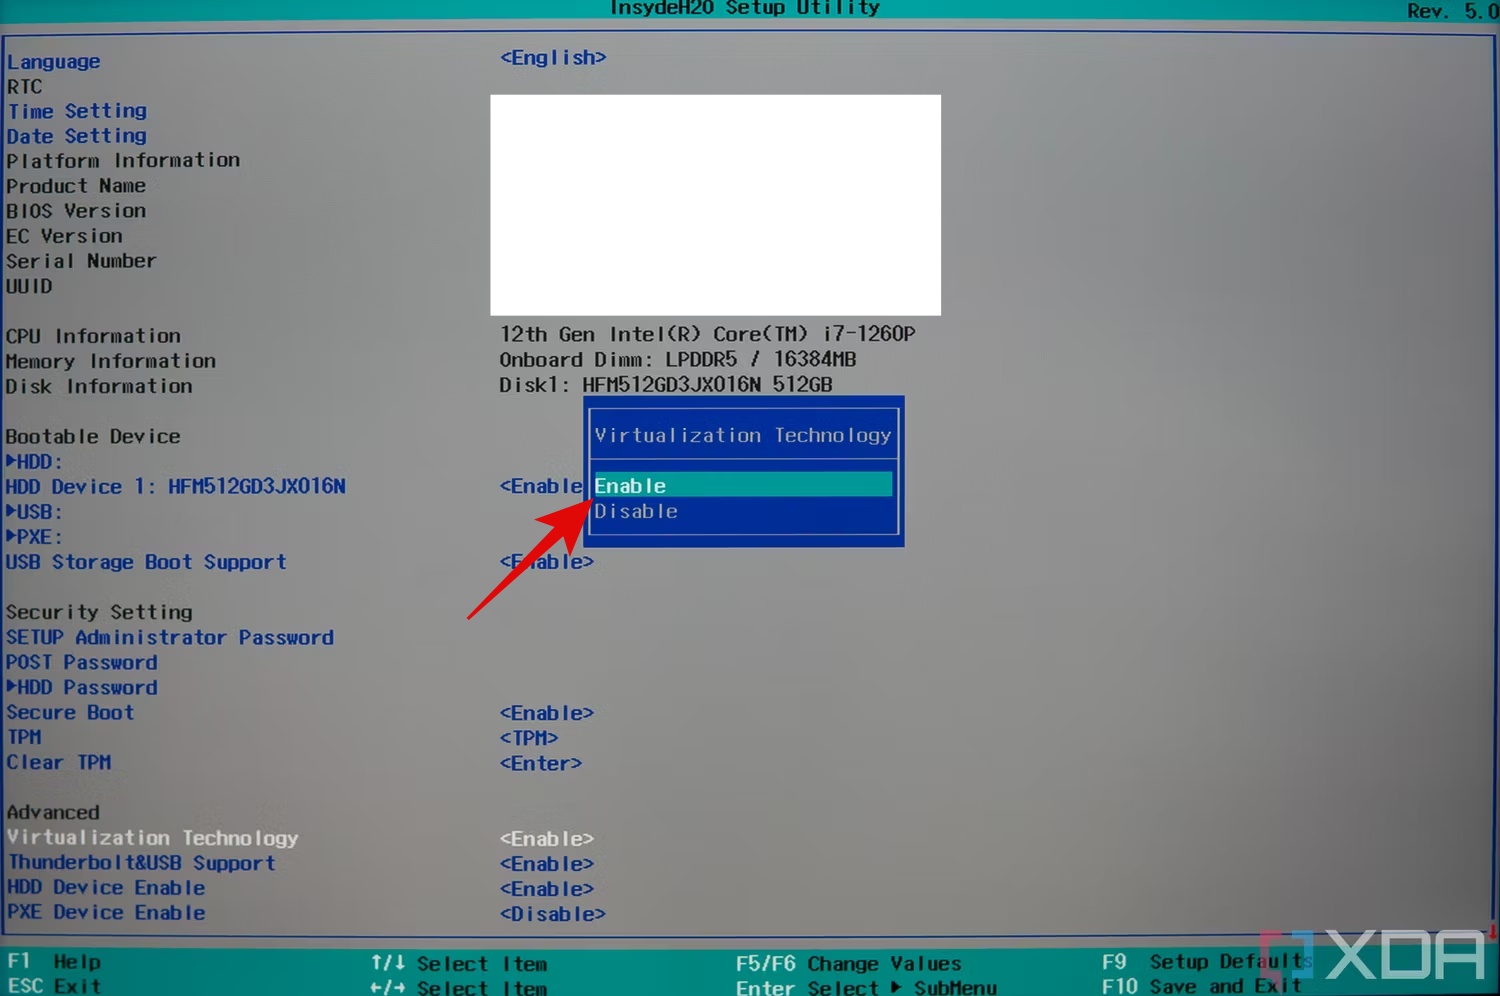
Step 6: Press Enter to select the “Enabled” option, confirming that you want to enable virtualization.
Step 7: Save the changes made in the BIOS settings by pressing the appropriate F10 key to exit the BIOS setup utility. Choose to save and exit the BIOS.
Your HP laptop will restart. The virtualization feature (VT-x) will now be enabled, allowing you to run virtual machines or use virtualization software.
Stage 3: Enabling Software Virtualization
You can enable the virtualization components available on Windows 11 after enabling virtualization at the hardware level.
Step 1: Select Start and then hit Settings.
Step 2: Now click on Apps.
Step 3: Then click on Optional features.
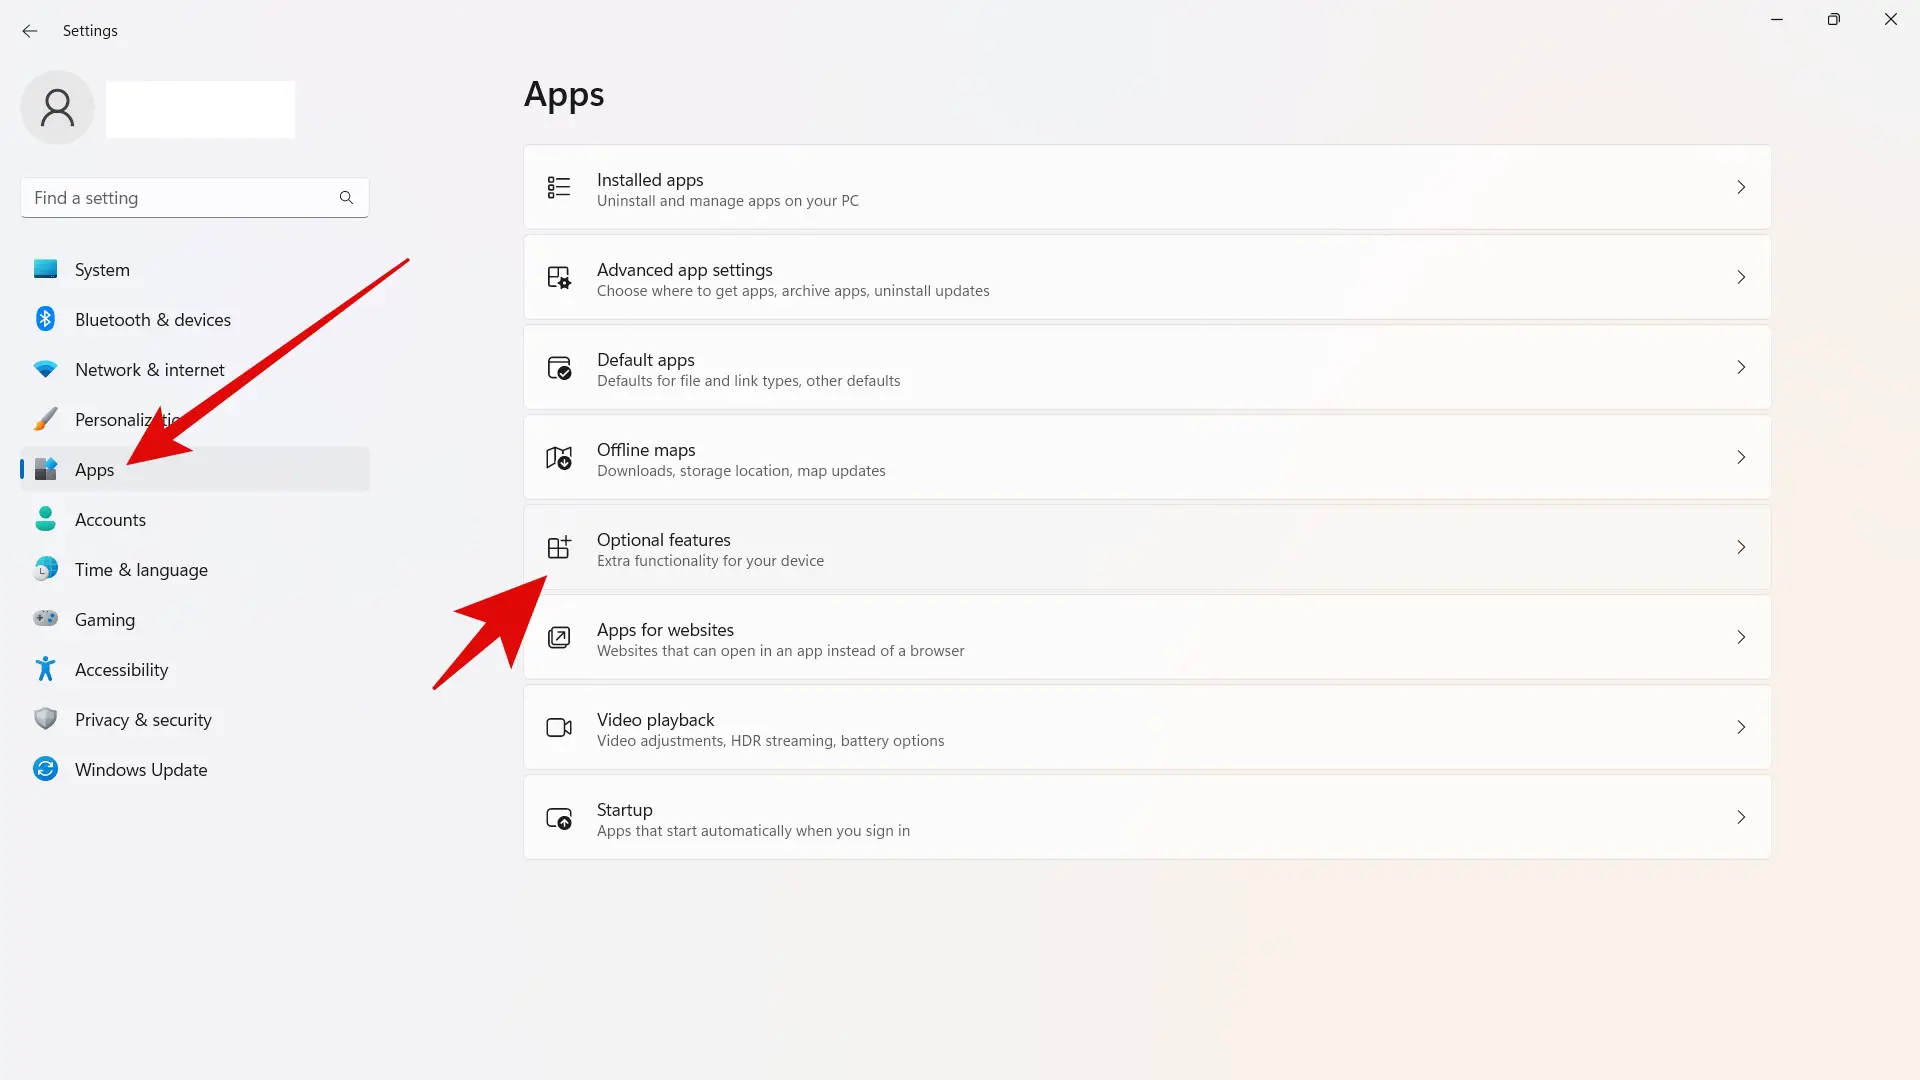
Step 4: Under Related settings, click on More Windows features.
Step 5: Now, check next to Virtual Machine Platform, Hyper-V, and Windows Hypervisor Platform.
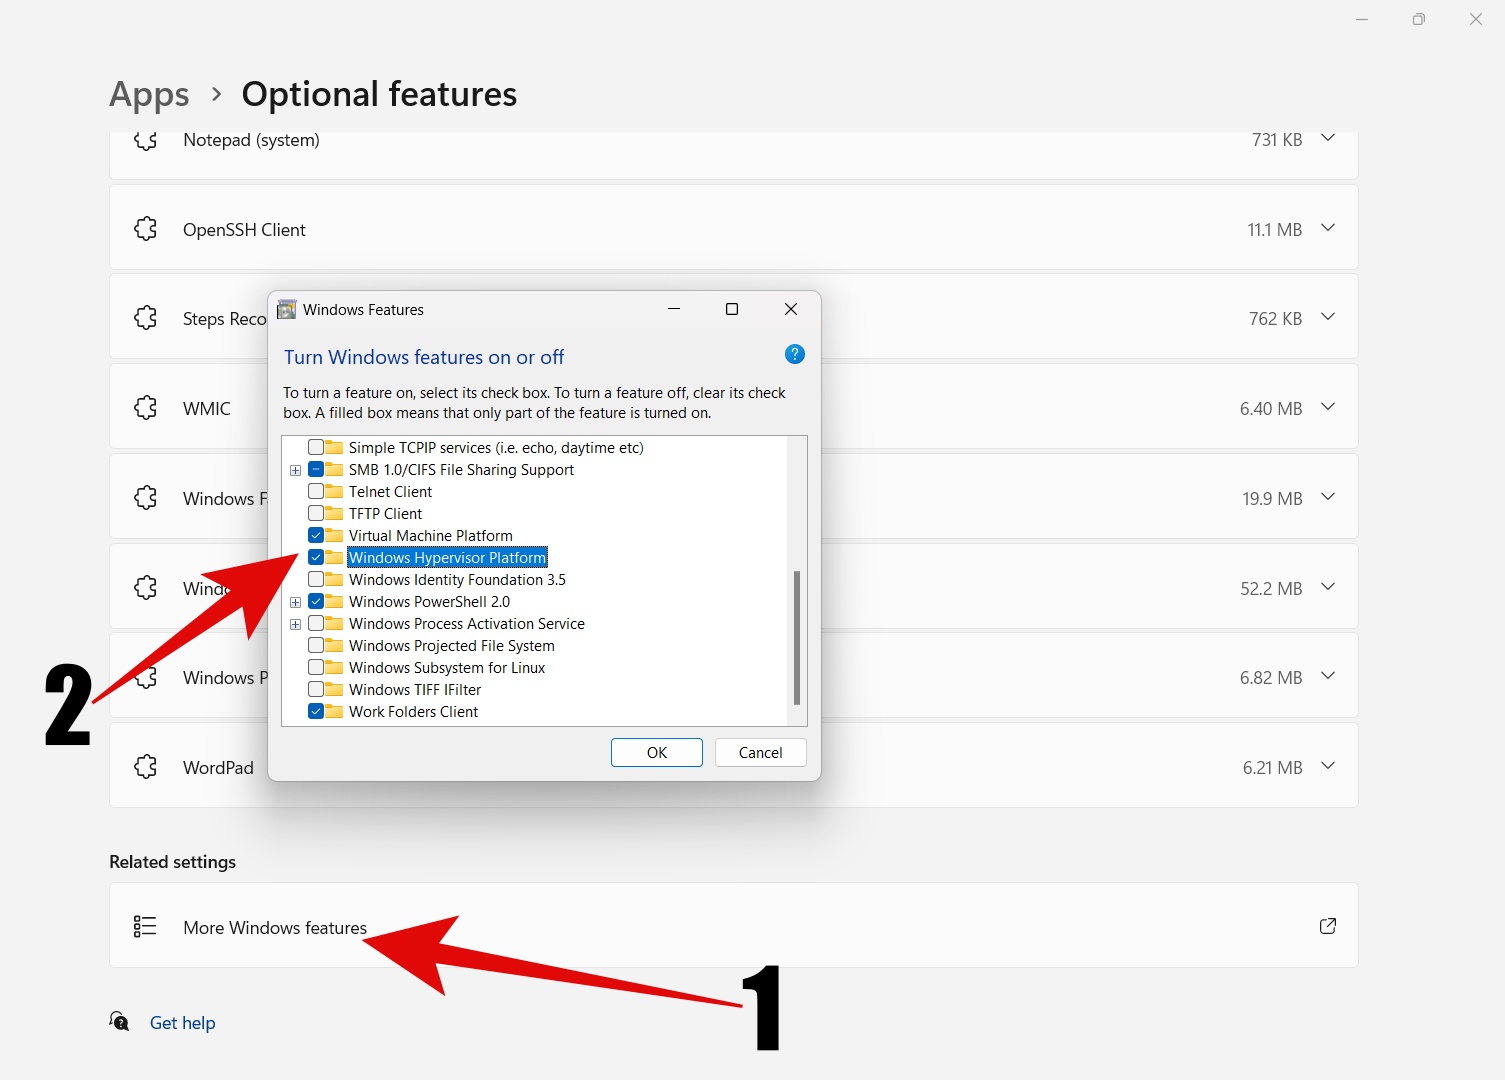
Step 6: Select OK.
Then restart your PC.
Closing Thoughts
It is critical to enable virtualization (VT-x) in Windows 11 for maximum performance while running virtual machines. Users can unlock the full potential of virtualization technology and enjoy its benefits by visiting the BIOS or UEFI settings and enabling VT-x.
Users can utilize virtualization to run several operating systems, test software in isolated environments, and increase productivity in a variety of disciplines. We hope this guide helps users to enable virtualization (VT-x) on their Windows 11.
FAQs About Virtualization (VT-x)
Yes, Windows 11 supports virtualization.
You can check if your system supports virtualization by accessing the BIOS or UEFI settings and looking for the virtualization option. Alternatively, you can use Google Search to see whether your CPU supports virtualization.
If you encounter issues, such as error messages or the inability to enable VT-x, ensure that your BIOS/UEFI firmware is up to date. Check if your hardware supports virtualization and consult the manufacturer’s support or user forums for further assistance.
The ability to enable VT-x depends on the hardware capabilities of your computer or laptop. Ensure that your CPU supports virtualization (VT-x) technology. Consult your system’s documentation or the manufacturer’s website for specific details about virtualization support on your device.
Restarting your computer after enabling VT-x in the BIOS or UEFI settings is important. Restarting ensures that the changes take effect and that virtualization features become fully available.