Do you want to install Windows on a new PC or want to repair the existing one using Pendrive? Then you can make a flash disk bootable using cmd and install Windows 10/11 or 8.1 & 7. There are some tools to create a bootable USB drive or Pendrive. But why would you install a third-party app when you can make a bootable flash drive using cmd (command prompt)?
Cmd is a powerful tool for performing different tasks if you know the commands. Third-party tools can help to make flash drive bootable, including Microsoft Official USB Installer. These tools do nothing but automate the process.
Such tools have limitations and take a long time to format and write Windows files into the USB flash drive. Some tools also cost money.
How To Make Flash Drive Bootable Using CMD (Command Prompt)
Here is a simple way to turn a USB flash drive into bootable media to install any version of Windows like XP, 7, 8, 8.1, and Windows 10 or Windows 11.
All you need is a flash drive with a storage capacity of 4-8 GB., 4 GB for Windows XP, 7, 8, and 8 GB for Windows 8.1, 10 & 11, and the downloaded iso file of Windows.
Follow these steps to make flash drive bootable using cmd-
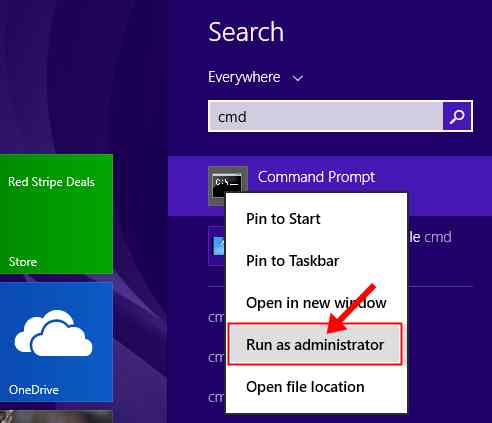
1. Insert your Flash Drive and go to start. Search for CMD.
2. Right-click on it and Run as Administrator.
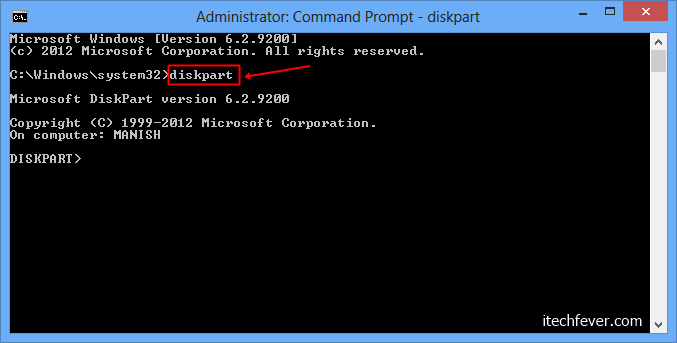
3. Once the command prompt is open.
Type diskpart and hit enter. It will enter into the disk partition management mode.
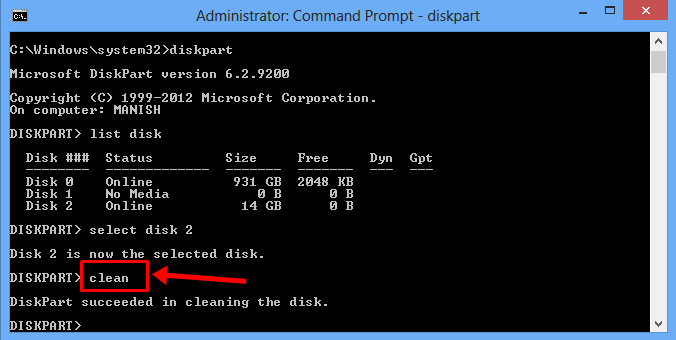
4. Type list disk and hit enter. Here you can see all the disks on your computer. It doesn’t show disk partitions but a list of the connected disk to your computer.
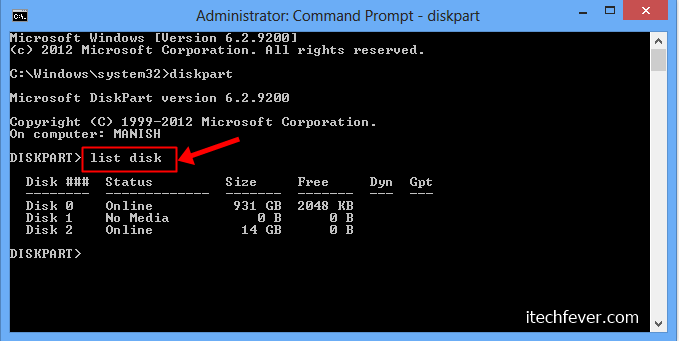
5. After you get the list of disks, find your flash drive by size. Here mine is 14 GB which is Disk 2.
Now let’s select the flash drive by typing select disk <disk no.> e.g. select disk 2 and hit enter.

6. Once the USB flash drive is selected, type clean and press Enter.
This command will erase everything from the flash drive. Make sure it does not contain your important files.
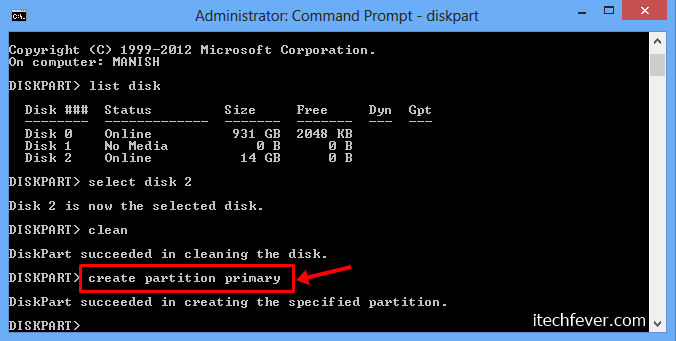
7. Now, you need to make your flash drive a primary partition
Type create partition primary and hit enter.
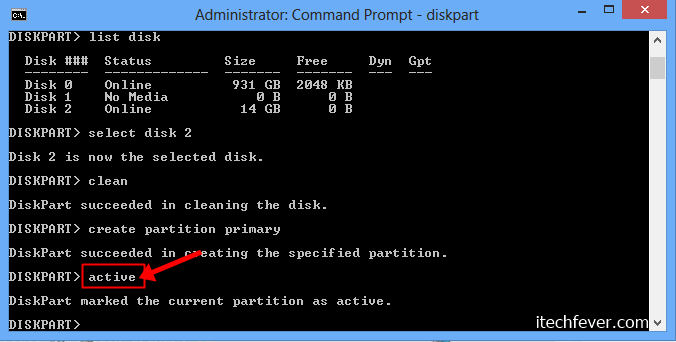
8. Once the disk is a primary partition, make it an active drive.
Type active and hit enter on your keyboard. The command will activate the flash drive.
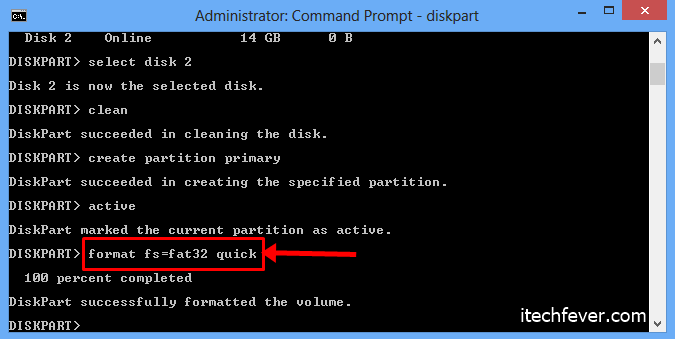
9. Now, format the flash drive.
Type format fs=fat32 quick and hit enter. This command will format the flash drive in quick mode.
FAT32 files system works with Windows 8.1 and the lower version of Windows. But if you are installing Windows 10, then you need to use an NTFS disk. Windows 10 contains a file names install.wim that is larger than 4GB. FAT32 does not support copying files larger than 4 GB. However, there is another problem, that not all motherboard support booting from NTFS disk. Then you need to create 2 partitions in the flash drive, one partition as FAT32 and another as NTFS.
So you need to format as format fs=ntfs quick, and should work.
The early version of Windows 10 supported FAT32, but Windows 10 versions 1903, 1909, 2004, 20H2, and later does not support FAT32.
10. Once the flash drive is formatted, you may not see it on This PC.
To get it back, you need to assign a literal to it, type assign, and hit enter.
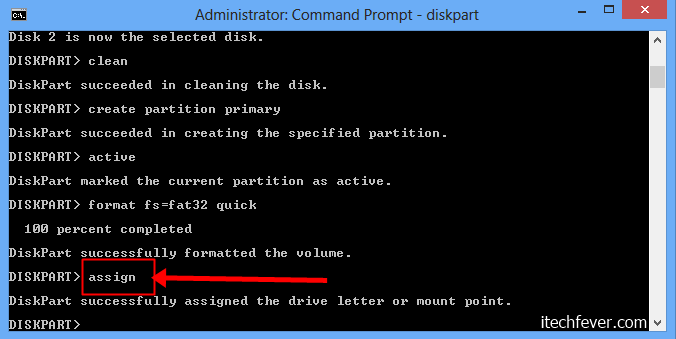
All done, you just made your USB flash drive bootable using cmd. Close this command prompt.
Install Windows 10/11, 8.1 & 7 Using a USB bootable flash drive
The bootable USB is ready, you can copy the Windows files, and ready to go.
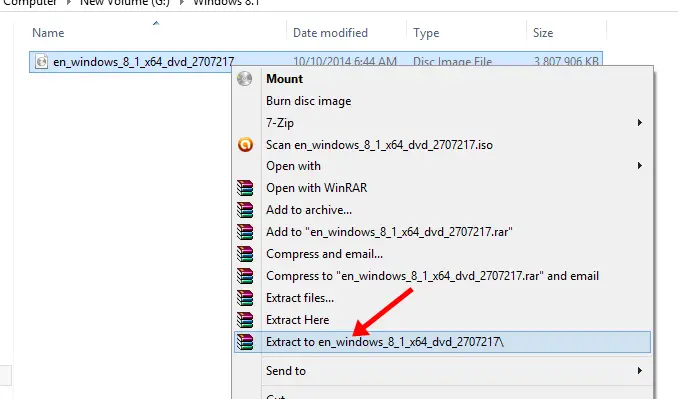
1. You must copy windows files from the PC to the flash drive. If you have a .iso file of Windows, then extract it using win rar.
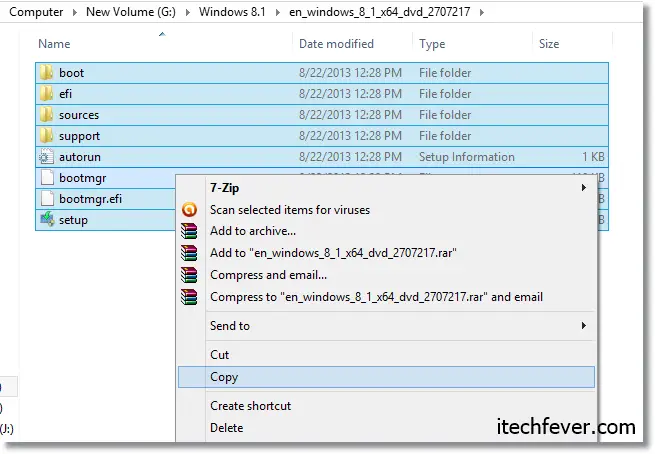
2. After extracting windows files, copy all files and paste them to the bootable Flash drive.
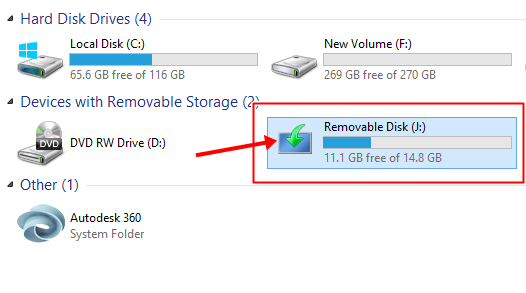
It may take some time to copy the files since Windows files take around 4 GB on the disk. The speed also depends on the flash drive. Use USB 3.0 flash drive on the same port for a faster transfer rate.
Once done, you are ready to install Windows using this flash drive. Remove and re-insert the flash disk, and it will get the windows setup icon which confirms that it is bootable media now.
Watch this video tutorial to make flash drive bootable.
To install Windows with this bootable flash drive, insert it into the computer and hit the boot key. From the list of bootable devices, select your flash drive and proceed to Windows installation.
Related– How to Install Windows 10 From USB Flash Drive [With Screenshots]
Conclusion
USB flash drives are handy tools to install Windows on any computer. You just need to make it bootable. Don’t rely on third-party apps for bootable USB. Cmd can do this task with a few commands within a minute.
Make sure you have a good flash drive. USB 2.0 is now older. Use USB 3.0 flash drives for a faster transfer rate hence the faster installation.
If you don’t have a USB 3.0 flash drive, get a Faster USB 3.0 Flash Drive from Amazon, which has a transfer speed of up to 225 MB/s.
After making the flash drive bootable, you can keep your data with Windows files that won’t affect Windows installation.
Must Read
- Ultimate Tips to Make Windows 8/8.1 Faster than Ever
- How to Fix Slow Running Windows 10 – 200% Faster PC
- Make Chrome Faster By Fixing High RAM Memory Usage
MobaLiveUSB is a small program to check if the USB drive is bootable or not. Copy the files to flash drive and run it from the drive. Use the Qemu engine to check.
Yes, you can copy files to USB drive along with Windows files. Or delete the Windows files and use it as you want.
You can copy the iso file to transfer it from one PC to another but you can’t install Windows. Extract the iso files and copy them to bootable USB to install Windows.