Even though with every Windows update, Microsoft tries to make Windows more efficient, many things can hinder it. One such thing is the background apps on Windows 11. While some are great and even handy occasionally, some apps only take unnecessary resources in the background. You can disable these apps to make your Windows more efficient and faster.
In this guide, you will find some easy ways to disable background apps in Windows 11 to boost your PCs performance. So make sure to follow the guide carefully.
Disable Background Apps in Windows 11
There are different ways to get rid of memory-intensive apps that start automatically with Windows. You can try any of these methods.
Debloating Windows 11
Disabling background apps alone won’t make your Windows more efficient. There are several other steps that you have to follow along with it. For instance, you can clean all the bloatware on your Windows.
We have a dedicated guide on how to debloat Windows 11. Read it here-
Read: How to Debloat Your Windows 11 to Unlock Maximum Performance
Once you do this, you can move to the next steps.
Disable Startup Apps From Task Manager
Windows has a lot of programs and apps that kick off when your PC starts, and they can hog the resources and often slow the entire interface. You can simply disable the unnecessary ones. Here is how:
Step 1: Hit the Windows Search icon on the taskbar, type “Task Manager,” and enter.
Step 2: Click on More details at the bottom to expand the task manager.
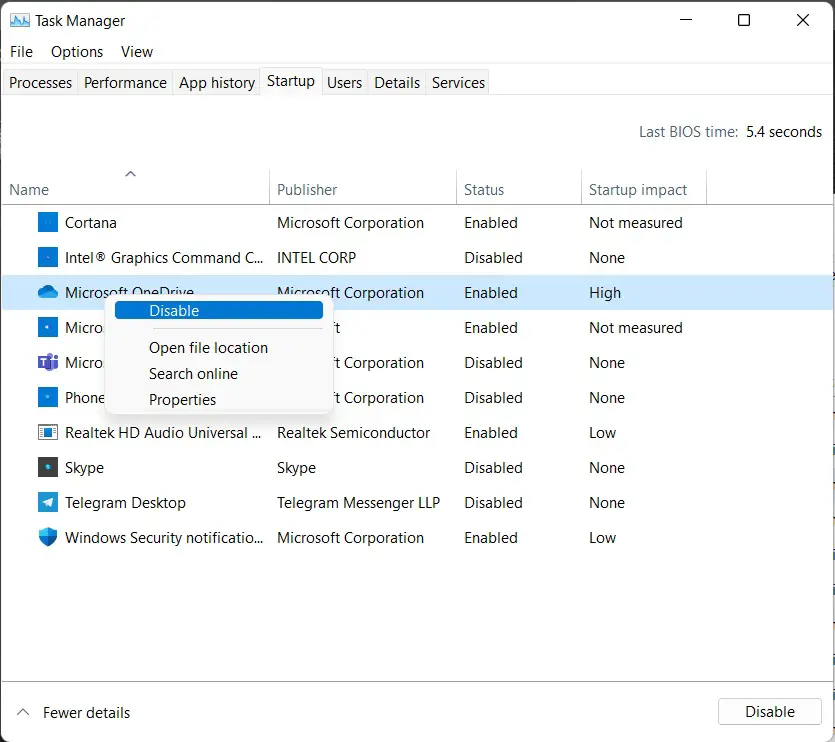
Step 3: Click on the “Startup” tab. If you can’t find this option, click on the hamburger menu at the top left.
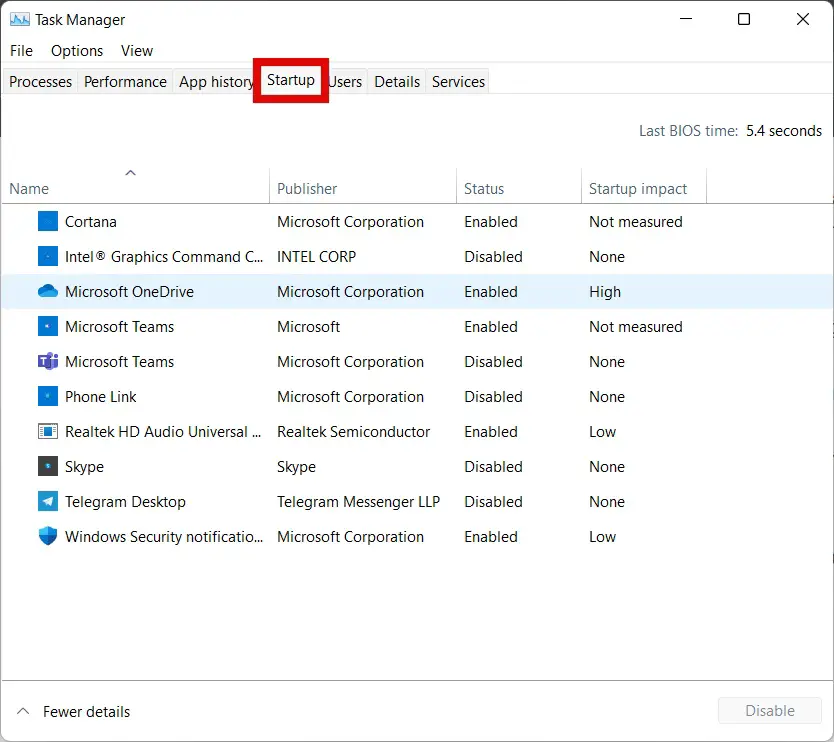
Step 4: Right-click on the program you want to disable and click Disable.
Alternatively, you can disable startup apps from “Settings. “
Step 1: Hit the search icon, type Settings, and hit enter.
Step 2: Go to Apps from the menu on the left.
Step 3: Click on Startup from here.
Step 4: Use the toggle to disable the apps you do not want to start up automatically.
Disable Background Apps Using Settings
Step 1: Hit the search icon, type Settings, and hit enter.
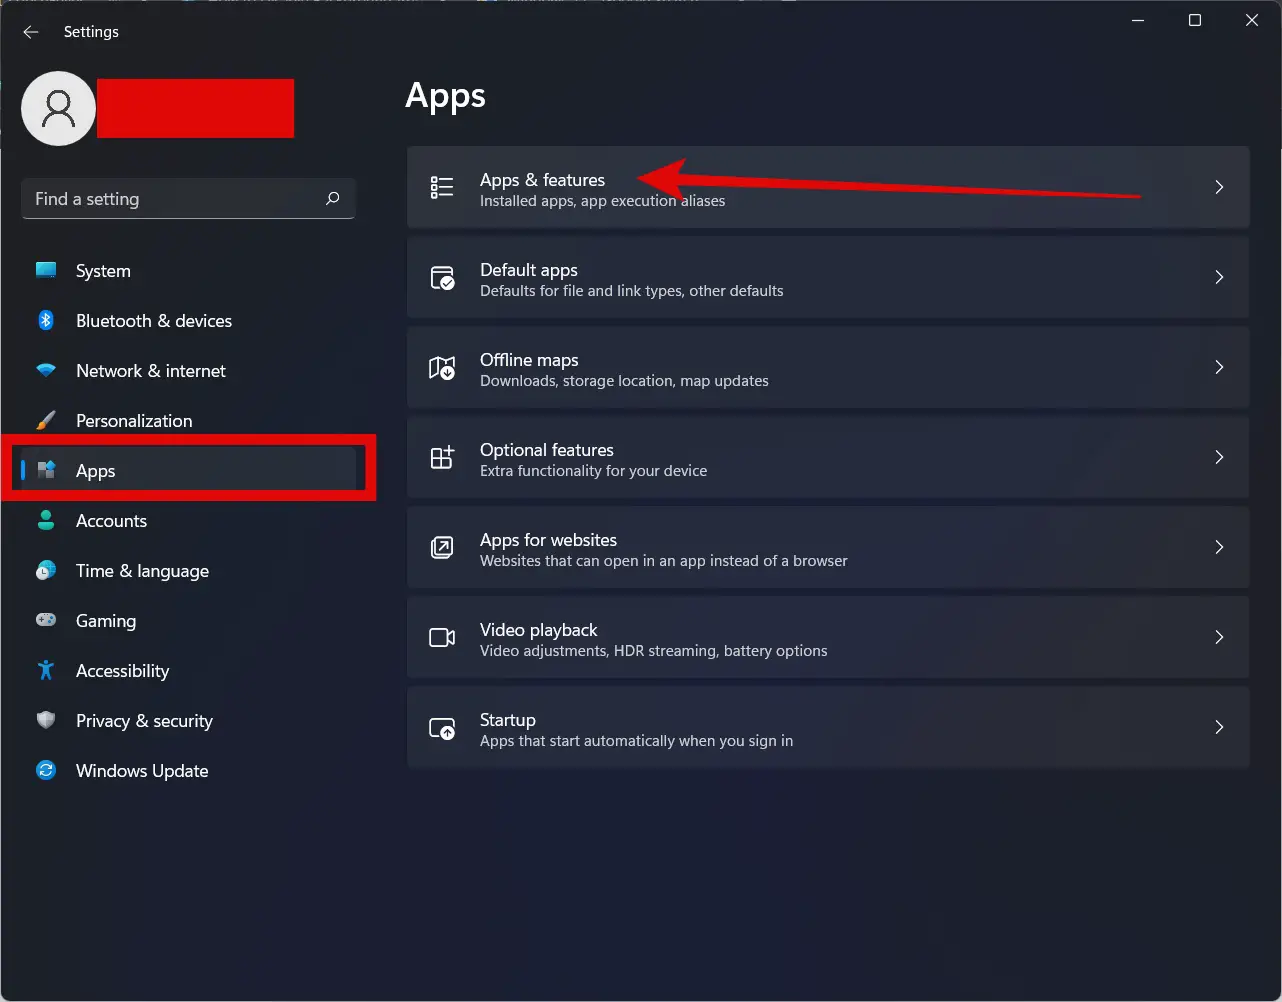
Step 2: Go to Apps from the menu on the left.
Step 3: Now click on Apps & features.
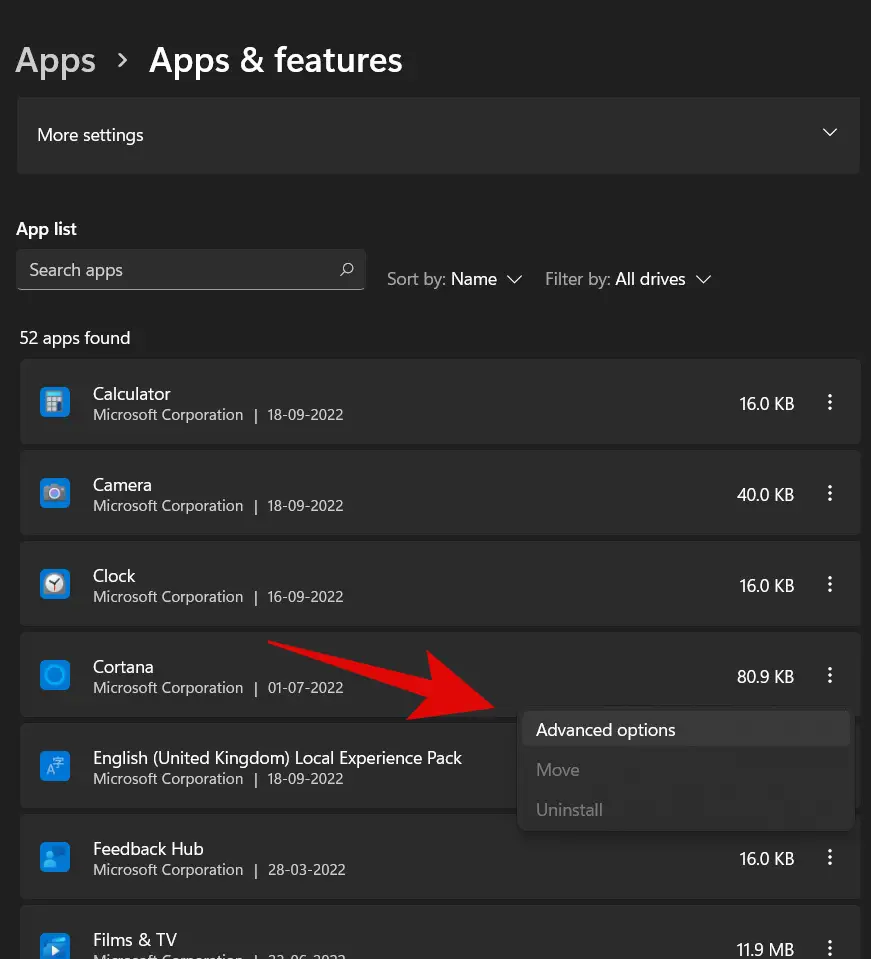
Step 4: Click on the three-dots icon next to an app’s name.
Step 5: Then click on Advanced options.
Step 6: Under Background app permissions, choose Never from the drop-down menu.
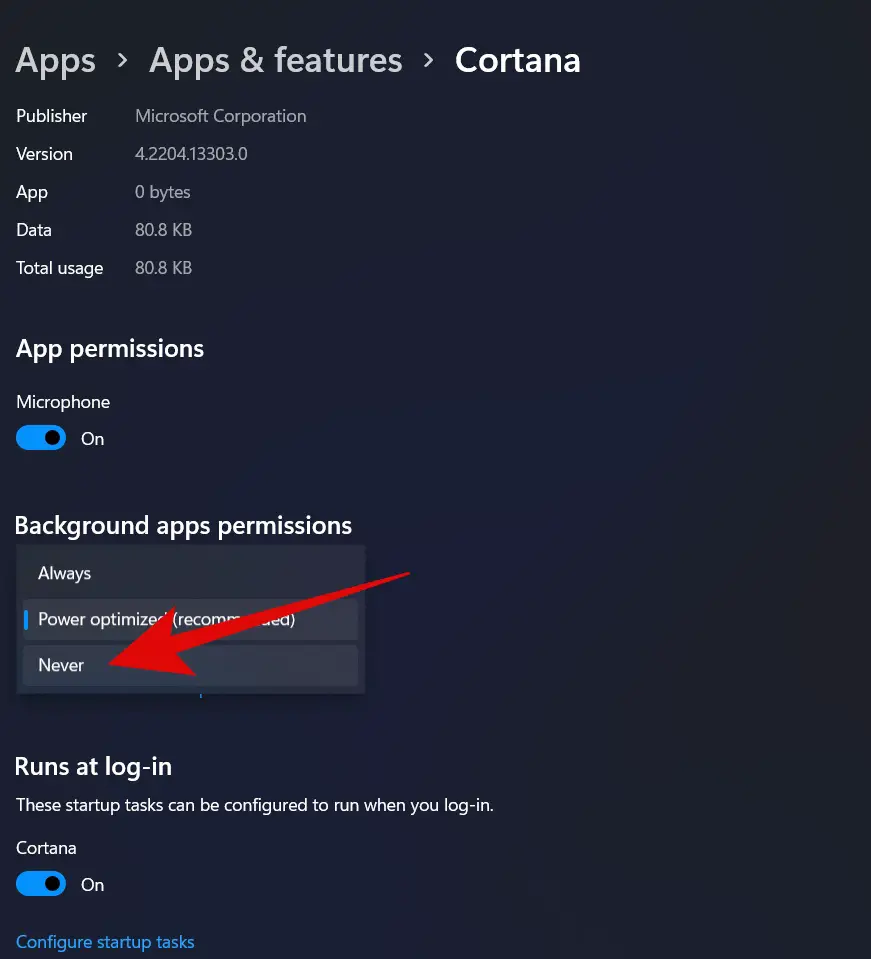
Step 7: Do this for the apps you want to disable the background permission.
Note: If you do not see the Background app permissions option on an app’s Advanced options, it probably does not runs in the background.
That’s it!
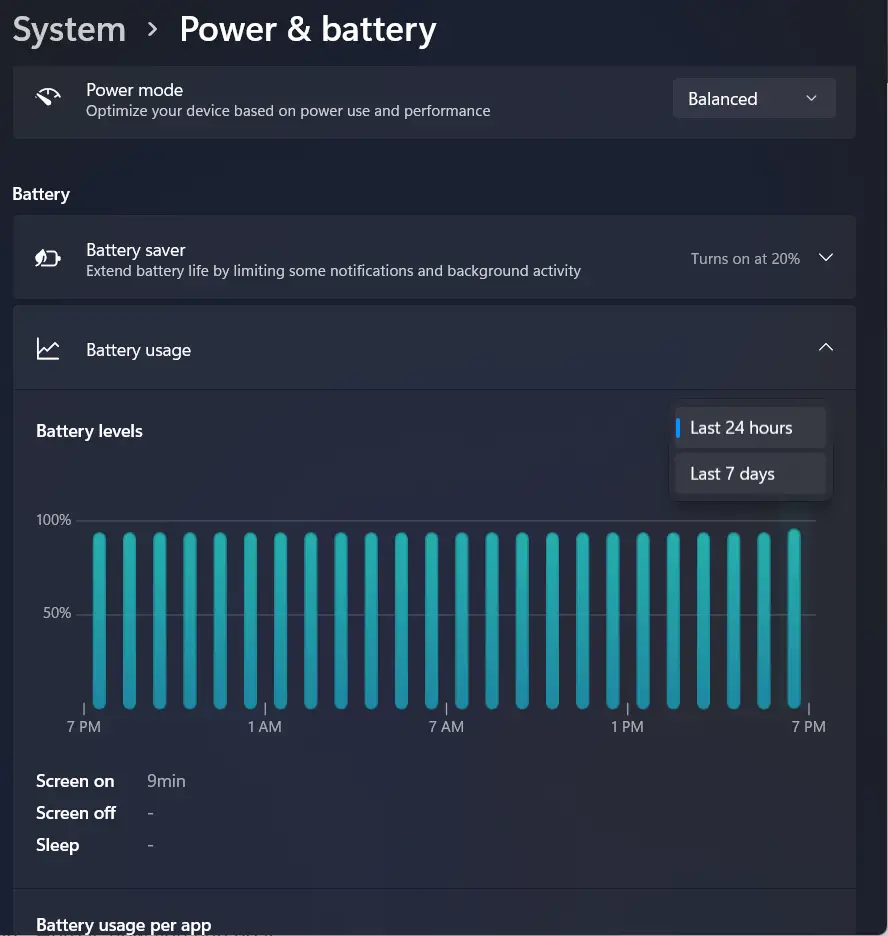
Using Battery Settings
Step 1: Hit the search icon, type Settings, and hit enter.
Step 2: Under the System tab, go to Power & battery.
Step 3: Under the Battery section, expand Battery usage.
Step 4: Use the drop-down menu and set Battery levels for “Last 7 days”.
Step 5: Click on the three-dots icon next to an app.
Step 6: Then click on Manage background activity.
Note: This option will be available only for the apps from the Microsoft Store.
Step 7: Under Background app permissions, choose Never from the drop-down menu.
Step 8: Do this for the apps you want to disable the background permission.
This should allow you to disable background apps that strain your laptop’s battery.
Using Group Policy Editor
This option is for users who have multiple user accounts on their PC. So it is a good idea to disable background apps for all users. Here is how you can do it:
Step 1: Click on the search icon, type “Run” and hit enter.
Step 2: In the Run dialog box, type “gpedit.msc” and hit enter.
Step 3: Follow this path: Computer Configuration\Administrative Templates\Windows Components\App Privacy
Step 4: double-click on the “Let Windows apps run in the background” in the right menu.
Step 5: Select the Disabled option, then click Apply and OK.
Using Registry Key
Step 1: Click on the search icon, type “Run” and hit enter.
Step 2: In the Run dialog box, type “regedit” and hit enter.
Step 3: Expand the following path: HKEY_LOCAL_MACHINE\SOFTWARE\Policies\Microsoft\Windows\AppPrivacy
Step 4: If you do not have the AppPrivacy key, you must create it. Otherwise, you can skip to Step 7.
Step 5: Right-click on the Windows key, and click on New>Key.
Step 6: Name this key as AppPrivacy.
Step 7: In the AppPrivacy key, right-click on the empty menu on the right side.
Step 8: Click on New>DWORD(32-bit) Value.
Step 9: Rename this key as LetAppsRunInBackground.
Step 10: Double-click to open it.
Step 11: Under Value data, type “2” and hit OK.
That’s it! Now you simply have to restart your PC.
Closing Phrase
So those are some of the methods to disable background apps in Windows 11. The goal is to make Windows more efficient, so you must follow all the abovementioned steps. You can simply disable background apps from settings, or you can even use the registry editor. Then you also have two more methods to do the same. We hope this guide helps you to make your Windows better. In case of any difficulty, feel free to reach out to us.
FAQs
A: Yes, you can eliminate bloatware to make Windows 11 more efficient.
A: It is totally safe to disable some startup apps that take unnecessary resources on your PC.
A: Yes, it is safe to use the registry editor. However, it is always a good idea to create a system restore point before doing so.