Want to make your AI character dance like a viral TikTok creator? Or recreate a cinematic reel using your own custom avatar?
Motion transfer is one of the most powerful AI techniques right now. It allows you to apply the exact body movements from any video to your AI-generated character, without complicated editing software or motion capture suits.
In this detailed guide, I’ll show you a practical, creator-friendly workflow using image models and OpenArt’s Motion Sync feature. I’ll also share important tips most tutorials skip, so you get clean, professional results.
What Is Motion Transfer?
Motion transfer is a technique where:
- A reference video provides the movement (dance, walk, gestures, etc.)
- An AI-generated character image becomes the performer
- The system applies the exact timing and motion from the reference video to your character
This is especially useful for:
- Instagram Reels
- YouTube Shorts
- AI influencer content
- Virtual characters
- Music videos
- Faceless content strategies
Step-by-Step: Transfer Motion from Any Video
Step 1: Choose or Record a Reference Video
You can use:
- Your own recorded dance
- A cinematic walking clip
- A viral Reels/TikTok dance
- Any short body movement video
Tip:
Choose videos with:
- Clear body visibility
- Stable camera
- Good lighting
- Minimal background clutter
The cleaner your input video, the better your output.
Step 2: Capture the First Frame
Pause the video at the very first frame and take a screenshot.
Why this matters:
AI motion tools work best when:
- The generated character starts in the same pose and framing
- The camera angle matches exactly
- Body proportions align closely
This step dramatically improves motion accuracy.
Step 3: Recreate the Same Pose Using Your AI Character
Now upload:
- The first frame screenshot
- Your AI character (or your own image if swapping identity)
Use image generation tools like:
- ChatGPT Image Generation
- Midjourney
- Nano Banana Pro
- Any advanced image model
Tip: Use Nano Banana Pro on OpenArts to achieve the best results without a watermark.
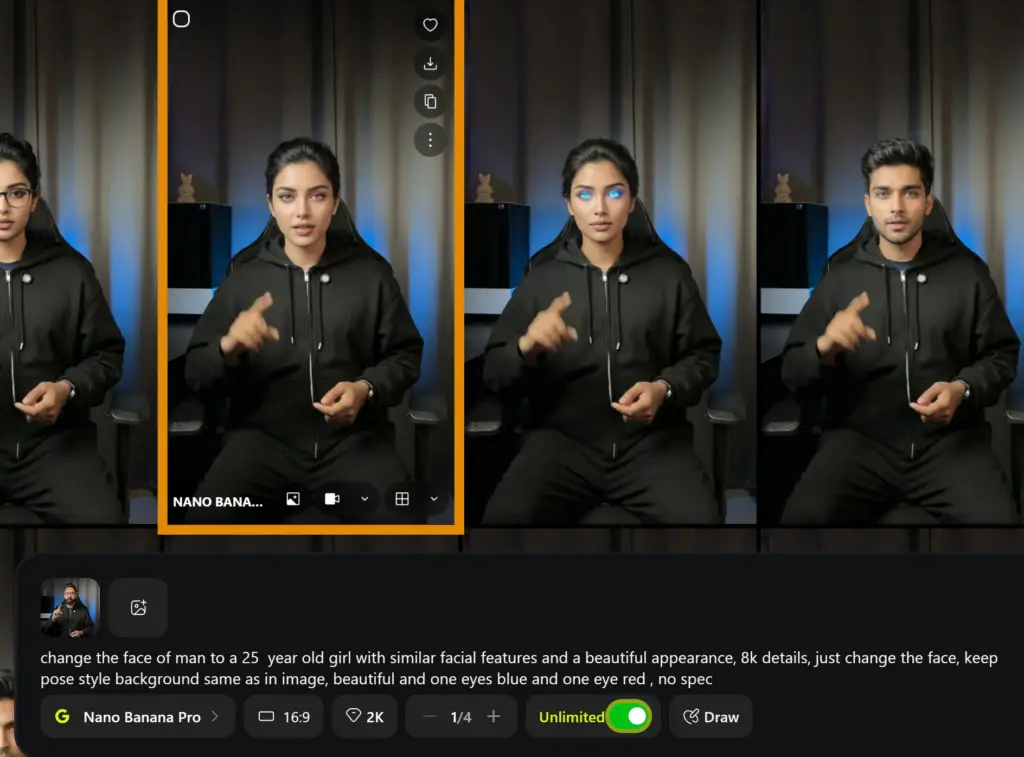
Use This Base Prompt:
Use the first reference image to recreate the exact same composition and pose for Model 2. Maintain the same camera angle, framing, and body posture, but change the outfit to a different, well-coordinated outfit in red. Ensure the new clothing matches the overall style and fits naturally while keeping the model’s identity and pose consistent.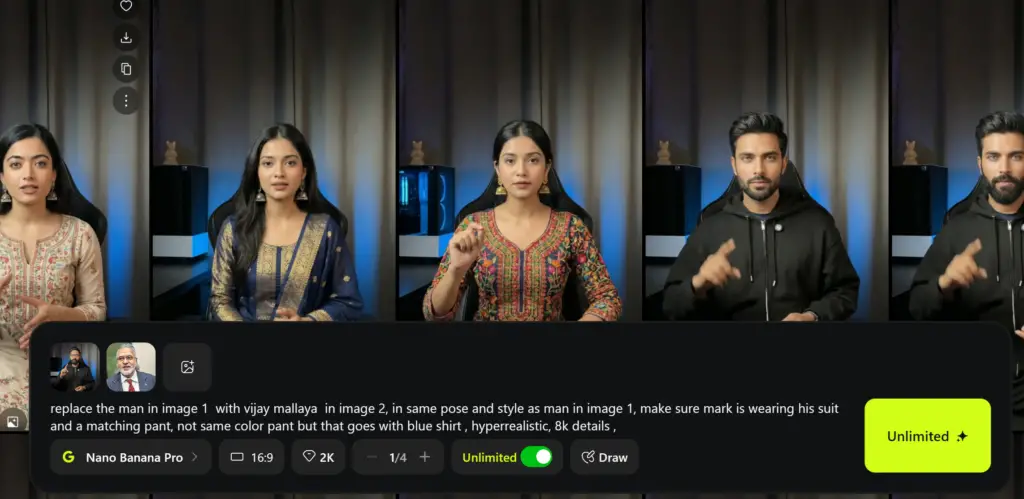
You can modify:
- Outfit color
- Background
- Lighting style
- Camera distance
- Expression
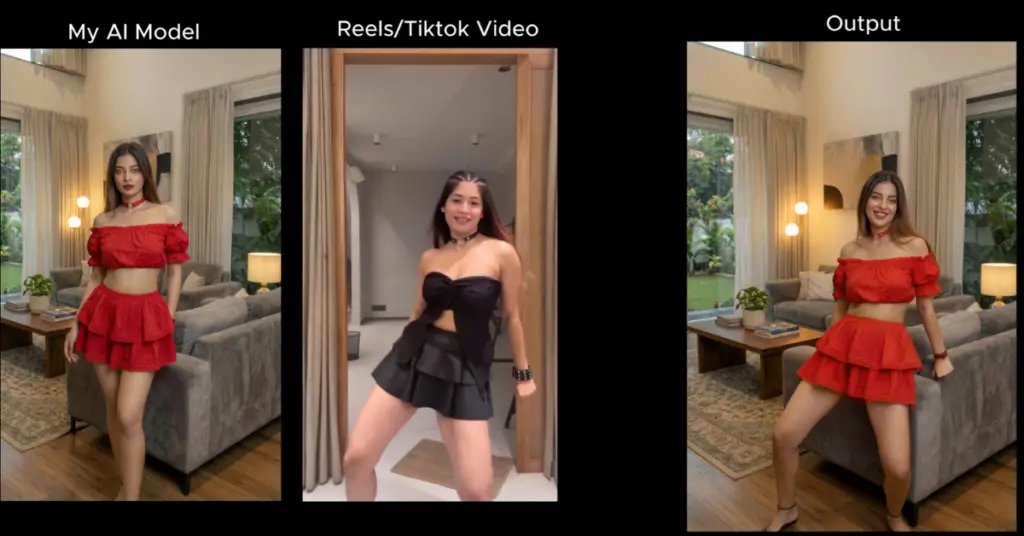
Example Workflow:
Original first frame:
AI recreated a character in the same pose:

If you don’t have an AI character, then simply write a prompt to swap the person with the character that you want.
Step 4: Apply Motion Using OpenArt Motion Sync
Go to the OpenArt Website.
Video → Motion Sync
Select the Kling 2.6 model.

Inside the dashboard:
- Keep original sound (optional)
- Upload your AI-generated character image
- Upload the reference video
Select:
- Motion Reference: Exact
- Mode: Video
- Standard or Pro (Pro gives cleaner results)
Optional Motion Prompt
Use the uploaded reference dance video and apply the same full-body motion to this character. Match arm movements, leg steps, motion, and timing from the reference video. Keep the character's appearance, outfit, and proportions exactly the same. Ensure smooth, natural, continuous motion with stable anatomy. Plain background remains unchanged. No camera movement. No text. No watermark.Then generate.
It usually takes a few minutes.
OpenArt’s Kling Motion Control model handles timing, limb tracking, and motion syncing very accurately when the starting pose matches well.
Video Tutorial:
Pro Tips for Better Results
Most people skip these, but they make a huge difference.
1. Match Body Proportions Carefully
If the reference video shows:
- Long legs
- Slim build
- Athletic body
Your AI character should have similar proportions.
Extreme differences can cause warped motion.
2. Avoid Extreme Camera Angles
Avoid:
- Side angles
- Top-down shots
- Heavy zooms
Front-facing or slightly angled videos work best.
3. Keep Background Simple
Busy backgrounds can cause:
- Limb distortion
- Ghosting artifacts
- Blurry motion
Plain or minimal backgrounds perform better.
4. Use High Resolution Image
Generate your character image in:
- 1024px or higher
- Sharp and clean edges
- Full-body visible
Cropping ruins motion accuracy.
Creative Use Cases
Here’s how creators are using motion transfer:
1. AI Influencer Content
Turn one static character into:
- Dance reels
- Fashion modeling
- Lip-sync videos
2. Cinematic Character Animations
Create:
- Fantasy warriors walking
- Nordic princess dancing in snow
- Cyberpunk models moving in neon streets
3. Music Video Production
Match:
- Beat drops
- Hook steps
- Viral choreography
Without hiring dancers.
4. Faceless Content Strategy
Don’t want to show your face?
Use:
- A custom AI avatar
- A stylized anime character
- A hyper-realistic digital version of yourself
Common Mistakes to Avoid
- Using low-quality screenshots
- Ignoring pose alignment
- Cropping feet or hands
- Using moving camera videos
- Not matching starting pose
Motion transfer is not magic.
It is precise alignment.
Final Thoughts
Motion transfer is becoming one of the most powerful tools for AI creators.
You don’t need expensive software.
You don’t need motion capture suits.
You don’t need a production team.
With:
- A clean reference video
- A properly aligned AI character
- And tools like OpenArt Motion Sync
You can create viral-quality animated AI content in minutes.
If you’re serious about building AI tools, content automation workflows, or viral tech content, keep experimenting with this method.
It’s only getting better.