Shifting to macOS can be a totally new experience for many people. There are a lot of subtle changes that slowly grow on you if you get a new Mac or shift to Mac from Windows. One of the queries a lot of users have is how to take a screenshot on Mac whether it is intel or M1 Mac.
Taking a screenshot on M1 Mac is relatively easy. In this guide, you will see all the methods by which you can take a screenshot on your Mac.
I am going to use the 2020 MacBook Air M1 with macOS Big Sur. These methods also apply to all the intel Macs and all the recent macOS versions.
Take A Screenshot on Mac
Method 1: Taking Screenshot of the Entire Screen
This is the Windows equivalent of taking screenshots. By this method, you can take a screenshot of your entire screen. Here is how you do it.
Step 1: Open the screen on which you want to take a Screenshot.
Step 2: Now press the “command⌘+shift+3” keys together and your system will take the screenshot of the entire screen.
Step 3: By default, it will be saved on the Desktop and you can access it from there.
That’s it! This is the easiest way to take a screenshot on your Mac.
Method 2: Taking Selective Screenshot
If you do not want to capture the entire screen of your Mac, you can use this method to select the range of your screenshot.
Step 1: Open the screen on which you want the screenshot.
Step 2: Press the “command⌘+shift+4” keys together and you will see a crosshair tool.

Step 3: Click on your mouse or tap on your trackpad, select the area you want to capture and then release your finger.

That’s it!
The area you select with your mouse or trackpad will be captured and saved on the desktop.
Method 3: Taking Screenshot of a Particular Menu
If you just want to take a screenshot of a particular menu, you can do that too and it is fairly easy.
Step 1: Open the menu for which you want the screenshot.
Step 2: Press the “command⌘+shift+4” keys and then press the space bar.
Step 3: You will now see a camera icon, just go to the menu you want to capture and it will be highlighted. Once highlighted, click or tap on your mouse to take the screenshot.

For example, I used the above step to capture my dock.

Method 4: Taking a Screenshot of Touchbar
If you are a user having a MacBook Pro with Touch Bar and you want to take a screenshot of your Touch Bar, you can do it too.
All you have to do is press the “command⌘+shift+6” keys together and it will take a screenshot of your Touch Bar.
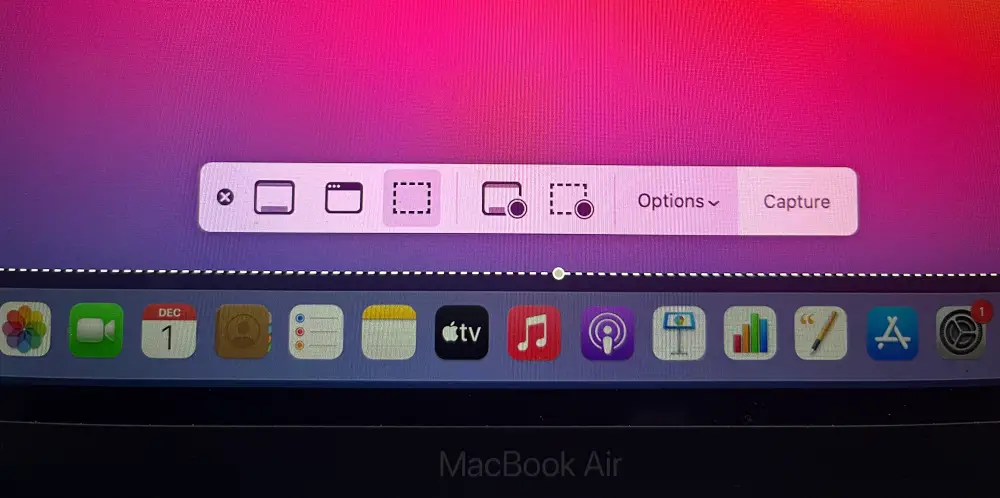
Method 5: Using Built-In Tool to Take Screenshot and Record the Screen
The newer versions of macOS come with a built-in tool that allows you to take all types of screenshots and record the screen on your M1 Mac as well.
To open the tool, just press the “command⌘+shift+5” keys together.
Here you will get the options to take screenshots of the entire screen, selective screenshots, or take screenshots of a particular menu. Not only that, but you also get the option to record your entire screen and record the selective area of your screen.
To open this tool on a MacBook Pro with Touch Bar, just expand your Touch Bar Menu and tap on the Camera icon.
Method 6: Using the Preview Menu
Using the Preview menu, you can take a screenshot. This is good for people who always forget these shortcut keys. Here is how you do it:
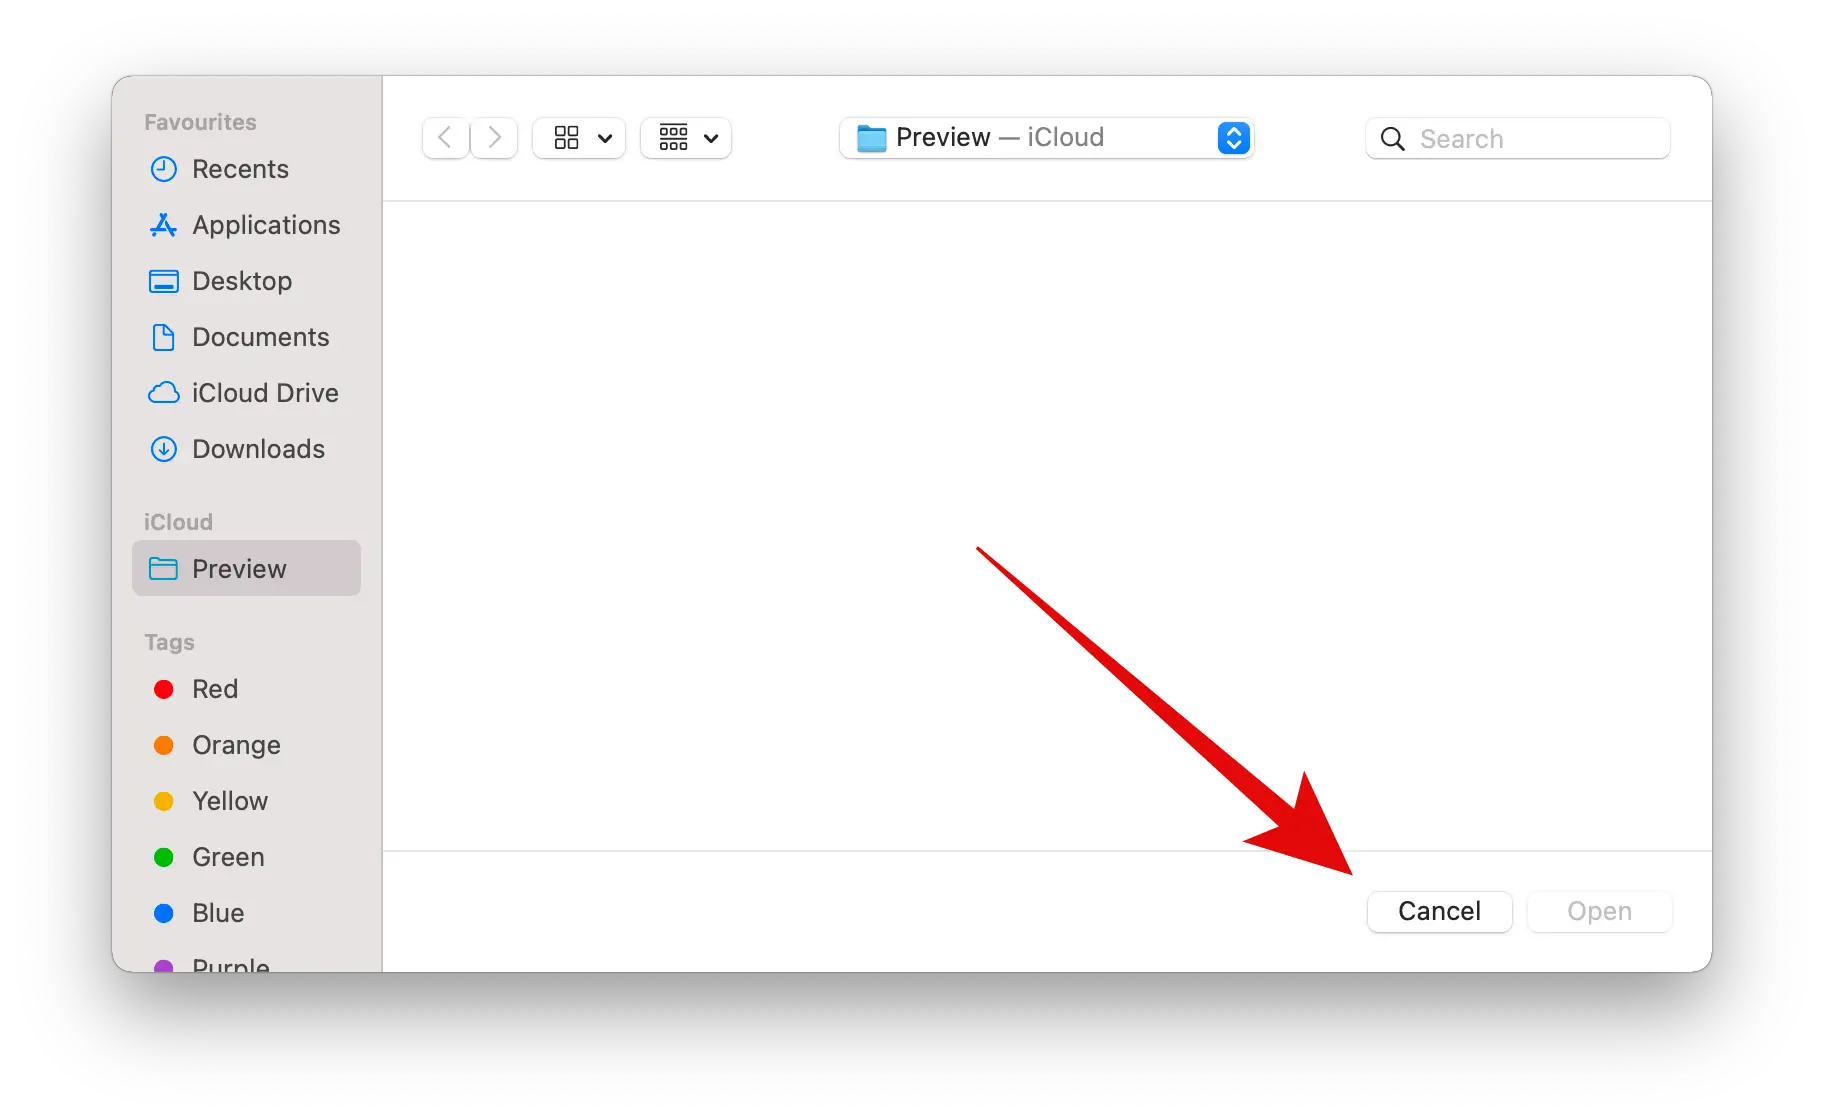
Step 1: Open the window for which you want the screenshot.
Step 2: Go to the Dock and open Preview.
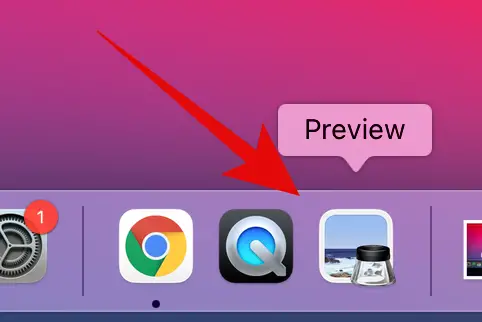
Step 3: Once the menu opens, do nothing and just tap on Cancel. Make sure to not click or tap anywhere.
Step 4: Now click on File on the Menu Bar at the top.
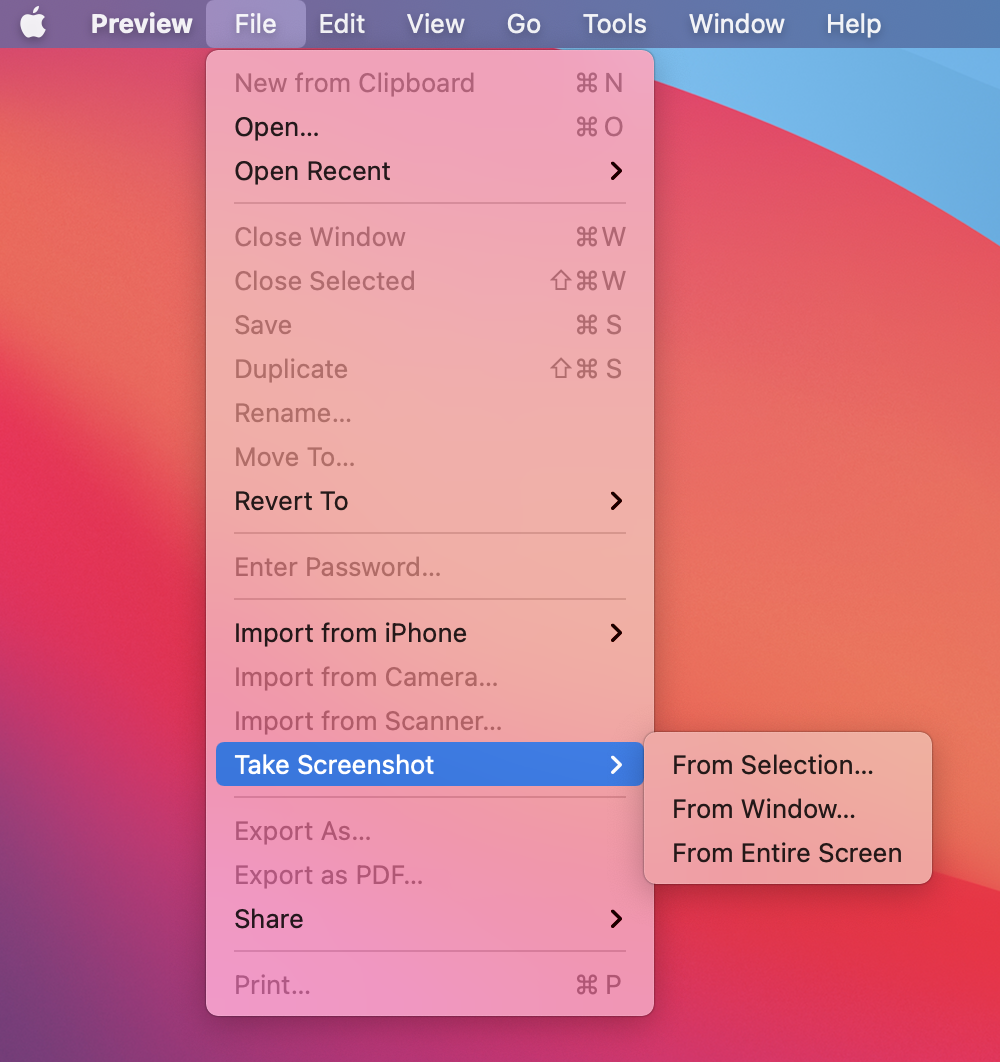
Step 5: Navigate and click on Take Screenshot.
That’s it! Here you will find all the options to take different types of screenshots.
Quick Tip
If you just want to take a screenshot to paste it in doc or somewhere else then there is not really a need to save it on your computer. If you want to take a screenshot on Mac and directly paste it to doc, you can do it easily.
All you have to do is press the Control(^) key also while you take the screenshot.
For example, if you want to take a screenshot of your entire screen and directly paste it somewhere without saving, you can press the “control^+command⌘+shift+3” keys together and then paste it on the location. By doing this, the screenshot image will not be saved on the computer. Instead, it will be directly pasted from the clipboard.
Closing Phrase
Taking screenshots on Mac is easy, you just have to remember the key combinations. Or you can use the preview app to capture the screen. You can use the above methods on any Mac device and it should work totally fine. In case of any difficulty, feel free to reach out to use anytime in the comments.
Read Next