Are you unable to hear audio from the speakers of your Windows 11 device? If yes, then you can easily fix the sound output problem of your device. However, this problem may occur both in Windows 11 laptops as well as desktop PC. There are numerous ways in which this problem can be fixed. Some of these are by updating the drivers, reinstalling the driver and system configurations, and restarting the audio services.
This article includes a freshly curated list of ways that can efficiently fix no sound output problems for all your Windows 11 devices.
Ways To Fix Audio Output Problems On Windows 11
All audio output of your Windows 11 devices can undoubtedly be fixed by selecting any of the methods included in this article.
Method 1: Check Audio level & Output Device
This is certainly one of the easiest methods to fix the problem. In this method, the users must observe a few things on their PC. These may include setting to the preferred audio level, selecting the current output device, assuring that the speakers are unmuted both from Settings as well as from the dedicated key on your keyboard, and selecting the correct output device.
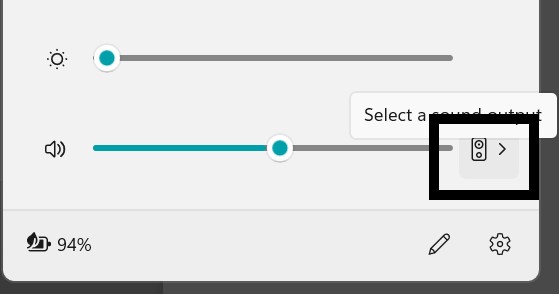
In order to check if the correct output device is selected, you can click on the system tray from the Taskbar, followed by clicking on the Select a sound output button.
Then select the correct output device from the available list of output devices. If the user is using a laptop, then they must select either Realtek digital output or headphones in case they have connected headphones to their device.
Method 2: Windows Update
Another easy as well as effective method is Windows Update. This helps you to keep your device up to date by downloading and installing the latest updates.
1. Start by opening Setting App directly or by pressing Windows + I keys together.
2. Click on Windows Update from the left pane, then click on Check for Update from the right pane.
3. Now, download and install the available updates.
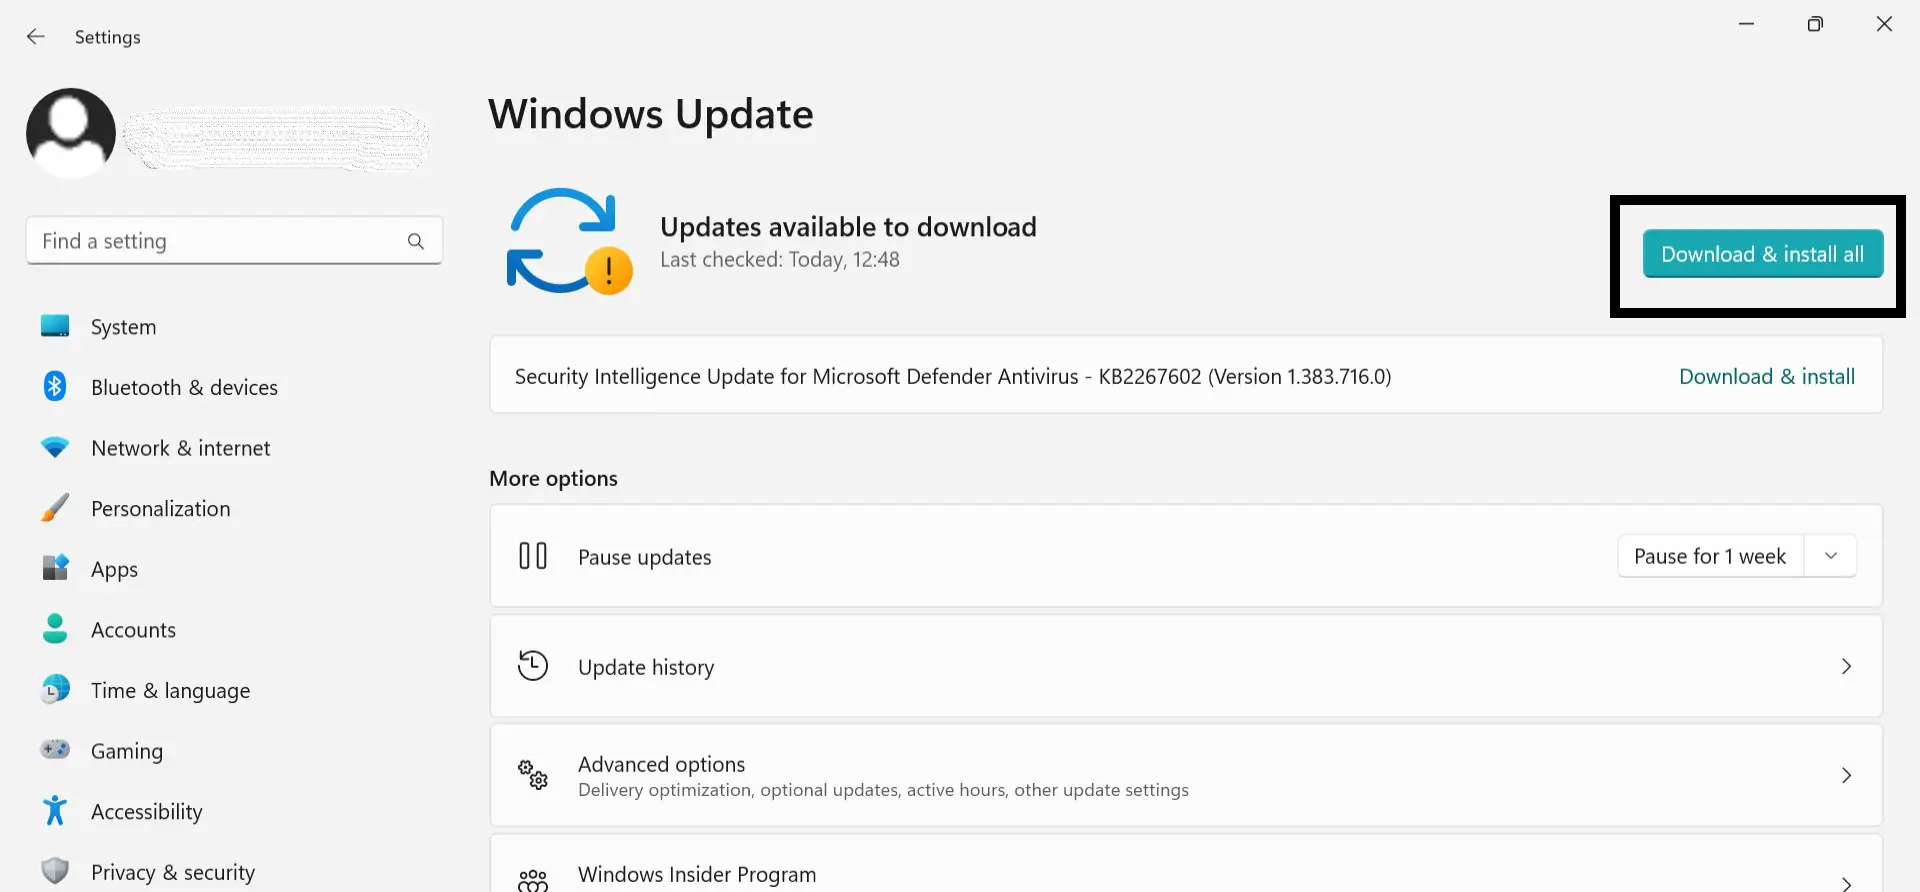
4. Lastly, restart your PC and observe if the audio output problem on your Windows 11 device has been fixed.
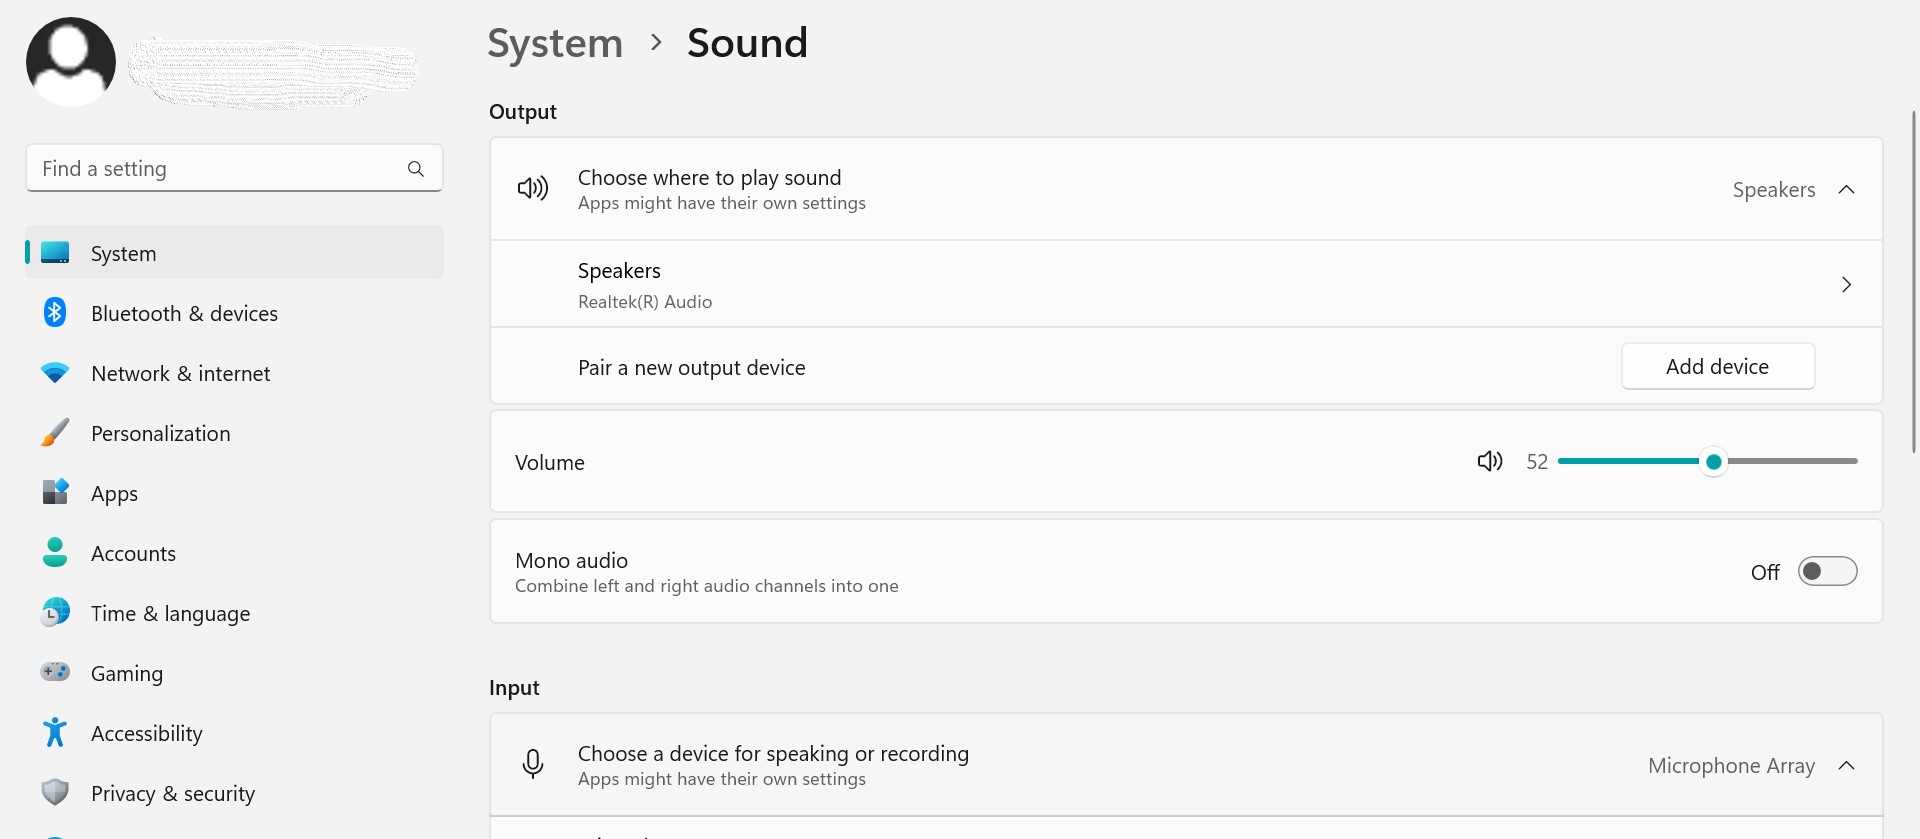
Method 3: Check Sound Devices
1. Start by opening Setting App directly or by pressing Windows + I keys together.
2. Click on System from the left pane, then click on Sound from the right pane.
3. Select any audio output device from the available options. Or you can add a device under the Output option to pair a new Bluetooth device.
4. Now, scroll down to the Advanced option and then click on All sound devices.
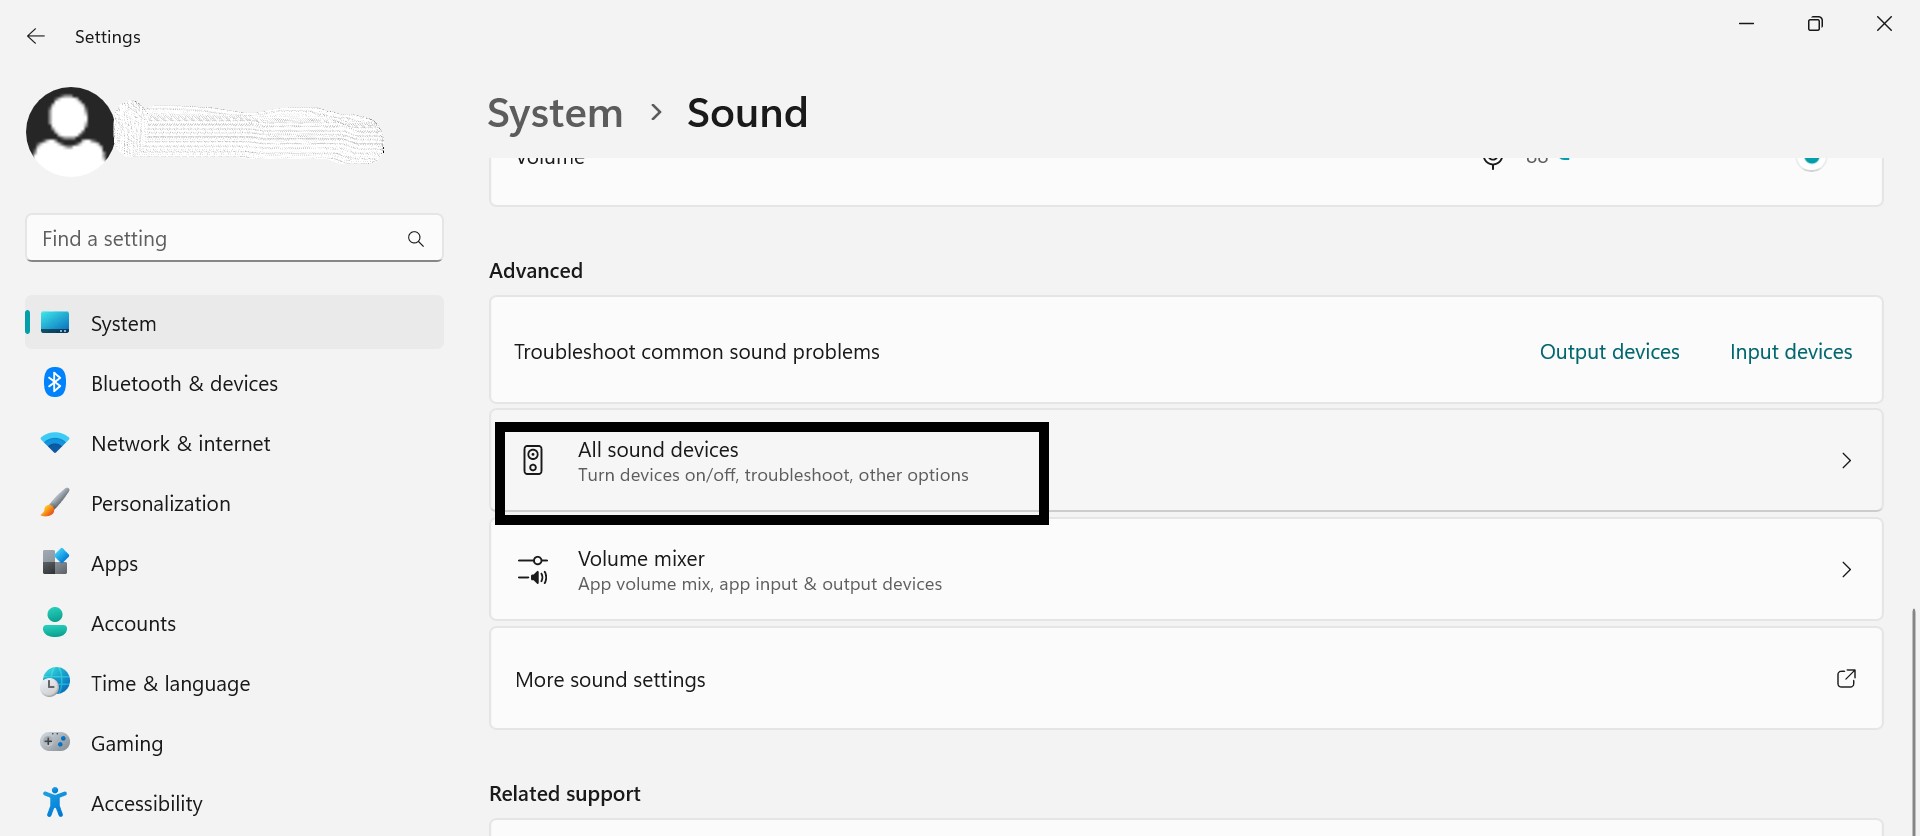
5. Click on the audio output device.
6. Lastly, tap on Allow beside the Audio output under the general option.
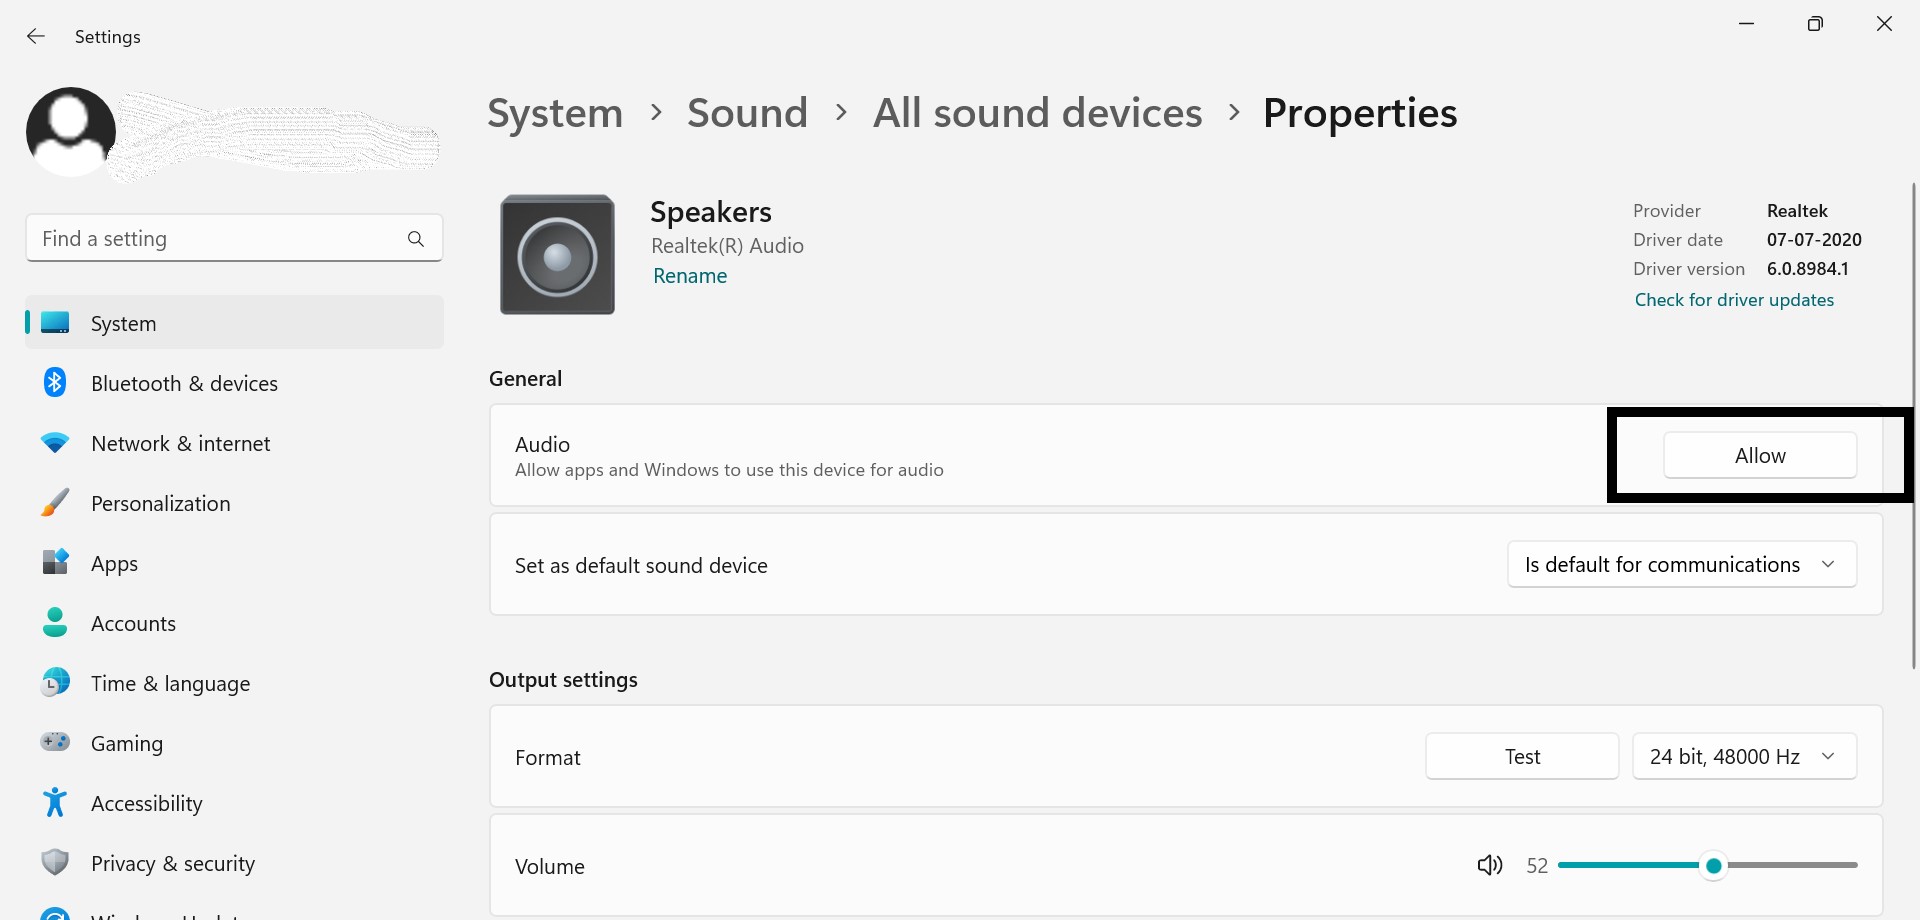
Now, check if the audio is audible or not.
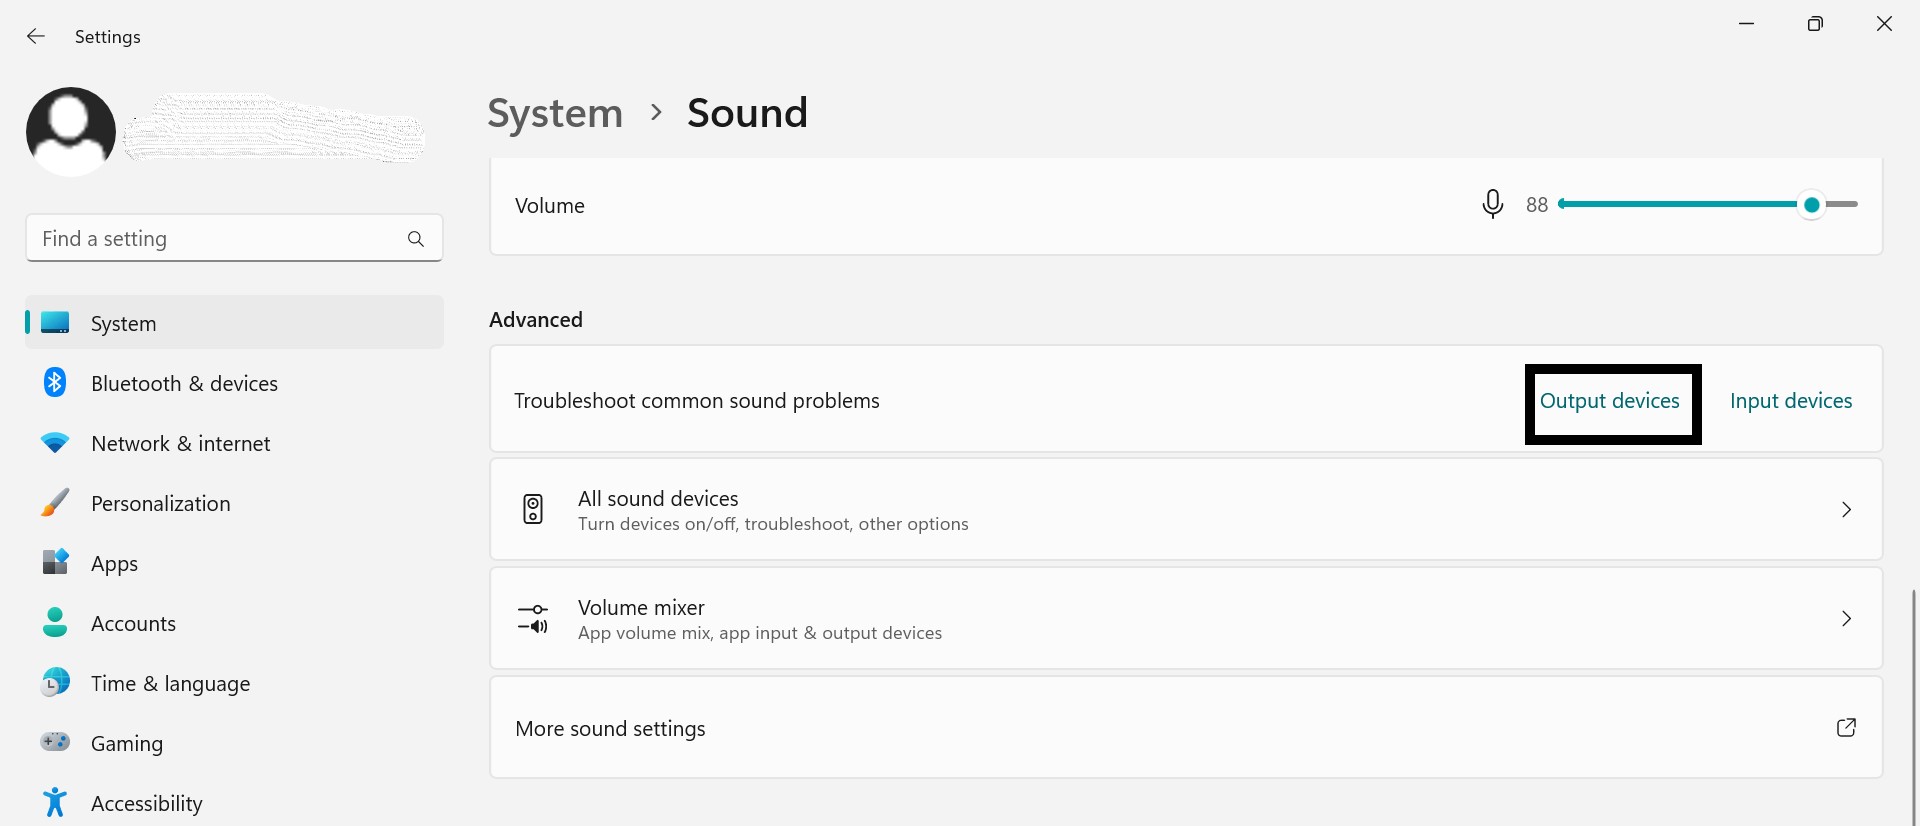
Method 4: Fix Audio Problems via Windows Troubleshooter
Windows troubleshooter is another great way to fix sound-related problems. The tool will automatically find the issue and suggest a fix or fix it for you.
1. Start by opening Setting App directly or by pressing Windows + I keys together.
2. Click on System from the left pane, then click on Sound from the right pane.
3. Scroll down to Advanced and then click on Output devices beside Troubleshoot common sound problems.
4. Now, select an output device from a list of these. (if you know the correct output device, then select it else, select any of them to try and test with different output devices)
5. Then click on next.
6. Now, Windows Troubleshooter will try to find and then fix the problem.
(It might also give you the option to fix the problem, then follow the on-screen instruction to evidently find an existing problem with the output device to fix problems.)
Method 5: Update or Uninstall and Reinstall Audio Drivers
You can fix outdated as well as problem-causing audio drivers using Device Manager. You can use this to either update, uninstall, or reinstall any troubled driver.
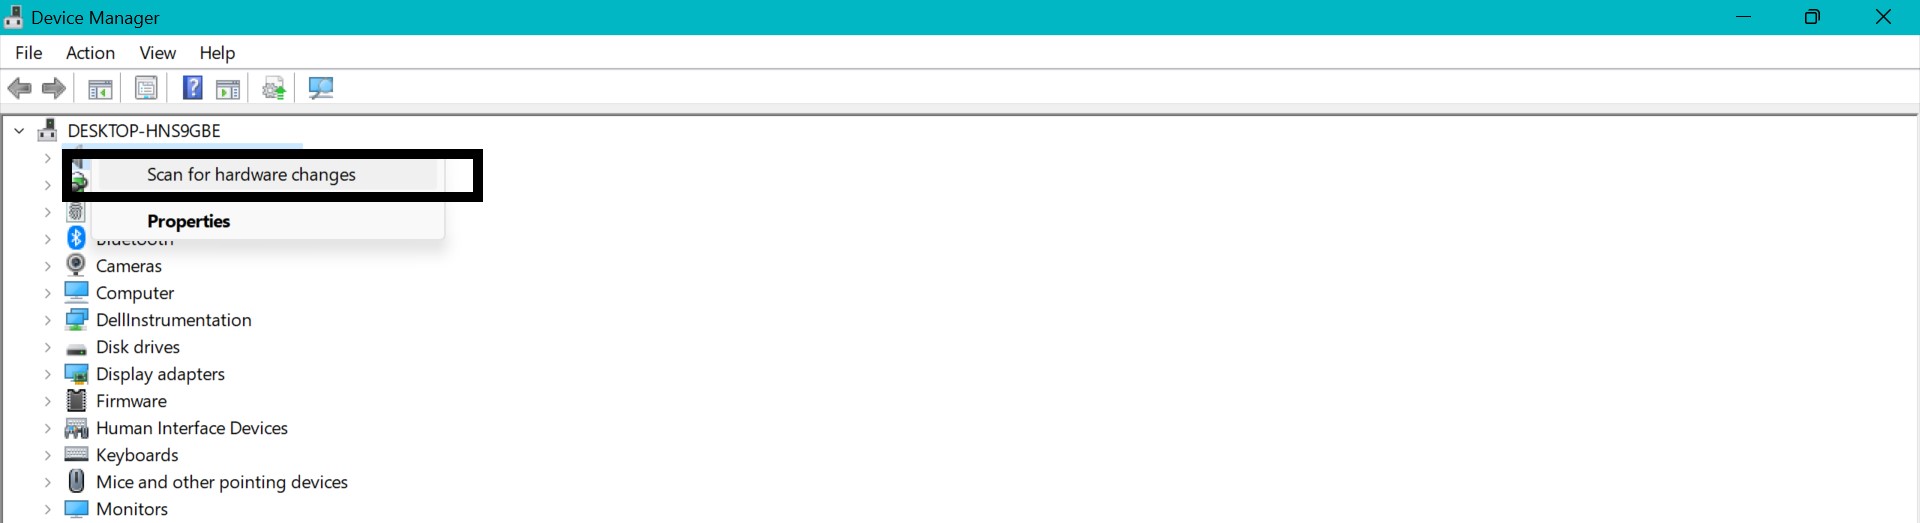
1. Go to the search bar and search for Device Manager, then open it.
2. Right-click on the audio input and output option and click on scan for hardware changes. (Now, check if you can hear audio or not. If it does not help, then follow the next step.)
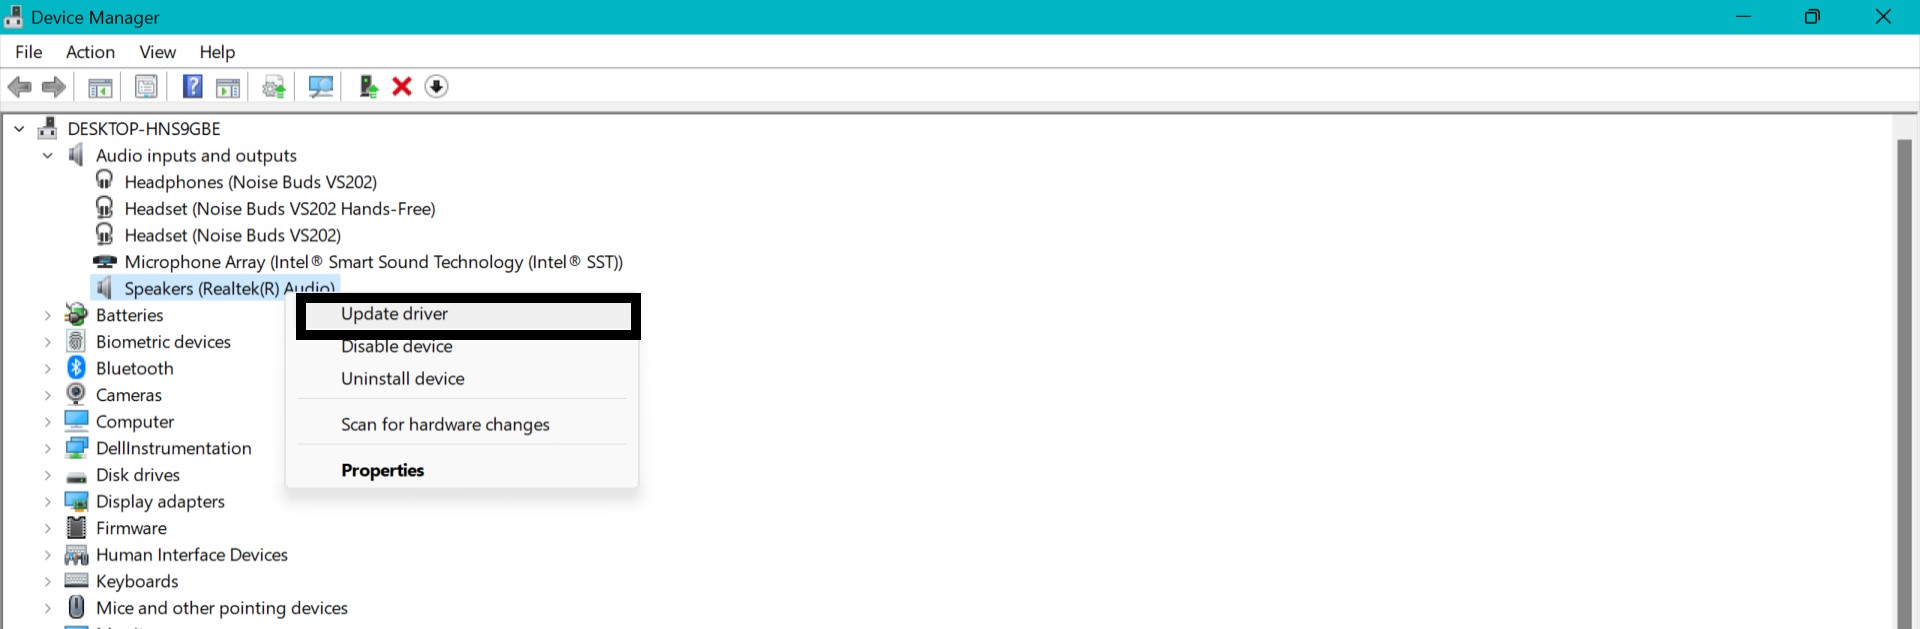
3. Right-click on the suitable audio output driver. Though, in most cases, it would be Realtek high definition audio output driver.
4. Click on Update driver.
5. Now, click on search automatically for the driver. (This will install the newly available updates; else, it will show that the best driver is already installed.)
6. If the best driver is installed, then right-click on the driver and also click on Uninstall device.
7. Click on Uninstall, then restart your PC. (After the restart, it will auto-install the driver. Now, check if you are able to hear the audio or not. If not, then follow the next step.)

8. Open the Device Manager again and then expand the audio input and output option to select the audio driver.
9. Here, right-click on the selected audio driver.
10. Then click on Properties.
11. Select the Driver tab from the top. If the Roll Back Driver option is enabled, then click on Roll Back the Driver and Restart your PC. (Now, check if you can hear the audio or not. If not, then follow the next step.)
12. Right-click on the driver again, then click on Update driver.
13. Now, click on Browse my computer for driver.
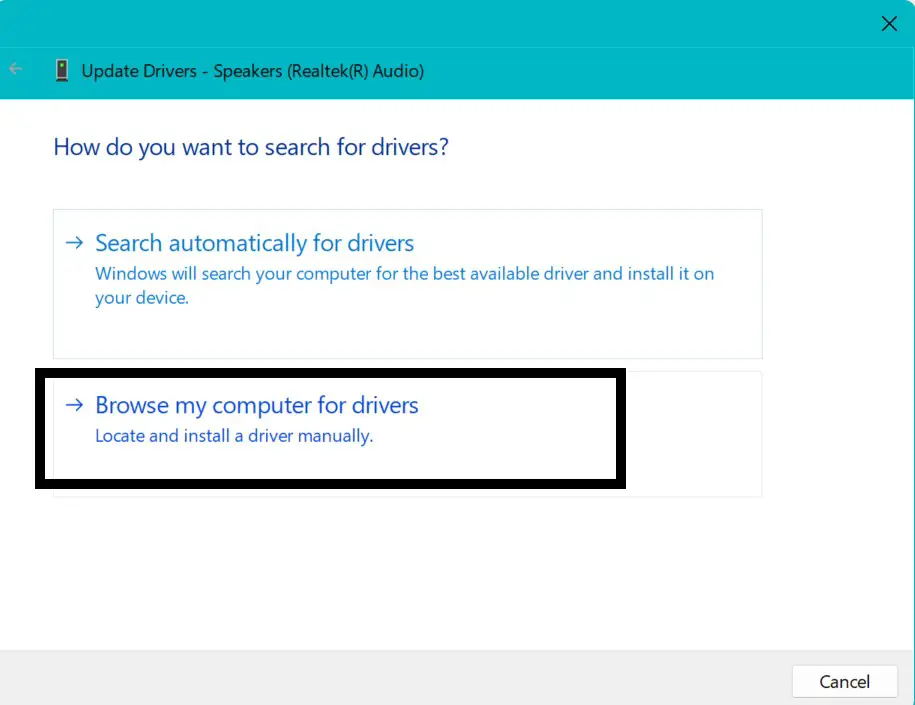
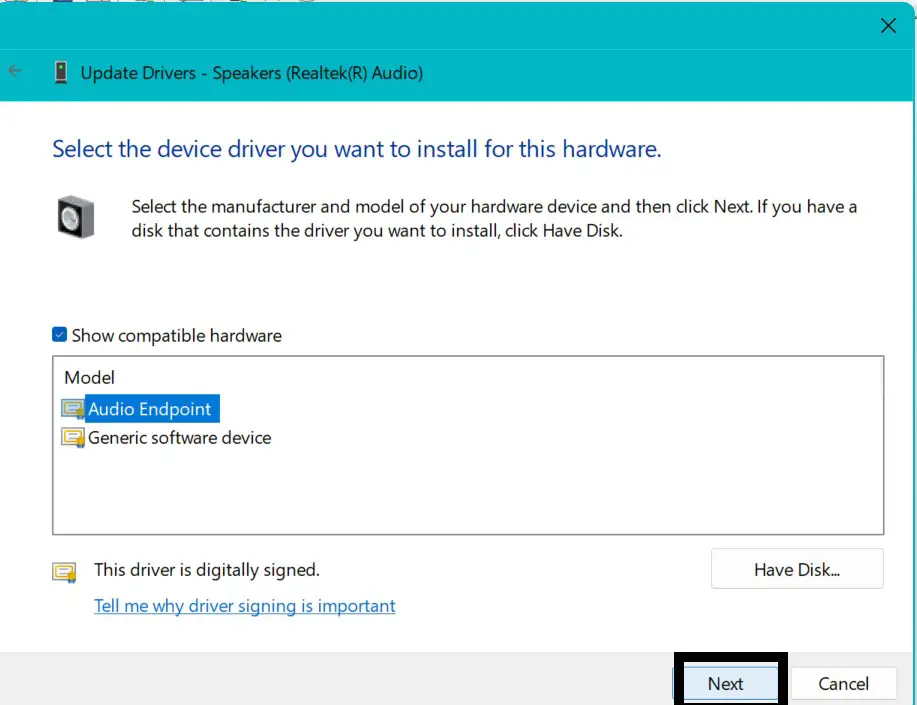
14. Click on Let me pick from a list of the available drivers on my computer. Also, click on the box beside show compatible hardware.
Then select your suitable audio driver, i.e. Realtek digital driver, from the list of available drivers and click on next. This will install that audio driver.
Now, check if the audio is working or not.
Update additional drivers
Besides the audio input and output option, these audio drivers are also available inside the Sound video and game controllers option in Device Manager.
You need to update/reinstall audio drivers under the sound video and game controllers. Just follow the above steps.
1. Expand the Sound video and game controllers option. Find and right-click on your preferred audio driver (here, Realtek(R) Audio) from the huge list of these.
2. Click on Uninstall device. Then click on uninstall.
3. Now, restart your PC to reinstall the driver again. Otherwise, click on the Action tab from the top and then click on Scan for hardware changes. This will install the driver again.

4. Check if the audio output is available, and if not, then right-click on the audio driver again and click on update driver.
5. Now, click on Browse my computer for driver.
6. Click on Let me pick from a list of the available drivers on my computer. Click on the box beside Show compatible hardware.
7. Here, select High Definition Audio Device and click on Next. (Ignore this driver update warning and undoubtedly click on Yes, if required) This will install the High Definition Audio Driver.
8. Now, Restart your PC. (Check if you are getting audio output or not. If not, then follow the next step.)
9. Expand the Sound video and game controllers option from Device Manager. Find and right-click on Realtek(R) Audio.
10. Click on Update driver.
11 Now, click on Browse my computer for driver.
12. Select Realtek high-definition audio driver and tap on Next. This will install it.
13. Lastly, Restart your PC and observe whether you are getting audio output.
Method 6: Install Realtek Audio Driver Manually
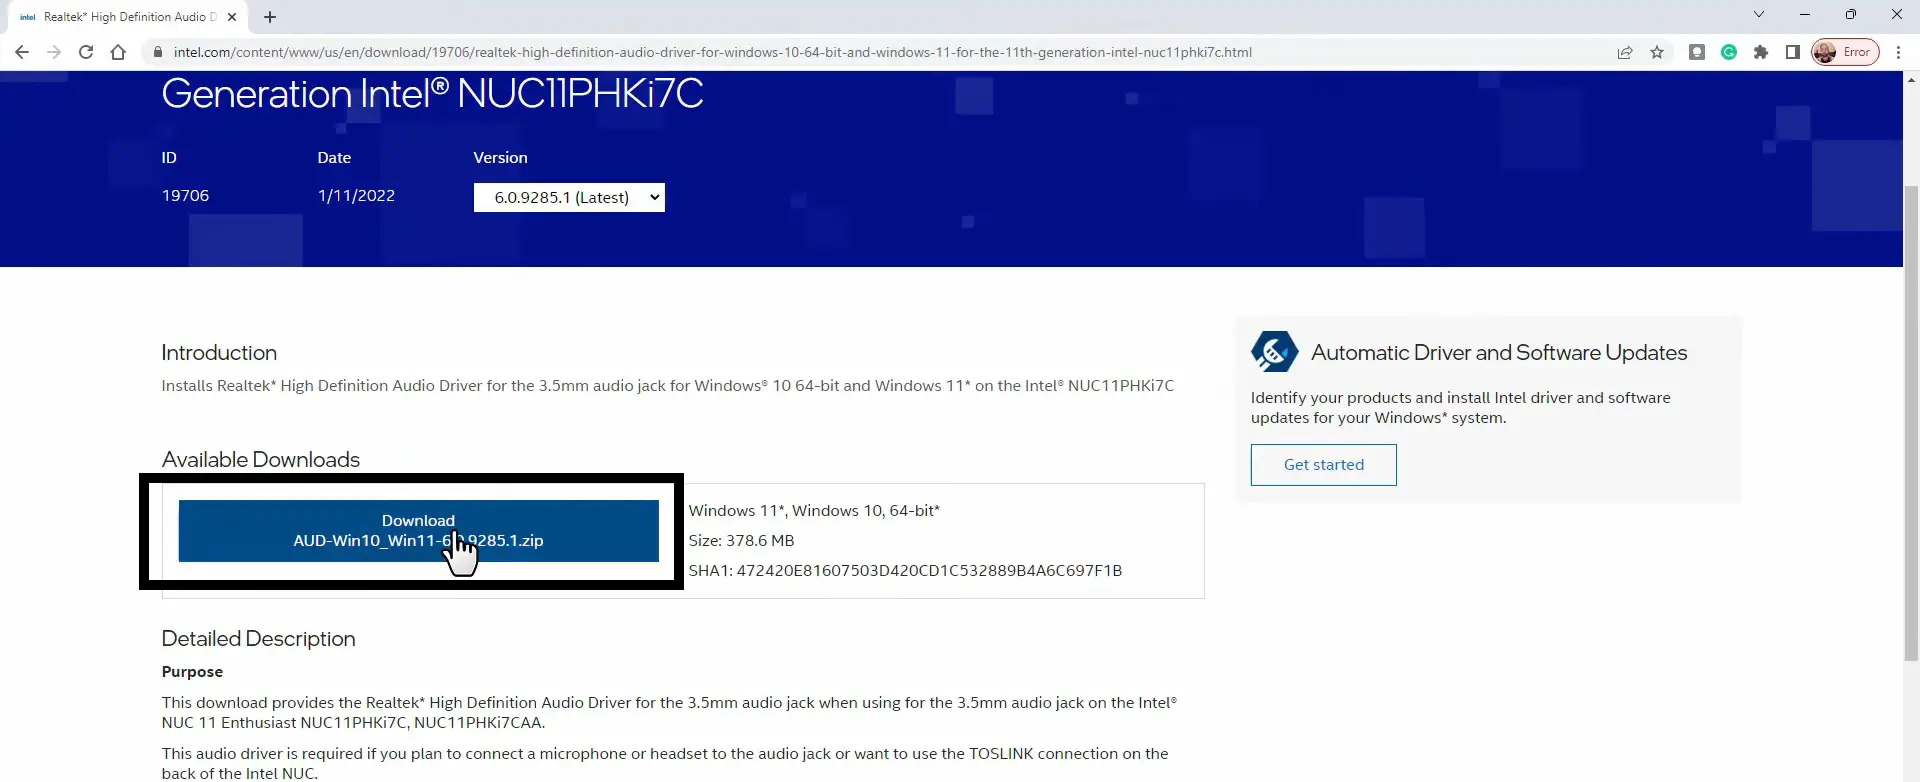
1. Start by opening any web browser, then search for Realtek audio driver for Windows 11.
2. Download the latest Realtek high-definition audio driver from either Realtek’s website or Intel’s website.
3. Then, extract and run the setup.exe.
4. Double-click on the setup.exe, then follow the on-screen instructions to install the driver.
5. Lastly, restart your PC and find the freshly installed Realtek Audio Driver.
Method 7: Check the Audio Services
Sometimes a system failure, improper shutdown, or different malware can stop the audio services; you need to check and enable it.
1. Start by going to the search bar, then search for Services and open it.
2. Right-click on the Windows Audio service.
3. Click on Properties.
4. Now, make sure that the service status is running. If it is not running, you must start the service status. Also, the startup type should be set to Automatic.

5. Lastly, click on apply, then click on okay. And observe if the audio output of your device is fixed.
Final Words
The Audio output of your device can undoubtedly and efficiently be fixed. Thus, all the suggested methods mentioned in this article are equally useful for fixing no sound output issues. These methods can certainly be tried one after the other unless you can fix this problem.
FAQs About Audio Issues
You can basically check and fix your device settings and sound drivers if your device is showing the error that no audio output device is installed.
If you have observed some audio issues in your Windows 11 device, then you can easily fix it by troubleshooting, updating drivers, restarting audio services, or installing Sound Manager.
You can easily fix no output device found either by automatically updating the audio device drivers or by manually uninstalling as well as reinstalling the audio device drivers.
Try installing the Realtek High Definition Audio driver from the official website.