WiFi may stop working on Windows 10 anytime without any error. Was it working fine the last night but when you logged in to Windows 10 in the morning and tried to access the Internet and there is no Internet or no signals at all? Well, this is a common issue with Windows to where WiFi stops working all of sudden without any particular reason.
You can try some steps to fix it if you are connected to WiFi but no internet issue. But what if you can’t find even any WiFi network signals? Not to worry you came to the right place.
There may be tons of reason behind this issue, here are some common reason behind WiFi malfunction –
- Incompatible apps and programs.
- Third-party firewall.
- Corrupt Windows registry keys.
- Different types of malware.
- Corrupt Windows files.
- Changed WiFi password.
- Weak Signals.
- Failed Windows updates.
- Network driver failure.
- Invalid IP configuration.
And many more, there may be several other unknown reasons behind the WiFi problems on your Windows 10.
In this extensive guide, you will find different ways to fix WiFi not working issue on Windows 10.
Troubleshooting The WiFi On Windows 10
This article will help you to fix every WiFi issue with your PC which includes but not limited to –
- Unable to connect to WiFi.
- WiFi stuck on connecting.
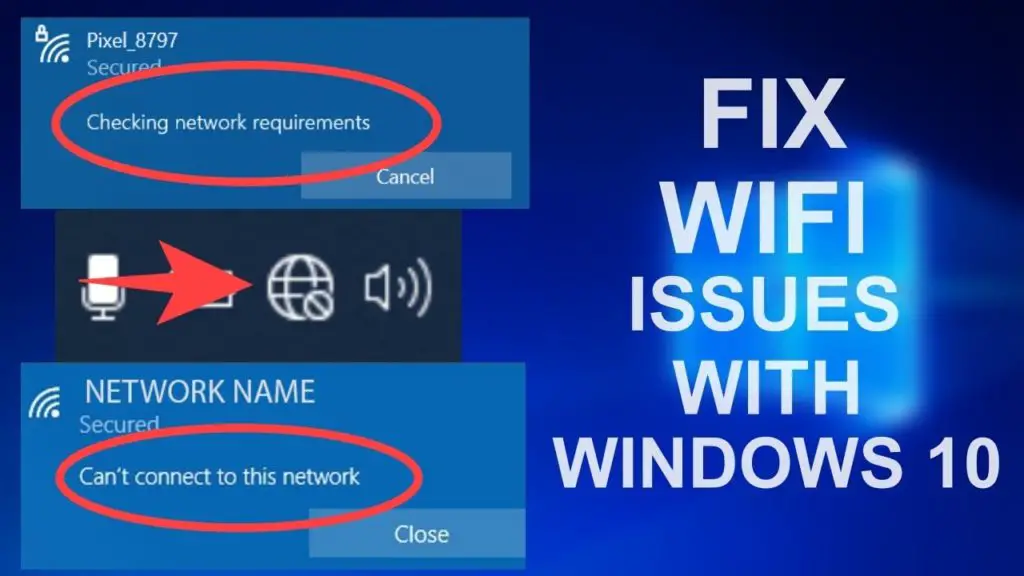
- Network icon turned red or Globe icon with a forbidden sign.
- No wifi network detected.
- WiFi keeps disconnecting.
- Connected to Internet but no internet access.
- Can’t connect to this network.
- Checking network requirements.
And other WiFi problems. So let’s jump to the fixes –
1. Check The Physical Key On The Keyboard
Most of the laptops have a physical key to turn ON/OFF the WiFi, you need to find the related key and make sure WiFi is turned ON from the keyboard, otherwise you will see a red X or Globe sign with no internet.
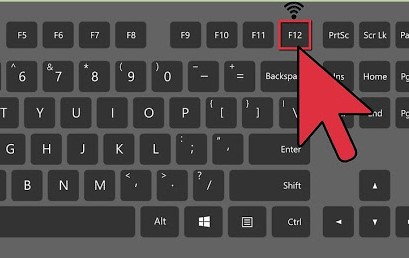
On some laptops, the WiFi key may work with the Function (fn) key. Then you need to press the fn key and the Network icon key together.
It may be a separate key as well near to power button or on the side of the laptop. Make sure to find the network key on your device.
2. Reset Internet Settings
If the WiFi is turned ON by a physical key or you don’t have any key for wifi and still not getting any networks then try to reset the Internet settings.
1. Search for the control panel and then go to “Internet Settings“.
2. Select the Advanced tab and click on “Restore advanced settings“.
3. Also, select “Reset” under “Reset Internet Explorer Settings“.
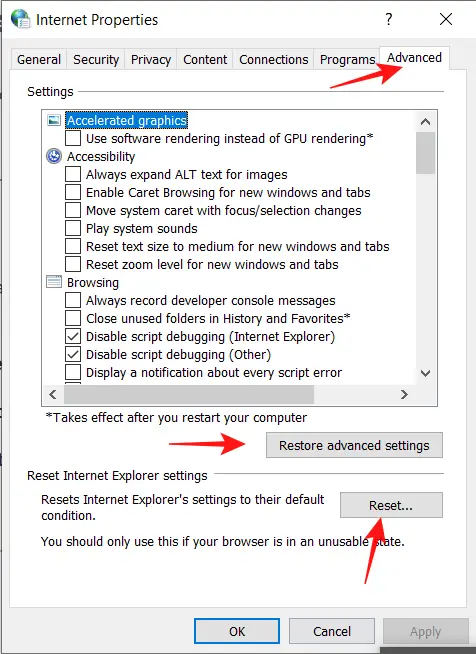
4. Click “Apply” then OK.
After doing the above steps you need to restart Windows 10. It will reset the internet settings and if there was any misconfiguration then it will resolve.
3. Use Windows 10 Troubleshooter
The inbuilt troubleshooter in Windows 10 is now quite advanced unlike the older version of Windows where it never worked. You can use the auto troubleshooter to find and fix the WiFi issues on Windows 10.
1. Go to “Start” and “Settings“.
2. Open “Network and Internet” settings and find the “Troubleshoot” option.
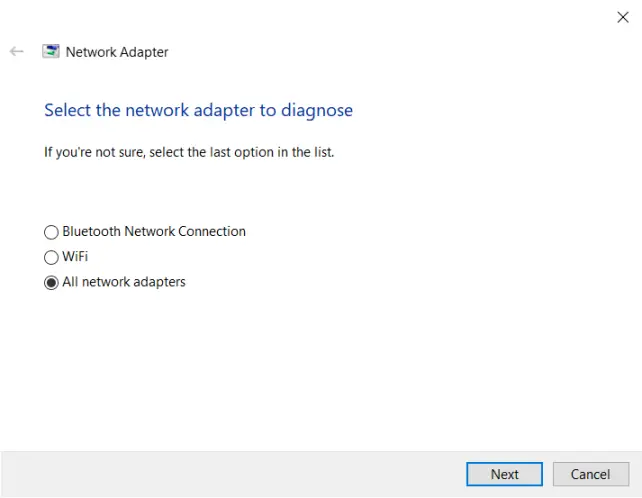
3. Click to troubleshoot and let the network troubleshooter find the problem. If it finds any problem then you will be able to use the suggested fix on the next window.
4. If it shows the solution then click on “Apply Fix” to resolve the network problems.
4. Check The Network Adapter
The network adapter may be disabled or misconfigured. If so then you won’t get any WiFi signals at all. Sometimes a third-party firewall or Windows update may cause this issue. You can check and re-enable the adapter form settings.
1. Go to Start and Settings.
2. Select Network & Internet Settings and scroll down on the page.
3. Under the “Advanced Network Settings” find the “Change adapter settings” option and click on it.
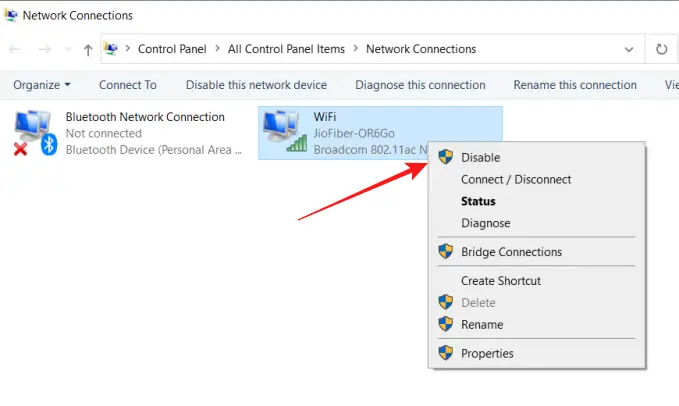
4. Look for the WiFi adapter and if the status is showing as “Disabled” then right-click on it and select “Enable“.
5. If it is already enabled then try to disable and re-enable it. Right-click on the adapter and hit disable and then enable.
Now look for the wifi signals. If you are still unable to see wifi networks then follow the next method.
5. Update The Network Driver
The corrupt network driver may block all wifi networks. You need to check the network driver and update it to a different version available on your computer.
Since you are unable to connect to the internet, we will use the drivers available on Windows 10 itself.
1. Press Win+R keys together to open the “Run” dialog box.
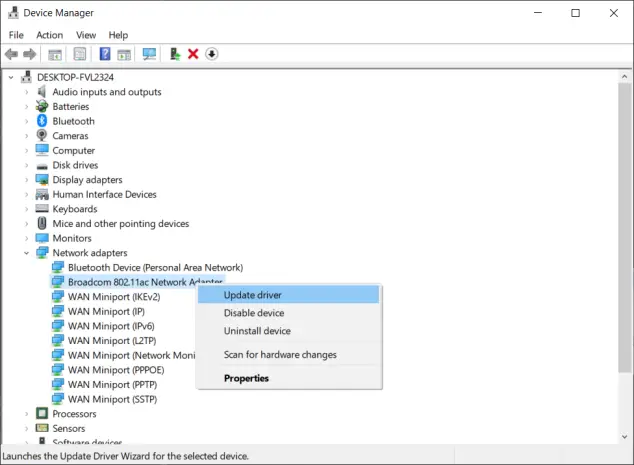
2. Type “devmgmt.msc” and click “OK” to open the Device Manager.
3. Look for the “Networks” option and expand it.
4. Find the WiFi driver listed there, it may be Broadcom, Atheros, Realtek, or any other network driver. Just look for 802.11 ac Network Adapter.
5. Right-click on the Network Adapter and select Update Driver.
6. Click on “Browse my computer for drivers“.
7. Now select “Let me pick from a list of available drivers on my computer“. And, you will see the different versions of drivers available on your computer.
8. Choose the driver to the date when WiFi was working and click on “Next” to install it.
After these steps, you have to restart the Windows and check if you are able to connect to the networks.
6. Uninstall The Network Driver On Windows 10
If the driver update doesn’t work then you can try to Uninstall the network driver.
1. Again open the Network adapter on the device manager. [Follow the steps 1-4 in the above method]
2. Right-click on the Network adapter and click “Uninstall Device“.
3. Check the box “Delete the driver software for this device” and click “Uninstall“.
Now Restart the PC. Windows will automatically install the best network driver from the list of available drivers.
7. Roll Back Driver & Disable Power Saving Mode
If you are getting a wifi issue after a Windows 10 update then your WiFi driver got corrupt during the update. You can try to roll back the driver to the last working condition.
1. Access the network adapter form the device manager [ Follow the steps 1-4 mentioned in method 5]
2. Right-click on Adapter and Click on “Properties“.
3. Select the “Driver” tab and click “Rollback Driver” from the options on the left side of the window.
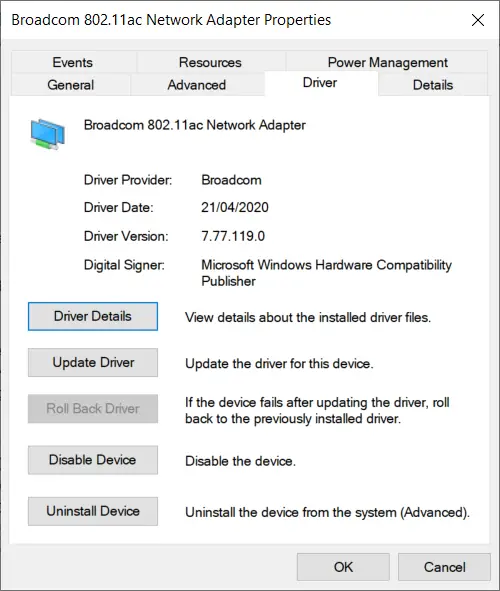
4. Select any reason and click “Yes” to roll back the driver.
5. Go to the “Power Management” tab on the driver properties window and uncheck “Allow the computer to turn off this device to save power“.
Restart and check.
8. Fix Windows Socket API Errors & Reset IP logs
Windows socket or simply Winsock settings contain your computer’s configuration for Internet connectivity. This configuration may get corrupt and result in socket errors due to unknown downloaded programs, files, or some malicious script on the computer.
You can fix the unknown socket errors and reconfigure the connectivity settings by resetting the Windows Socket.
Follow these steps to reset Windows Socket –
1. Go to Start and search for “cmd“.
2. Right-click on “Command Prompt” and select “Run as Administrator“.
- Type “netsh winsock reset” on cmd and hit enter on the keyboard.
- Execute “netsh winsock reset catalog” press enter.
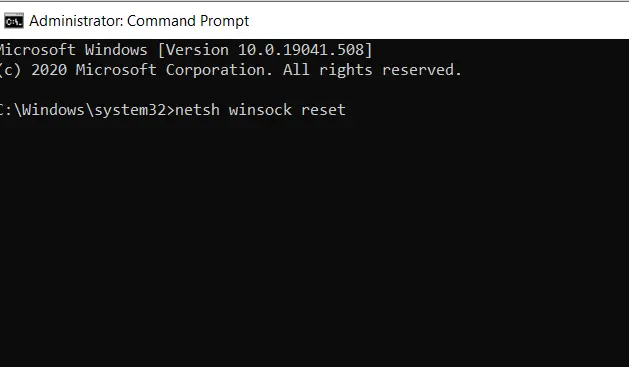
Additionally, you can reset the IP logs on Windows 10
Type in cmd “netsh int ip reset resetlog.txt” press enter.
The above commands will help you to fix the Socket API errors on Windows 10.
Restart is required to make the changes effective.
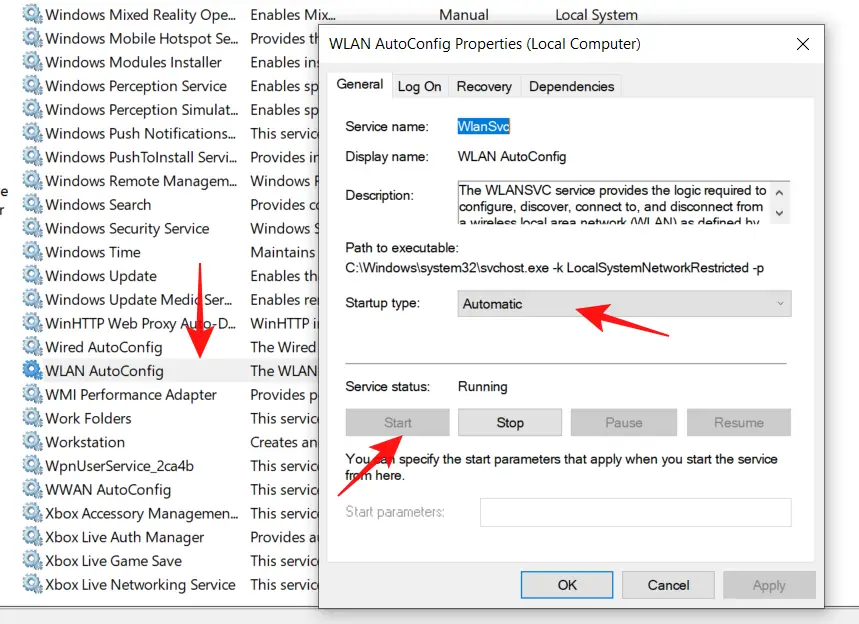
9. Check the WLAN AutoConfig & Other Services On Windows 10
There are Windows services for every process, these core services help Windows 10 keep running. If something goes wrong then you should check the related Windows services.
WLAN Auto config is a service that is responsible for WiFi on your device. DHCP (Dynamic Host Control Protocol) service keeps the internet connection on Windows PC. If any of these services are not running then you won’t get WiFi or access the Internet on PC.
You should check for these services and make sure they are running.
1. Press Win+R to open the Run dialog box.
2. Type “services.msc” and hit OK.
3. You will get a list of services, check for the WLAN Autoconfig and DHCP services. If they are not running then right-click on it and go to “properties“. Click to “Start” the services and select Startup Type as “AUTOMATIC“.
4. Check for other “Network” related services and turn them ON.
5. If you are not sure then enable all the necessary services from Microsoft Configuration settings.
6. Open Run dialog box and type “msconfig” and hit “OK.
7. Go to the services tab and then click on “Enable All“.
Restart the Windows and check if you are getting the wifi signals or not.
10. Network Reset To Fix WiFi Not Working Problems
A network reset will delete all the network profiles and saved configuration. You can try to reset the network settings to the factory settings, if there is any issue or misconfiguration then it will solve the problem.
1. Go to “Settings” > “Network & Internet”
2. Scroll down to the bottom and click “Network Reset“.
- You will get another window with a message “This will remove and reinstall all your network adapters, and set other networking components to their original settings. You might need to reinstall other networking software afterward, such as VPN client software or virtual switches“
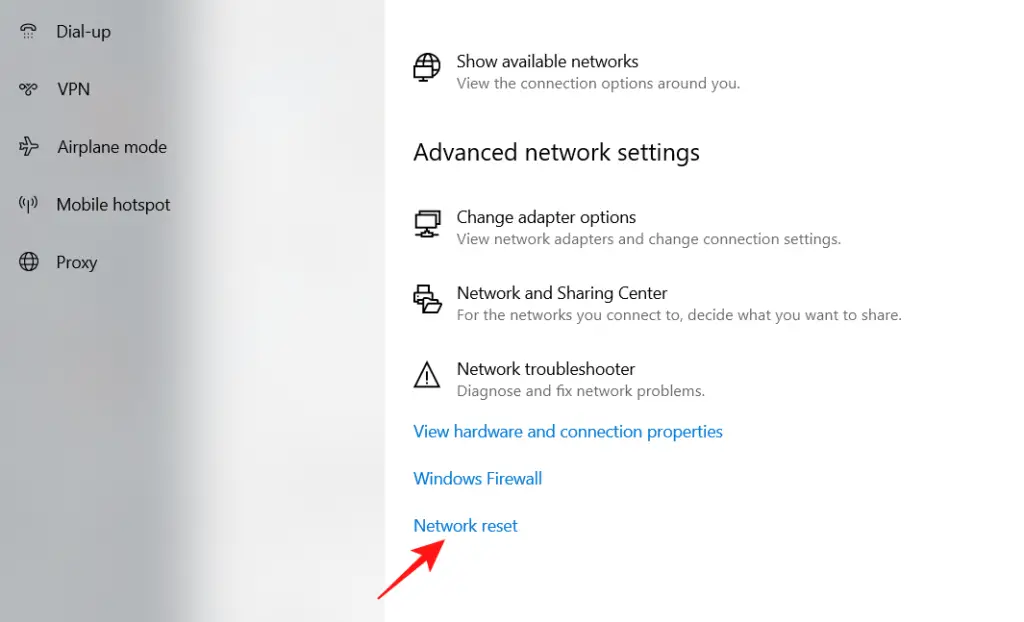
Just click on the “Reset” option and “Yes” on the confirmation window.
Now, Windows 10 will restart itself.
Login back to Windows and check if you are getting the WiFi connections, type in your WiFi password, and connect to your network. This option works in most cases.
11. Install Latest Network Driver
Point 5 [Update Network Driver] will update or reinstall the drivers available on your PC. But what if there is an issue with the driver itself then you can try to install the latest version of the network driver.
1. Access the internet on a working device, another PC is preferred.
2. Go to the laptop manufacturer website and search for the network driver for your laptop model.
If you have a custom-built PC then check for the motherboard drivers or if you are using a separate network card then go to the card manufacturer website and download the driver.
Also, you can do a simple Google search like – ” WiFi driver for Asus” go to the official website, enter the device model, select the operating system, and find the latest WiFi driver.
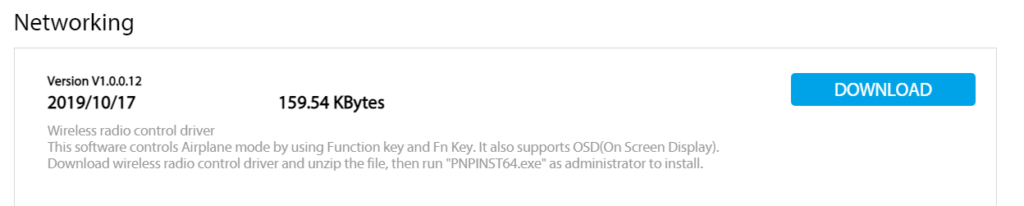
3. Transfer the software to your PC where WiFi is not working. Follow on-screen instructions to install the driver and restart the PC.
The newer version of the network driver will fix the WiFi issue with your Windows 10.
12. Check For Conflicting Programs & Services
There may be a third-party program or firewall that may block the network ports resulting in no internet access. But the problem is you can’t find that program or service easily.
You need to do some hit and trial by disabling certain services.
1. Press Win+R and type “msconfig” to open the System Configuration.
2. Go to the “Boot” tab and select “Safe boot” with the Network option checked.
3. Restart the PC and it will boot into the “Safe mode with Networking” option.
4. Now check if you are able to connect to the network, if not then there is no issue with third-party programs and services.
5. If you can connect to WiFi in safe mode then you need to find the evil services.
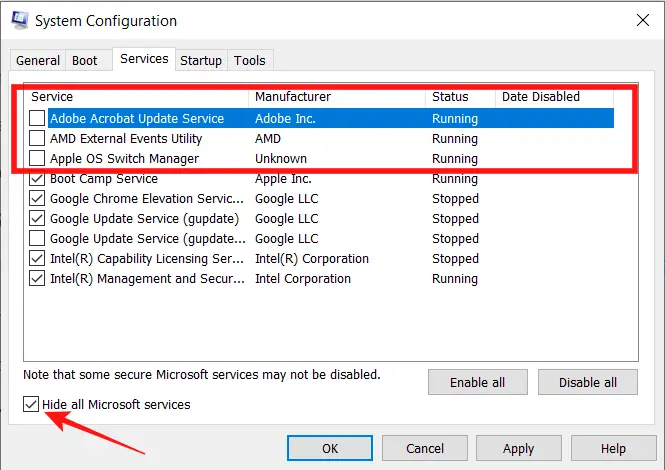
6. Open the System Configuration again and select the “Services” tab.
7. Check the option “Hide all Microsoft services” and uncheck half of the services.
8. Restart in Normal mode. Uncheck the “Safe Boot” from the Boot tab.
9. If you can connect to WiFi then there is a service from the “Disabled” services causing the issue.
10. Again go to Safe mode with Network and Enable half of the services which you disabled. (If you have disabled the 20 services then enable 10 of them).
11. Restart and check.
12. You need to repeat the process several times until you find the “Evil” service.
13. Once you find it, check the associate program with that service and Uninstall it.
14. Restart and check.
This method will help you to find the root cause of why WiFi is not working on your PC.
13. Check The Network Hardware
All the above methods will fail if there is a problem with the network hardware, you can try 100s of tips but nothing will work. So you should check if the network hardware is Ok or not.
It’s quite simple.
1. Search for cmd and open it.
2. Type “ping 127.1.1.1” or ping 127.0.0.1 and hit enter.
3. If you are getting a reply like – Reply from 127.1.1.1: bytes=32 time<1ms TTL=128” then the network hardware is good.
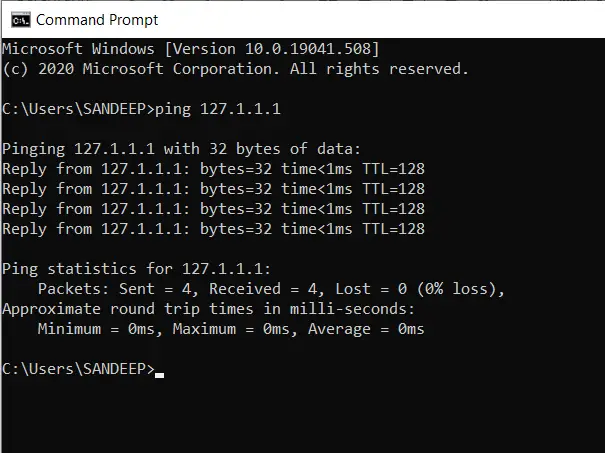
4. If it says “General failure” then you need to check the IPV6 if it is enabled then disable it. If it is still showing the error then there may be a hardware problem with your PC and the Network Interface card (NIC) needs to be replaced.
Contact the authorized service center and get it repaired.
Conclusion
WiFi may stop working on Windows 10 at any time without an error, there may be different reasons behind the issue. All the above methods listed above will surely help you to resolve the WiFi problems on your Windows PC.
Try these methods in the given order to avoid the hours of troubleshooting. If you still have a problem with WiFi let me know.
Also Read –